Set up AI Agent: Integrate with Corporate Database
Tutorial Objective
This tutorial will guide you in building a “Question-Answering AI Agent” that can retrieve relevant information from an internal company database based on user queries.
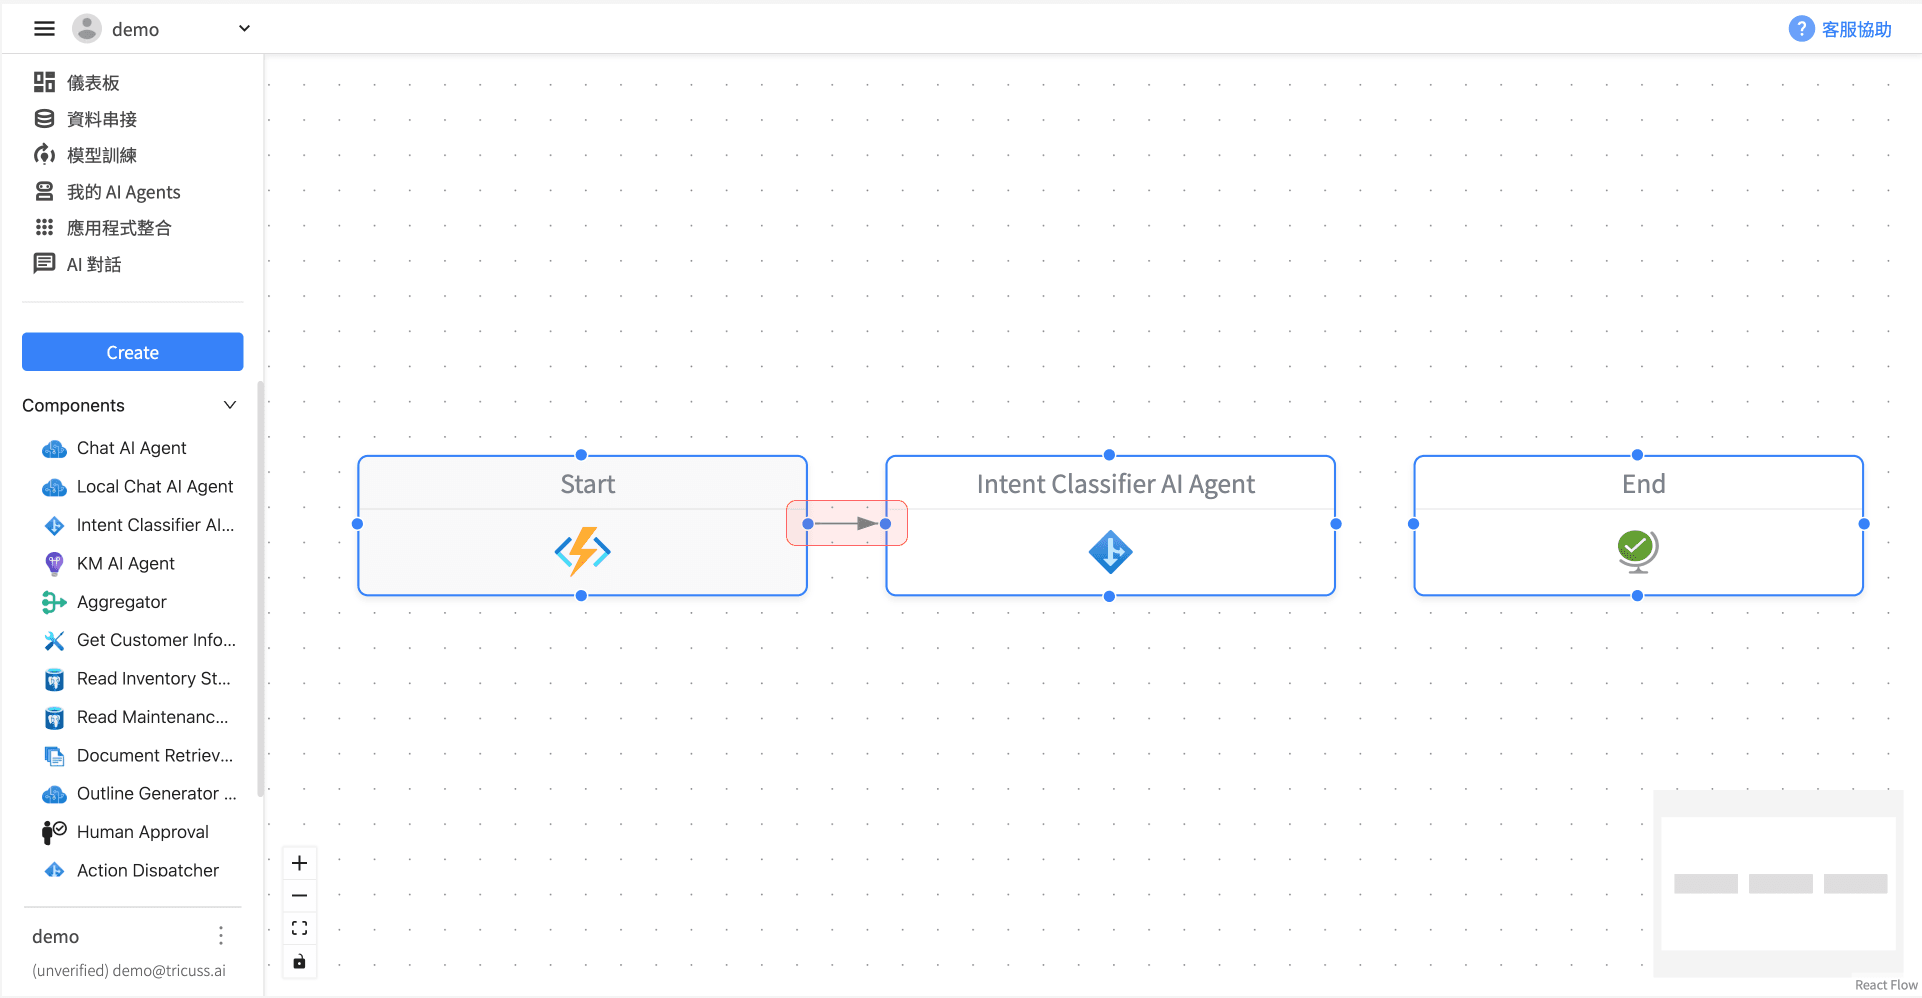
1️⃣ Remove the default Chat AI Agent
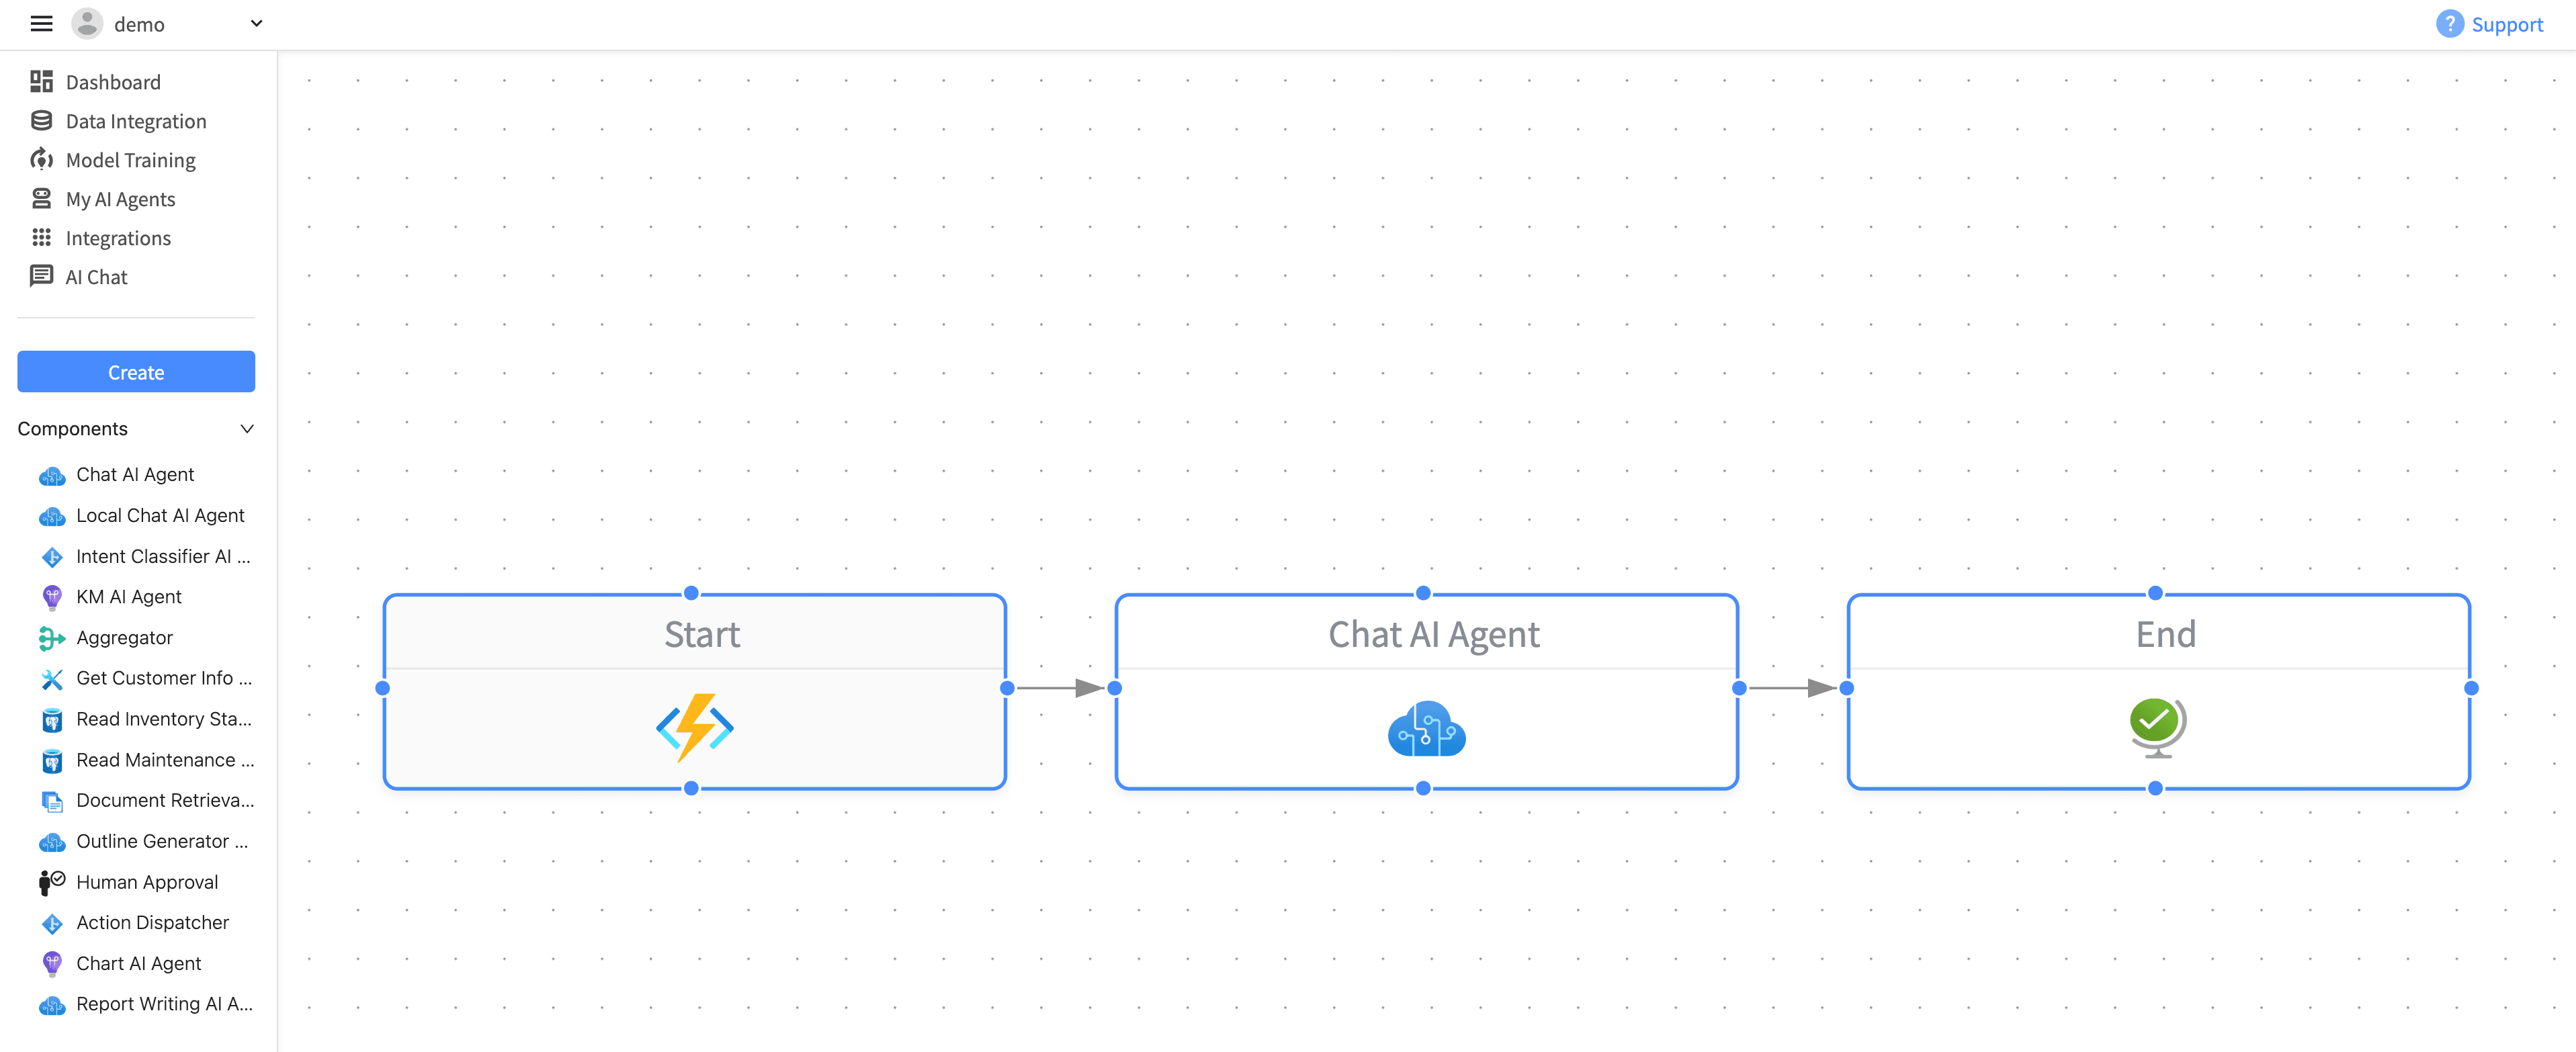
When you begin creating a new AI Agent, the default workflow appears as follows: Start ➡️ Chat AI Agent ➡️ End
(The flow must always begin with Start and end with End)
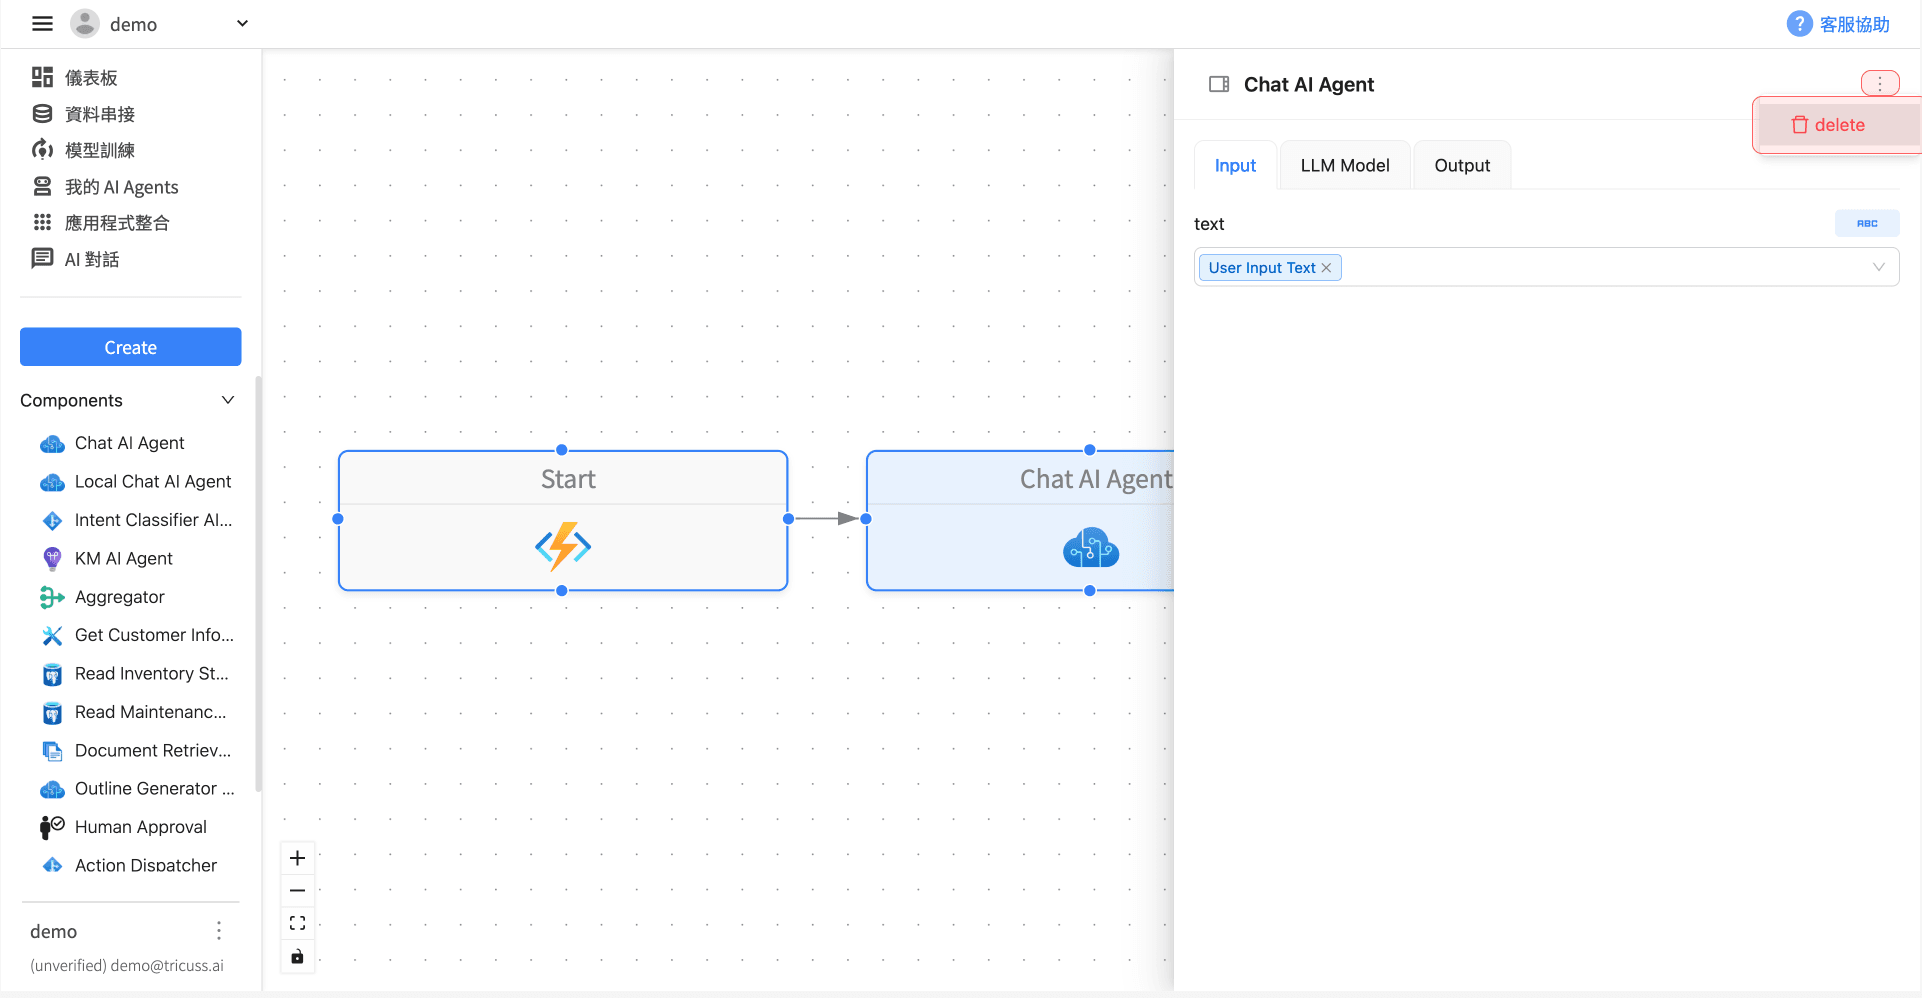
Since the main feature of this case is connecting to an internal database, the default “Chat AI Agent” component needs to be deleted:
Click the menu icon (⋮) on the component in the right panel, then click delete.
2️⃣ Drag and add Intent Classifier AI Agent
From the Components list on the left, drag the Intent Classifier AI Agent into the workflow.
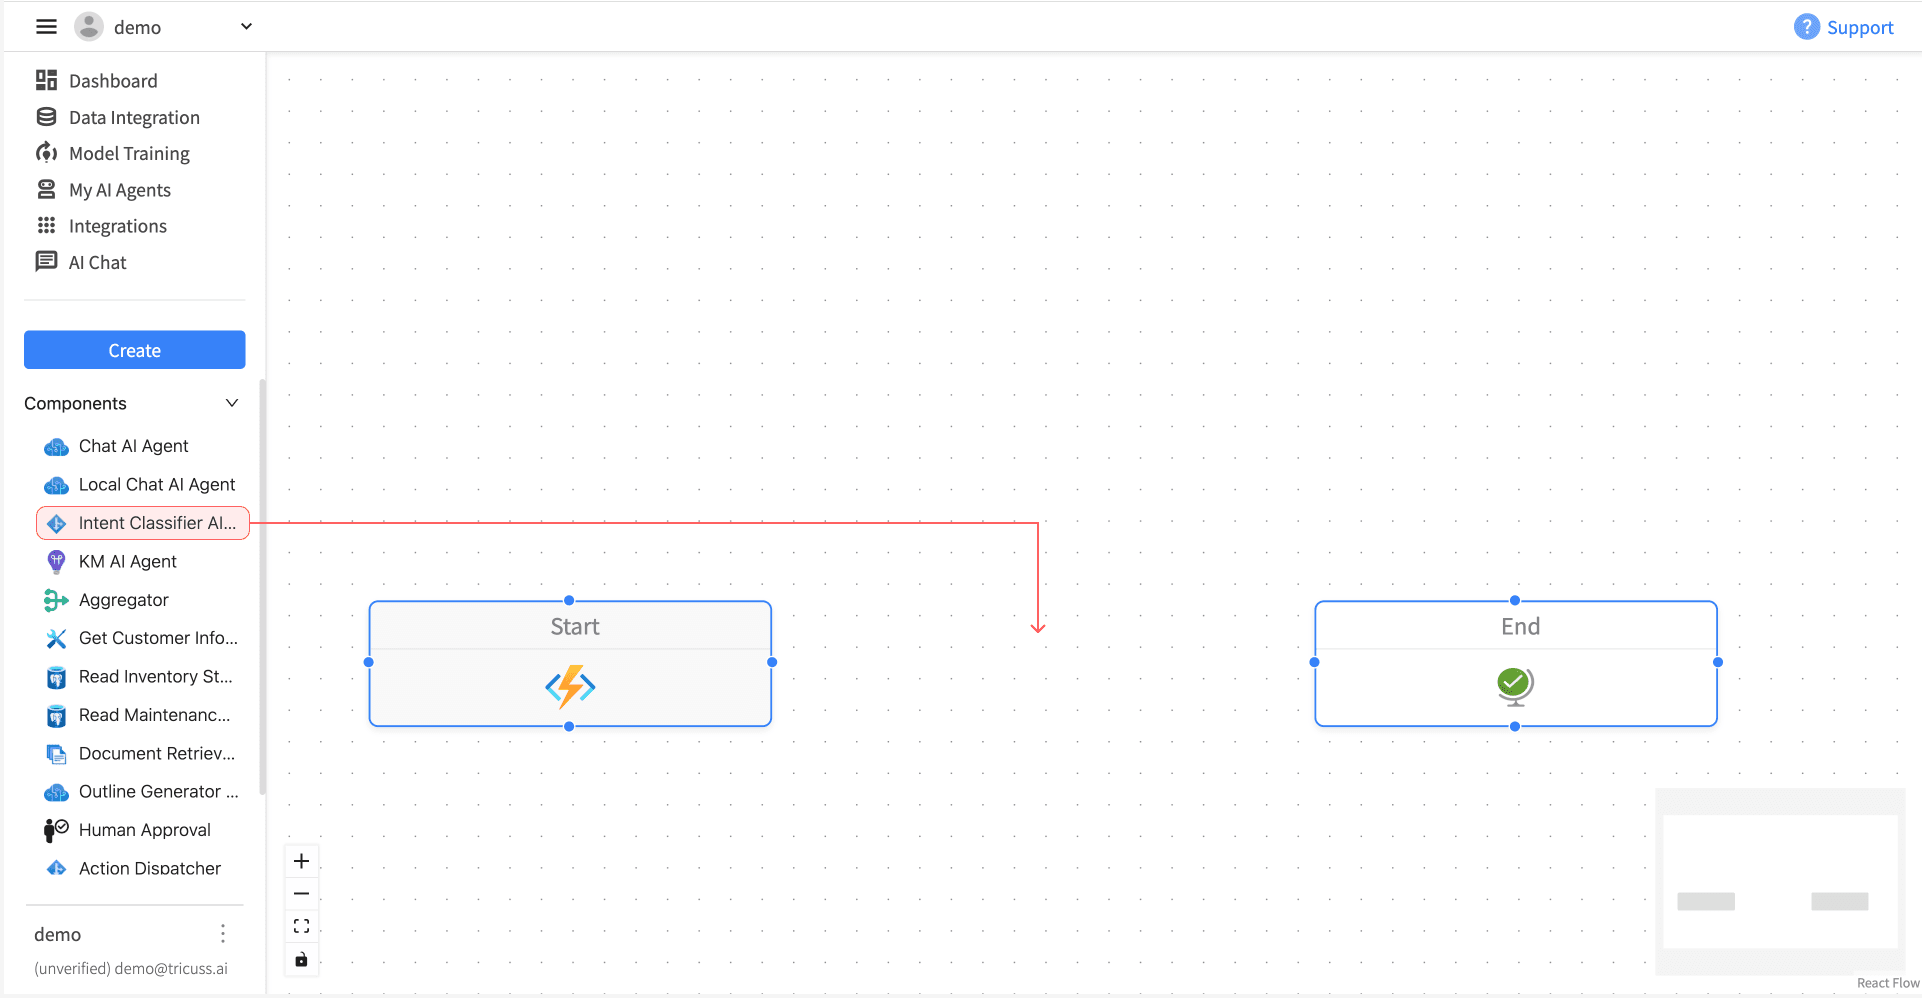
⚠️ Pay attention to the direction of the arrows:
Connections should extend from left to right, indicating execution order.
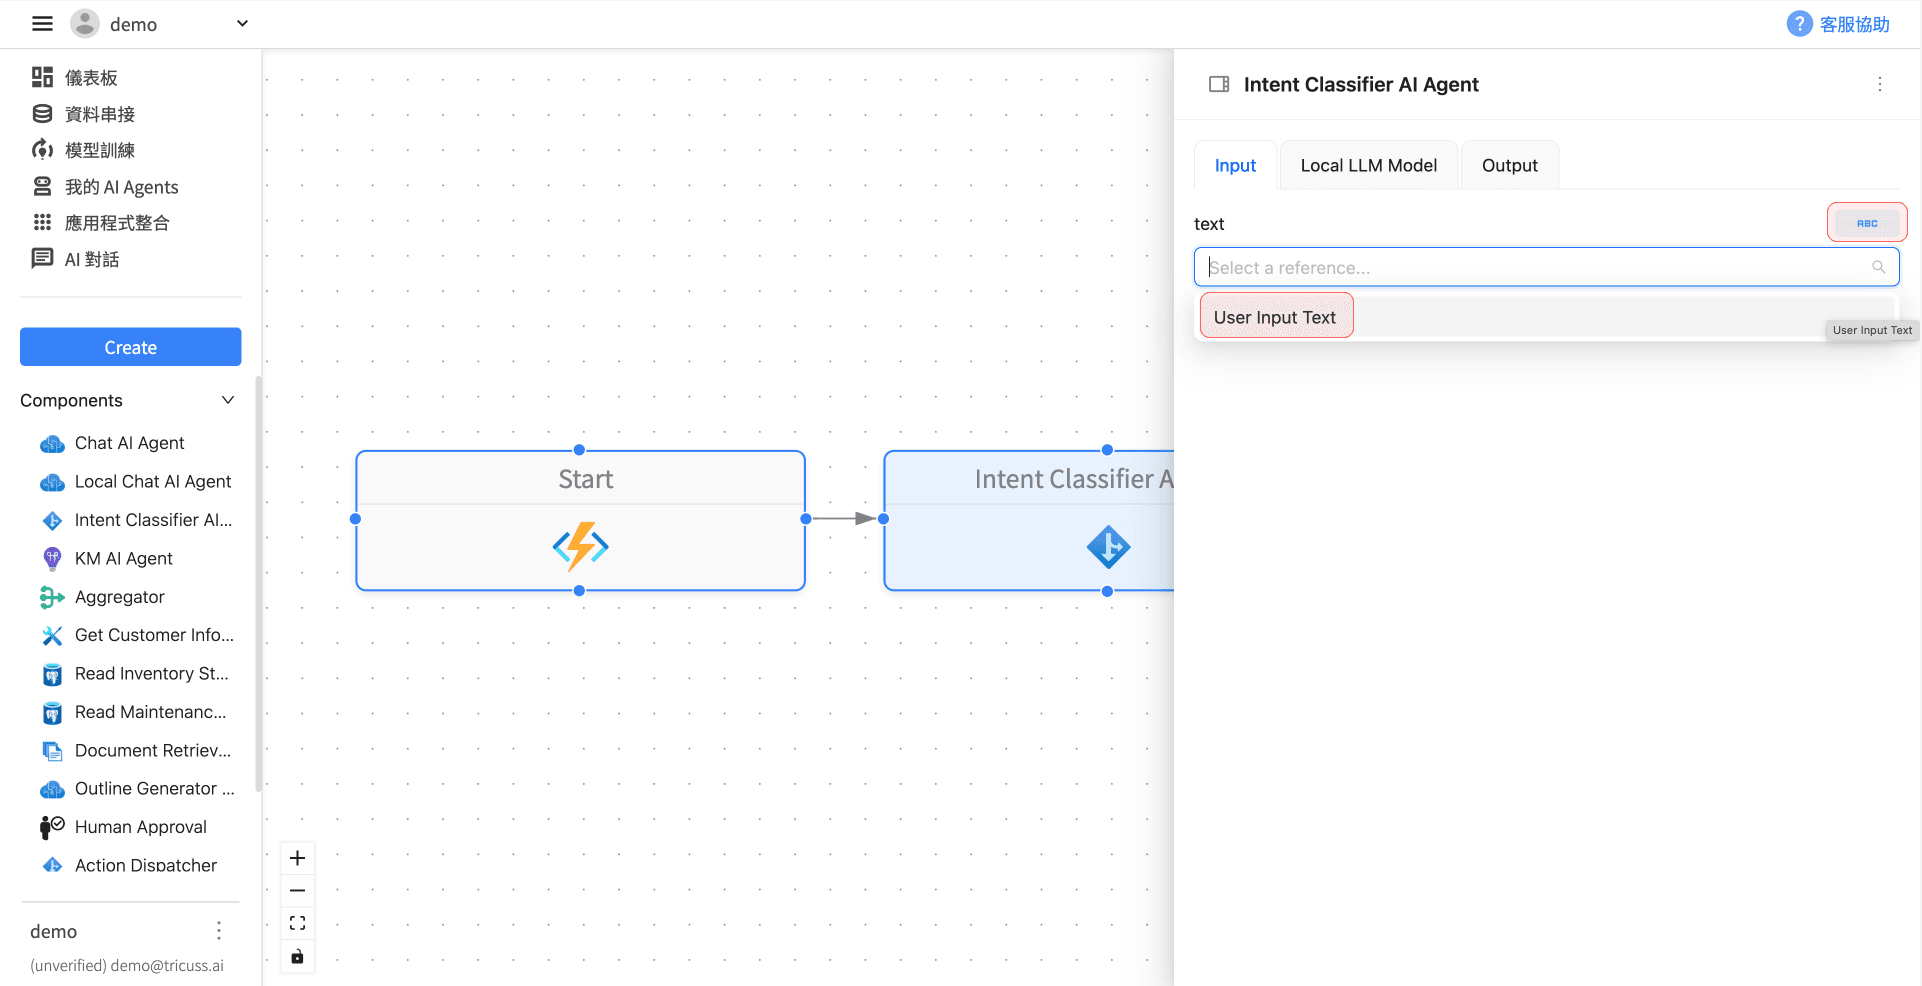
3️⃣ Set Input: Select User Input Text
Click the “Intent Classifier AI Agent” and switch to the Input tab.
Click the “ABC” button in the top right, and from the dropdown menu, select User Input Text.
This module serves as the first layer of input processing, using a local language model (Local LLM) to analyze semantics and determine the user's intent and the appropriate data source.
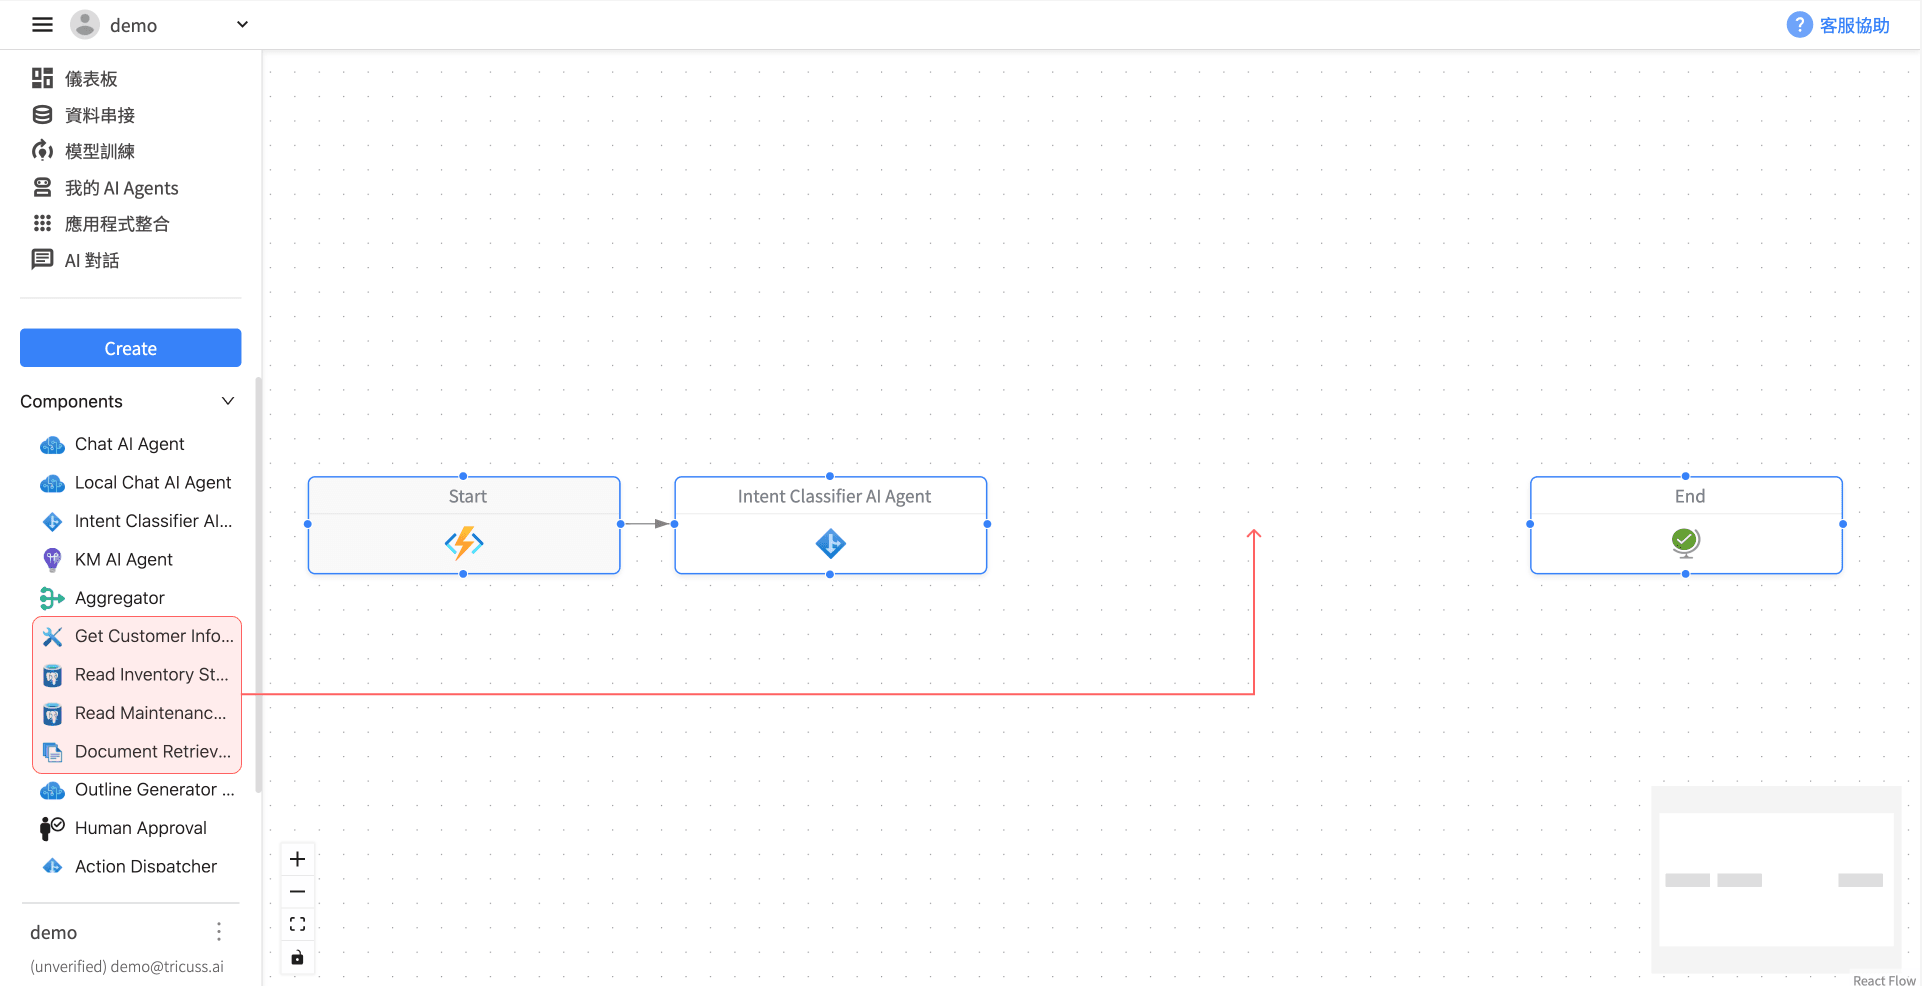
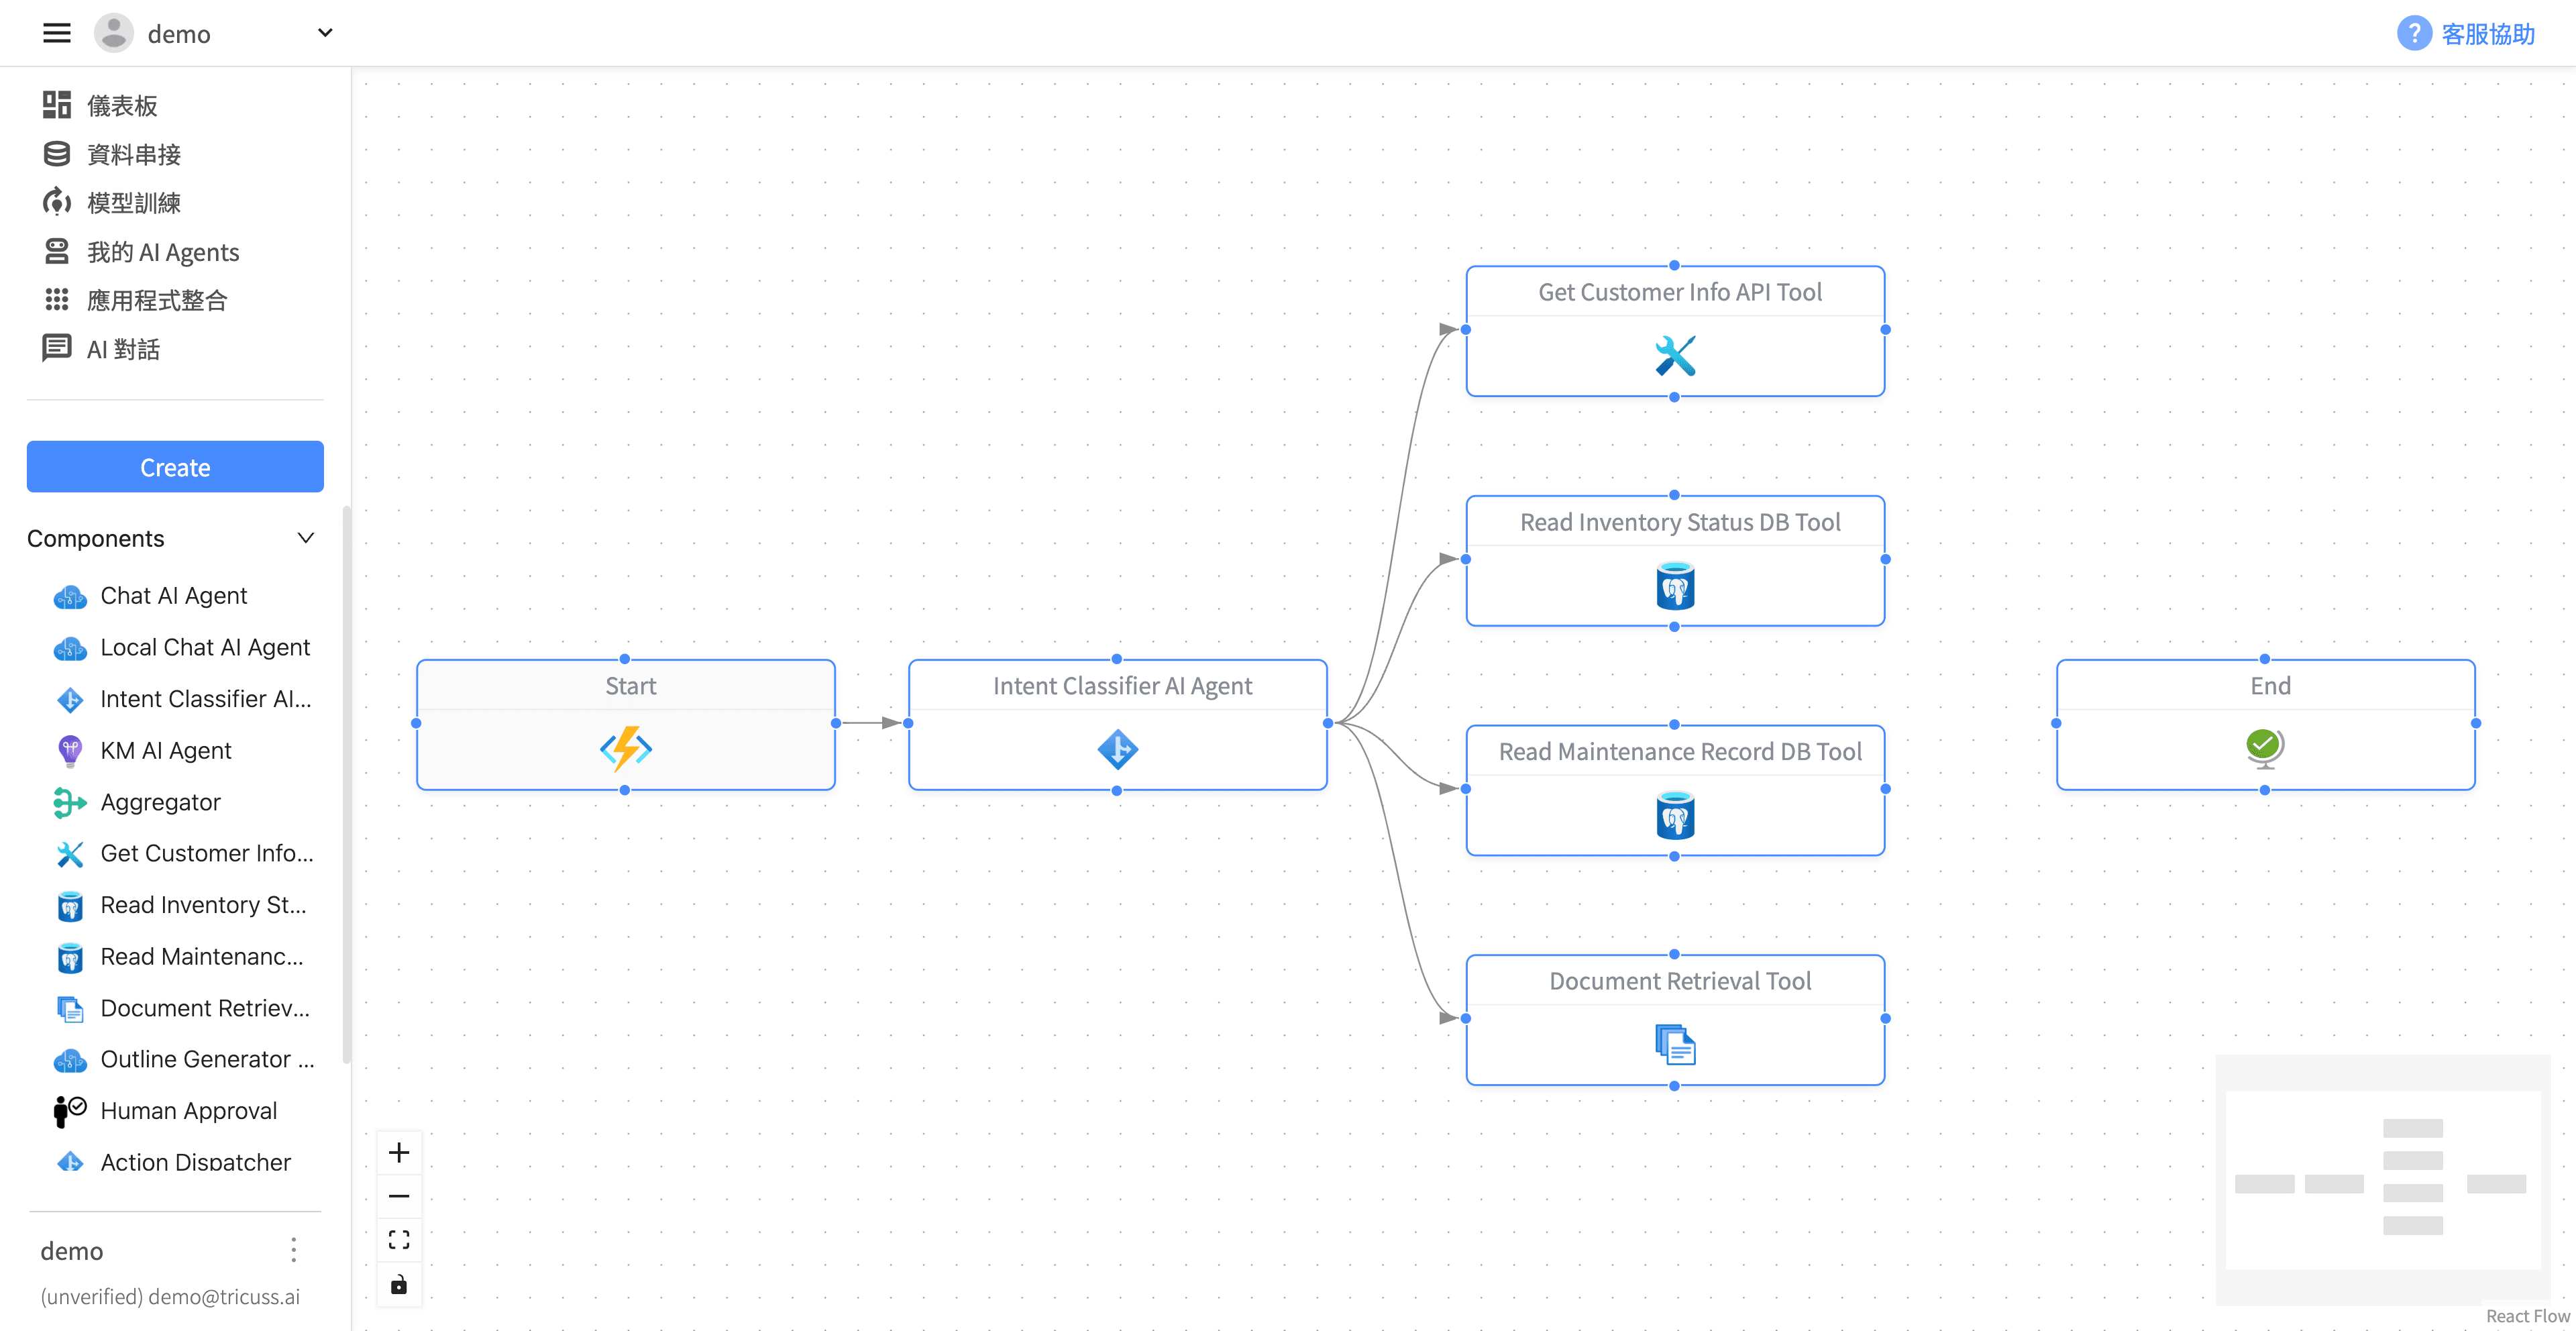
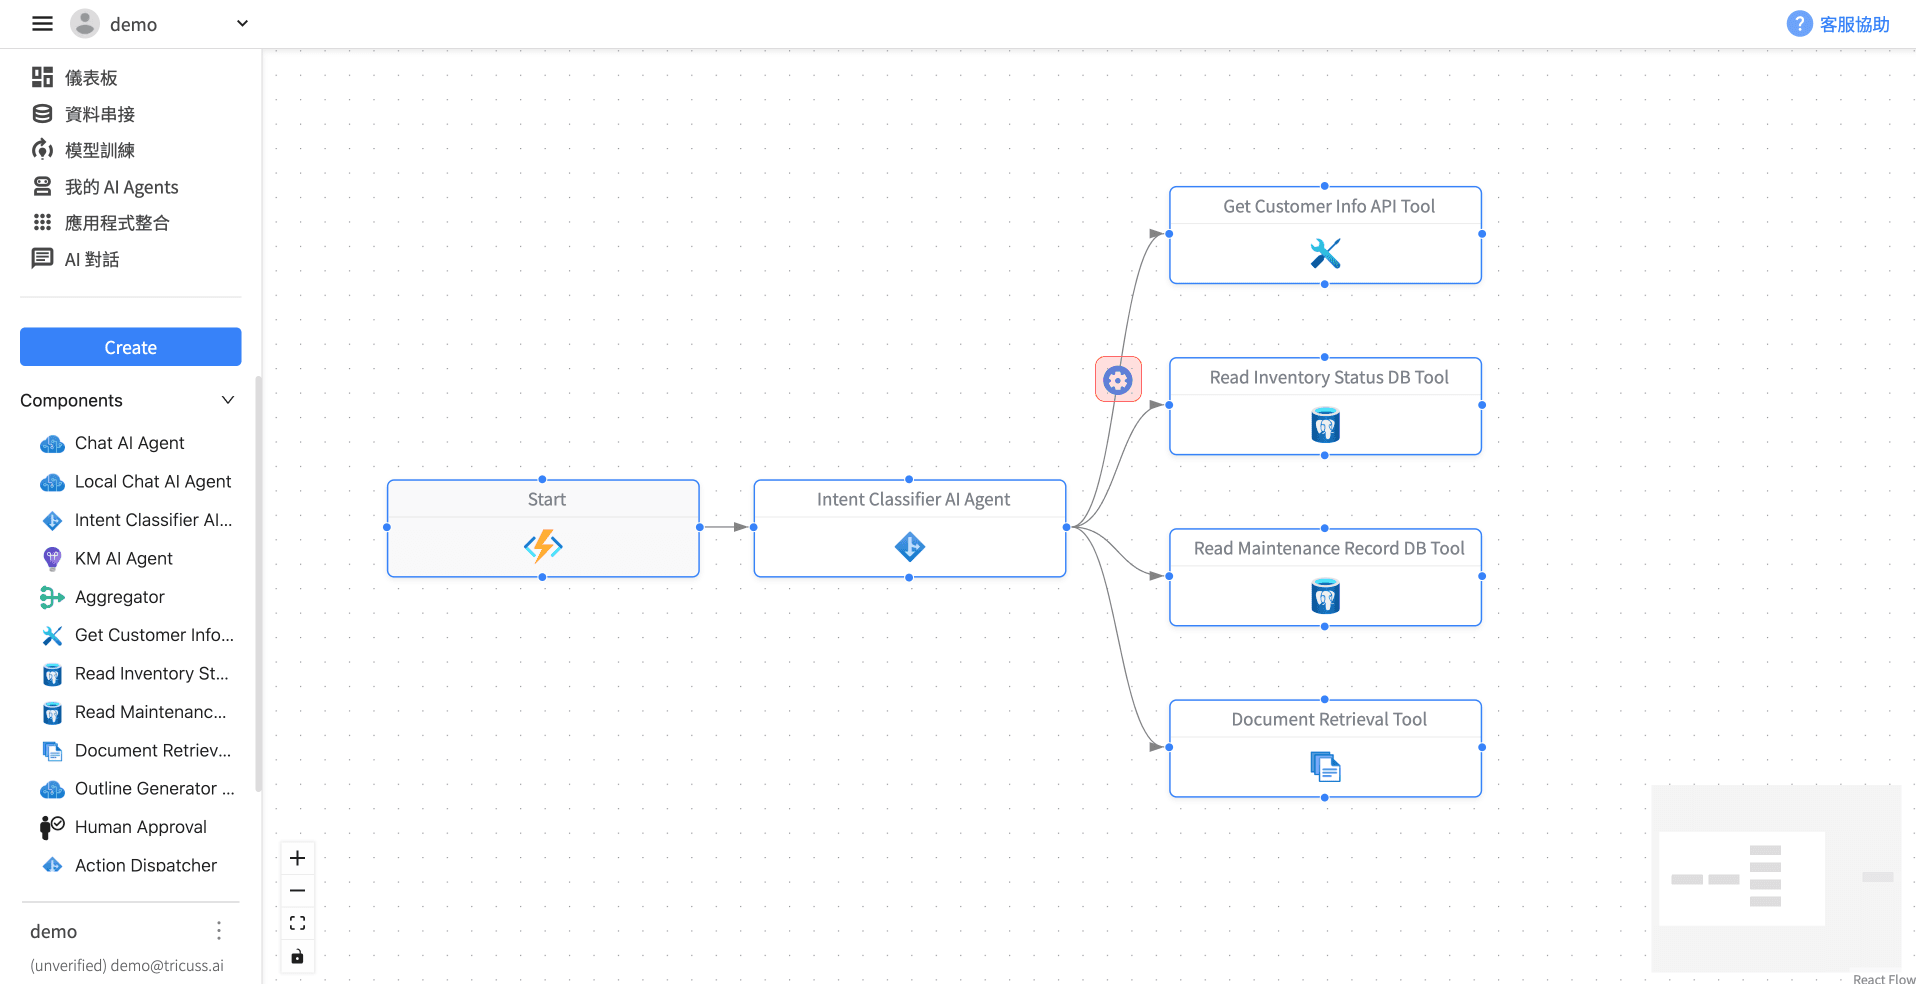
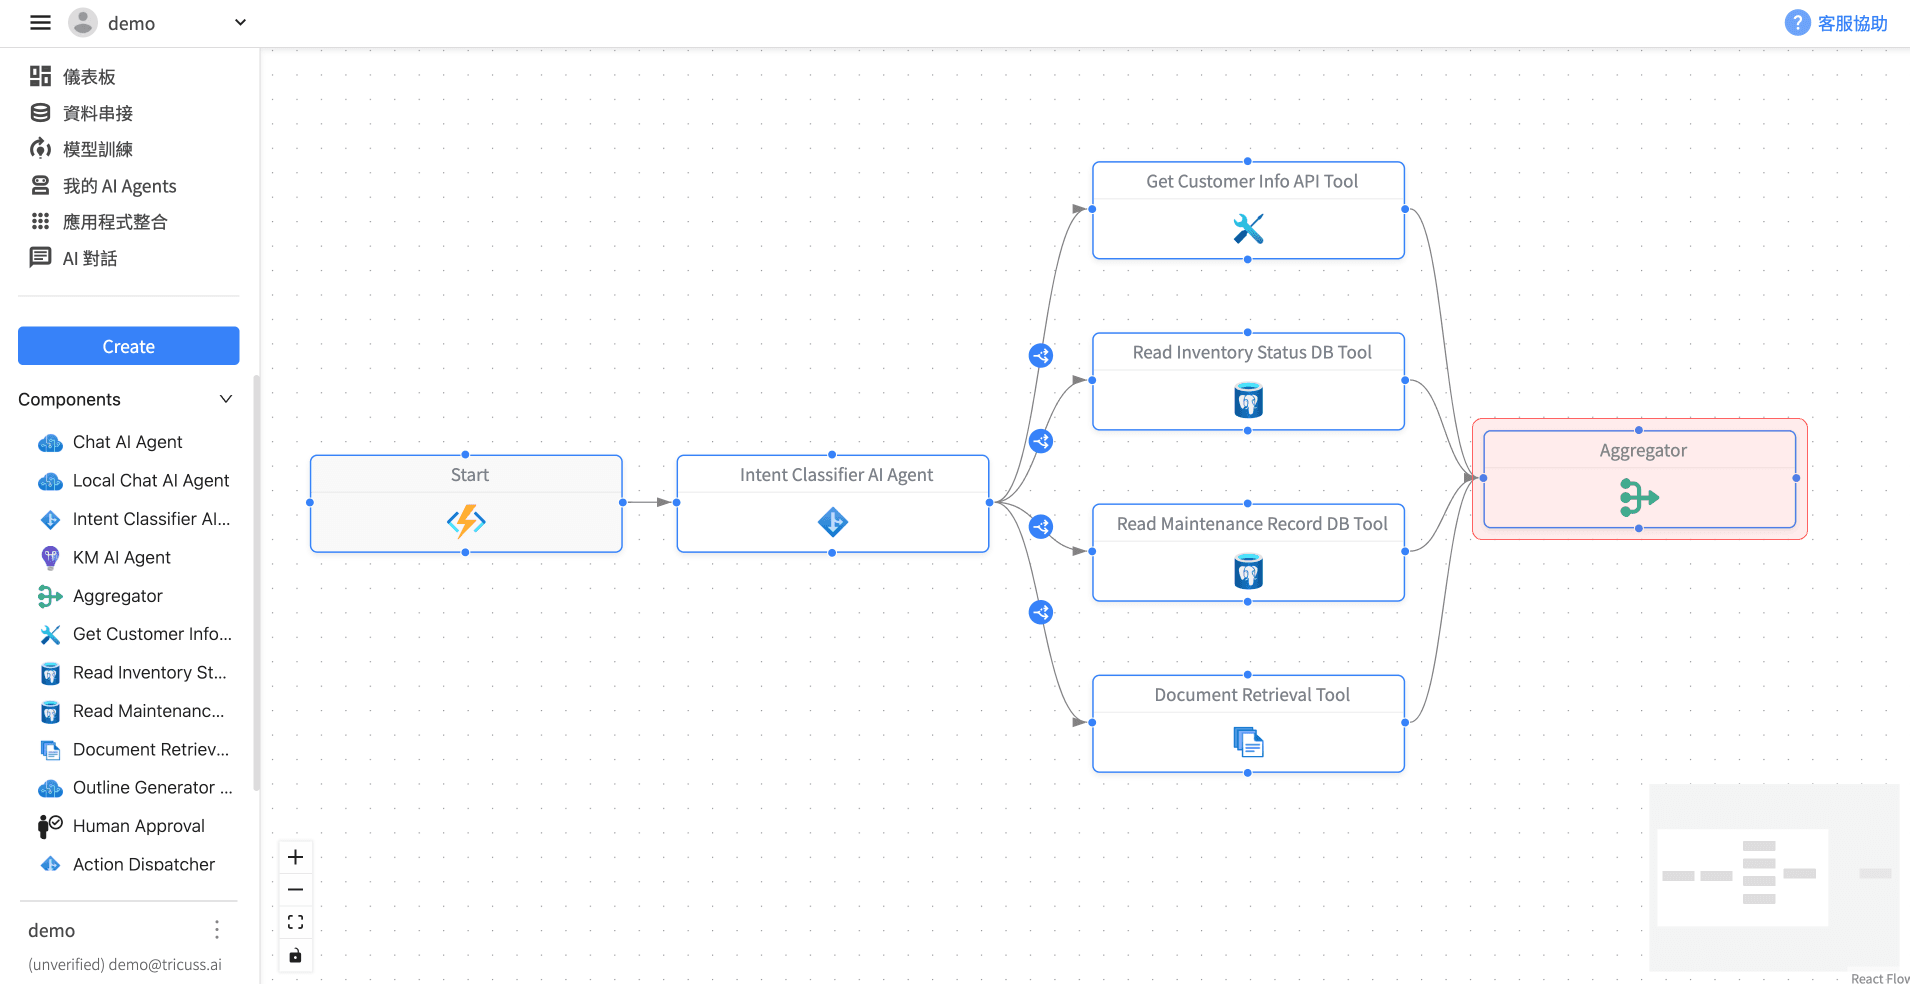
4️⃣ Add and connect data source components
Add the internal database API and document upload components to the workflow:
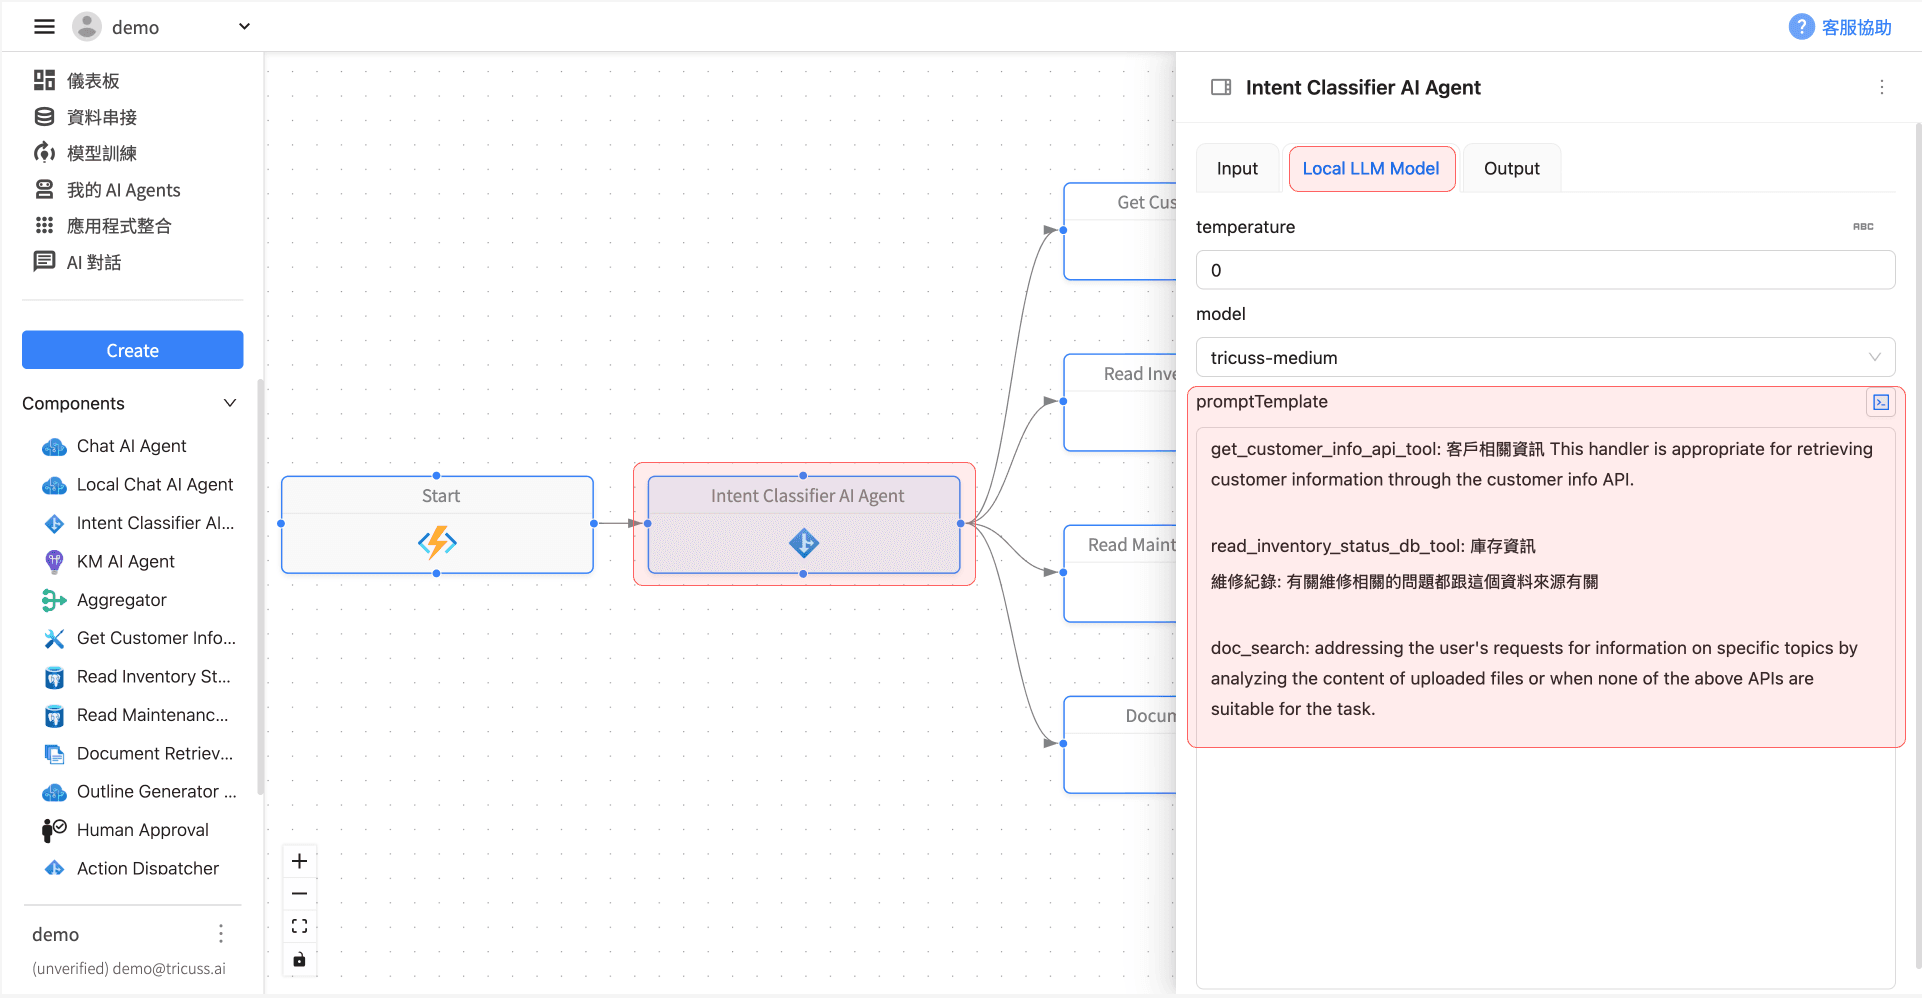
5️⃣ Set semantic recognition Prompt Template
Go back to the “Intent Classifier AI Agent” → Local LLM Model tab, and enter the following in the promptTemplate field:
get_customer_info_api_tool: 客戶相關資訊 This handler is appropriate for retrieving customer information through the customer info API.
read_inventory_status_db_tool: 庫存資訊
維修紀錄: 有關維修相關的問題都跟這個資料來源有關
doc_search: addressing the user's requests for information on specific topics by analyzing the content of uploaded files or when none of the above APIs are suitable for the task.
6️⃣ Prompt explanation (Prompt Definition)
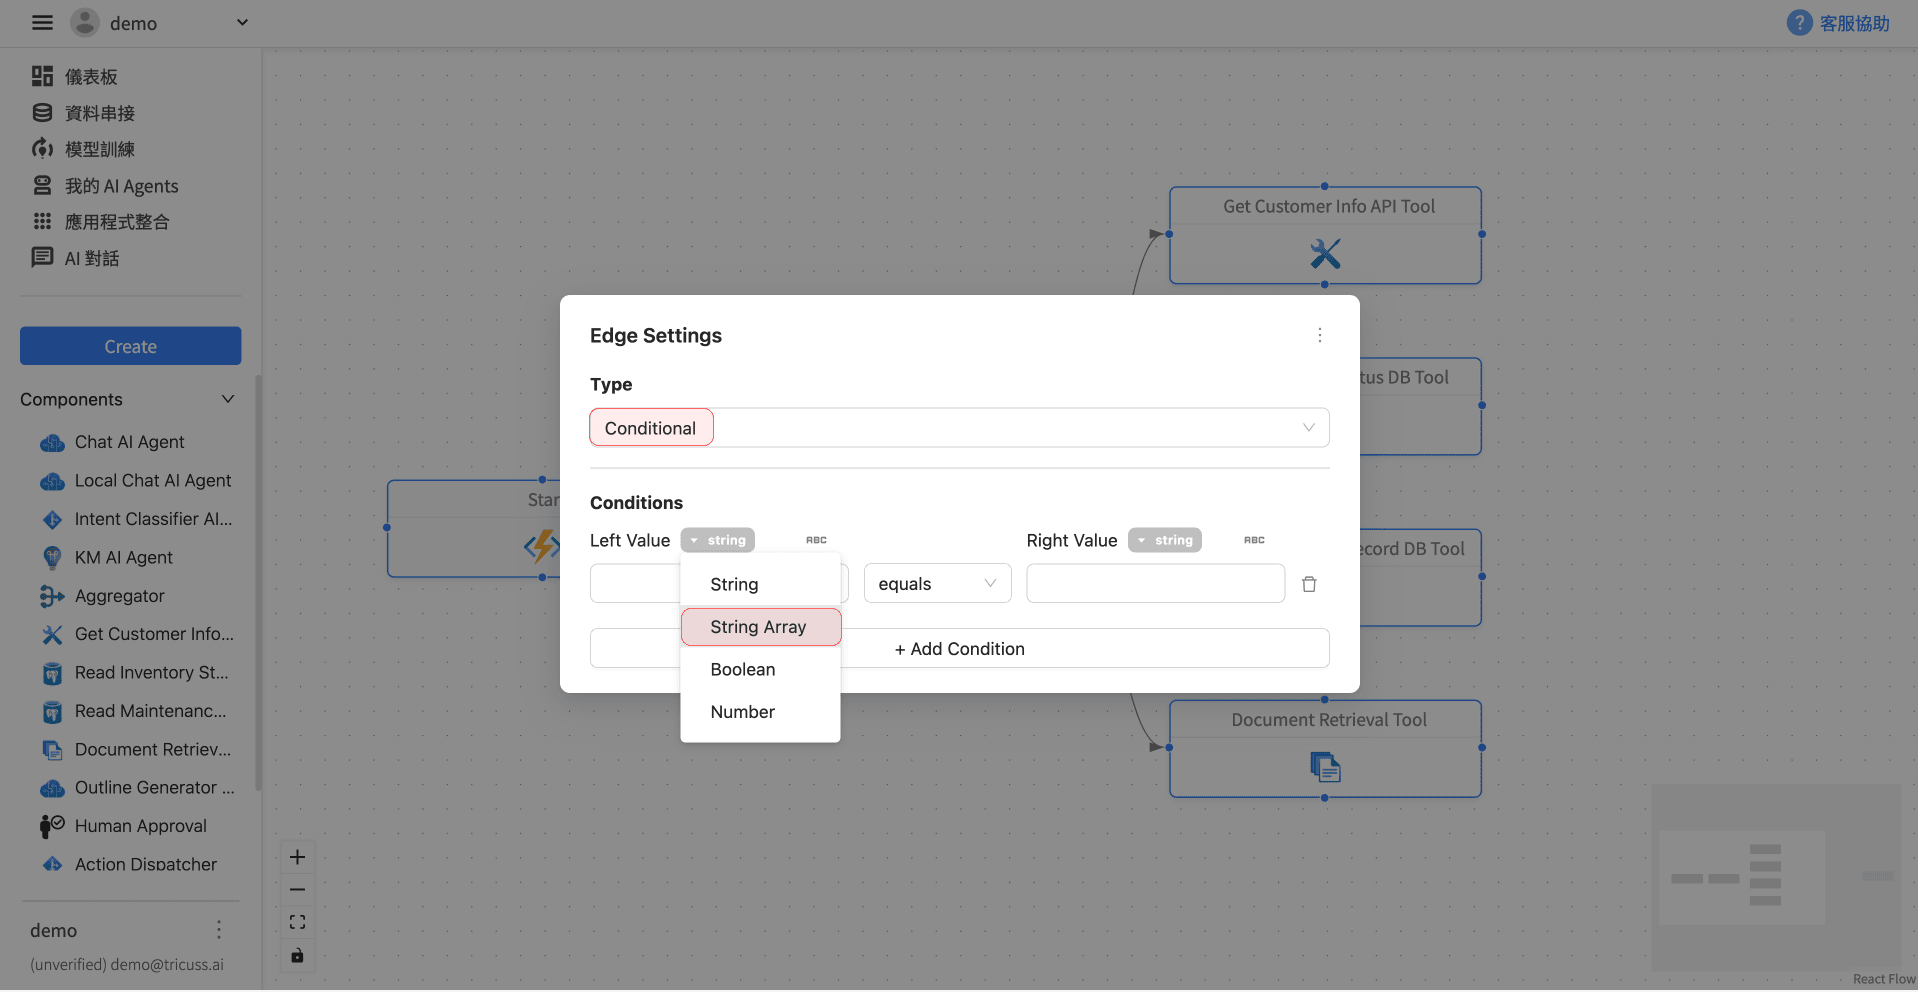
7️⃣ Set Conditional Routing
Use conditions to automatically route to the corresponding data components based on intent:
Hover over the first line in the workflow and click the gear icon that appears.
In the “Edge Settings,” set the Type to Conditional and click Add Conditions.
Set it up as follows:
-
Set Left Values to “String Array” because the “Intent Classifier AI Agent” will output multiple results.
-
In the Left Values dropdown, choose:
Intent Classify AI Agent.outputs.action -
In the middle dropdown, choose:
contains -
In Right Value, enter:
get_customer_info_api_tool
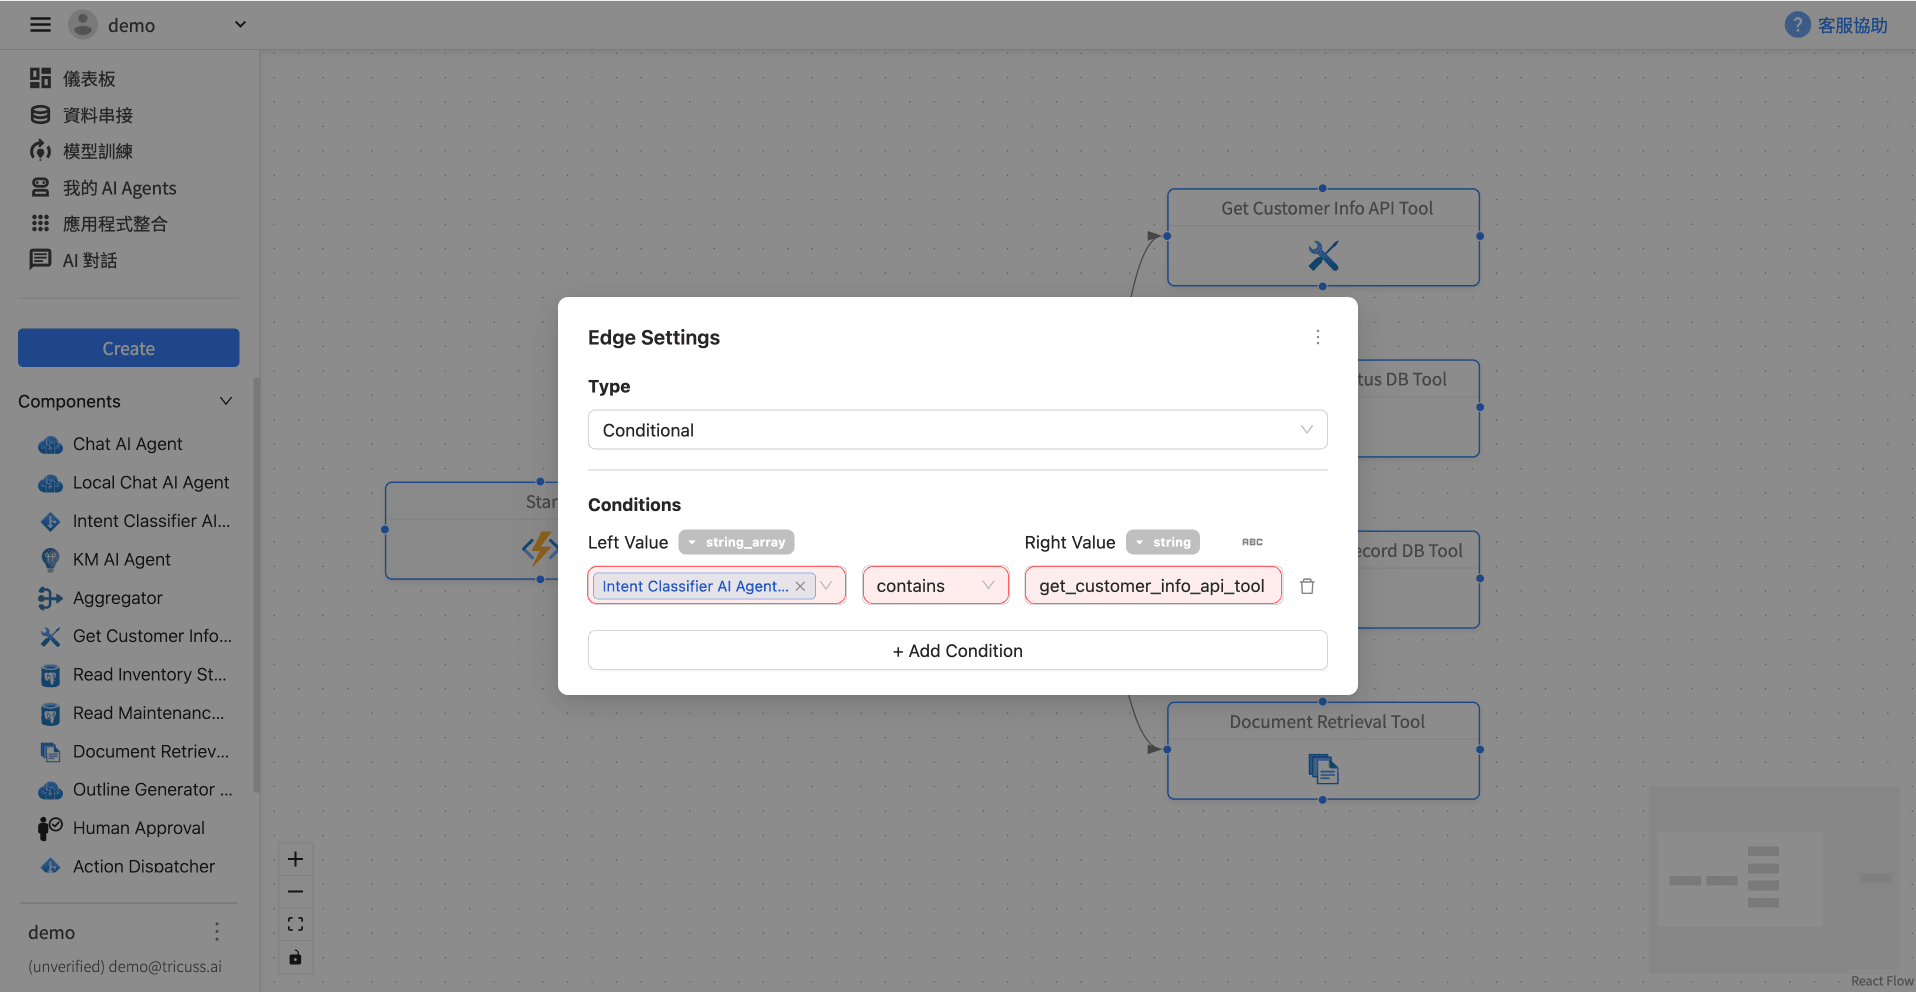
Explanation: The Right Value is one of the values input in the promptTemplate of the “Intent Classifier AI Agent” → Local LLM Model tab.
Thus, the other conditions are: read_inventory_status_db_tool, 維修紀錄, doc_search
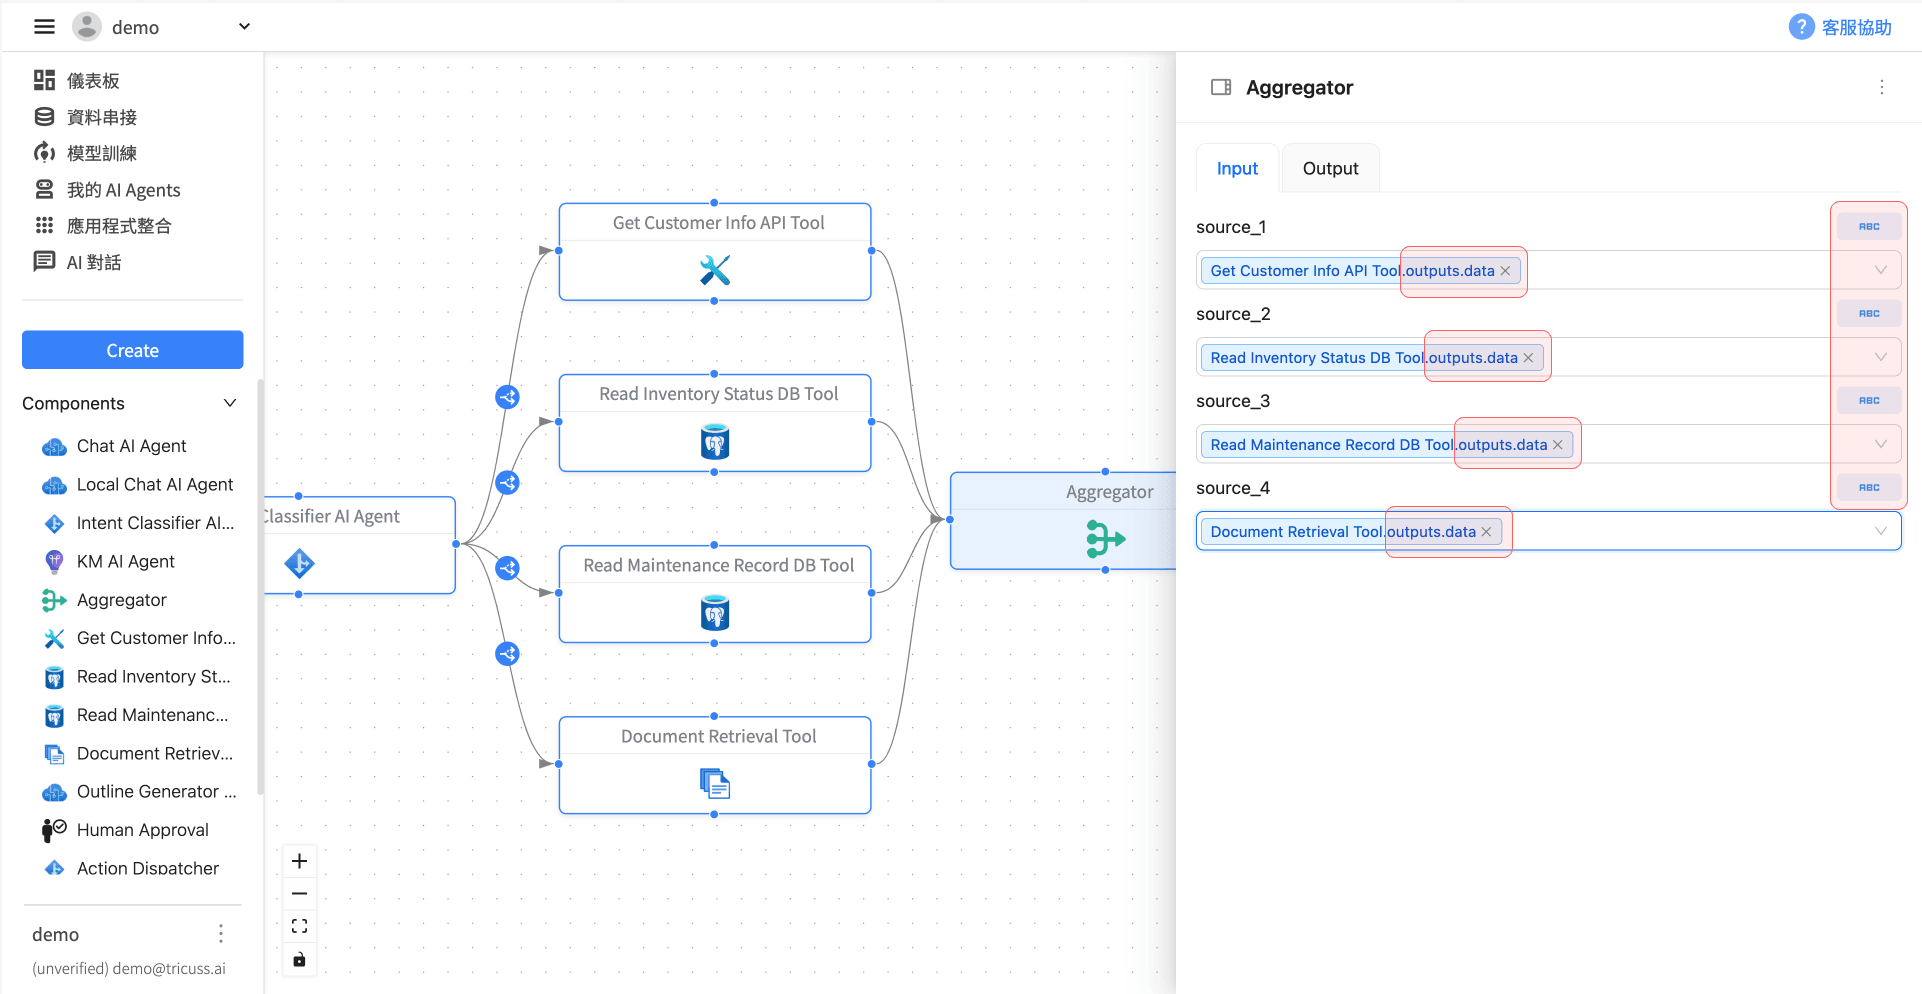
8️⃣ Add Aggregator to merge results
When multiple data sources may provide answers, use an Aggregator to consolidate outputs.
Add an Aggregator component and connect each data source.
In the Input tab, click “ABC” and choose the outputs.data from each component as the input source.
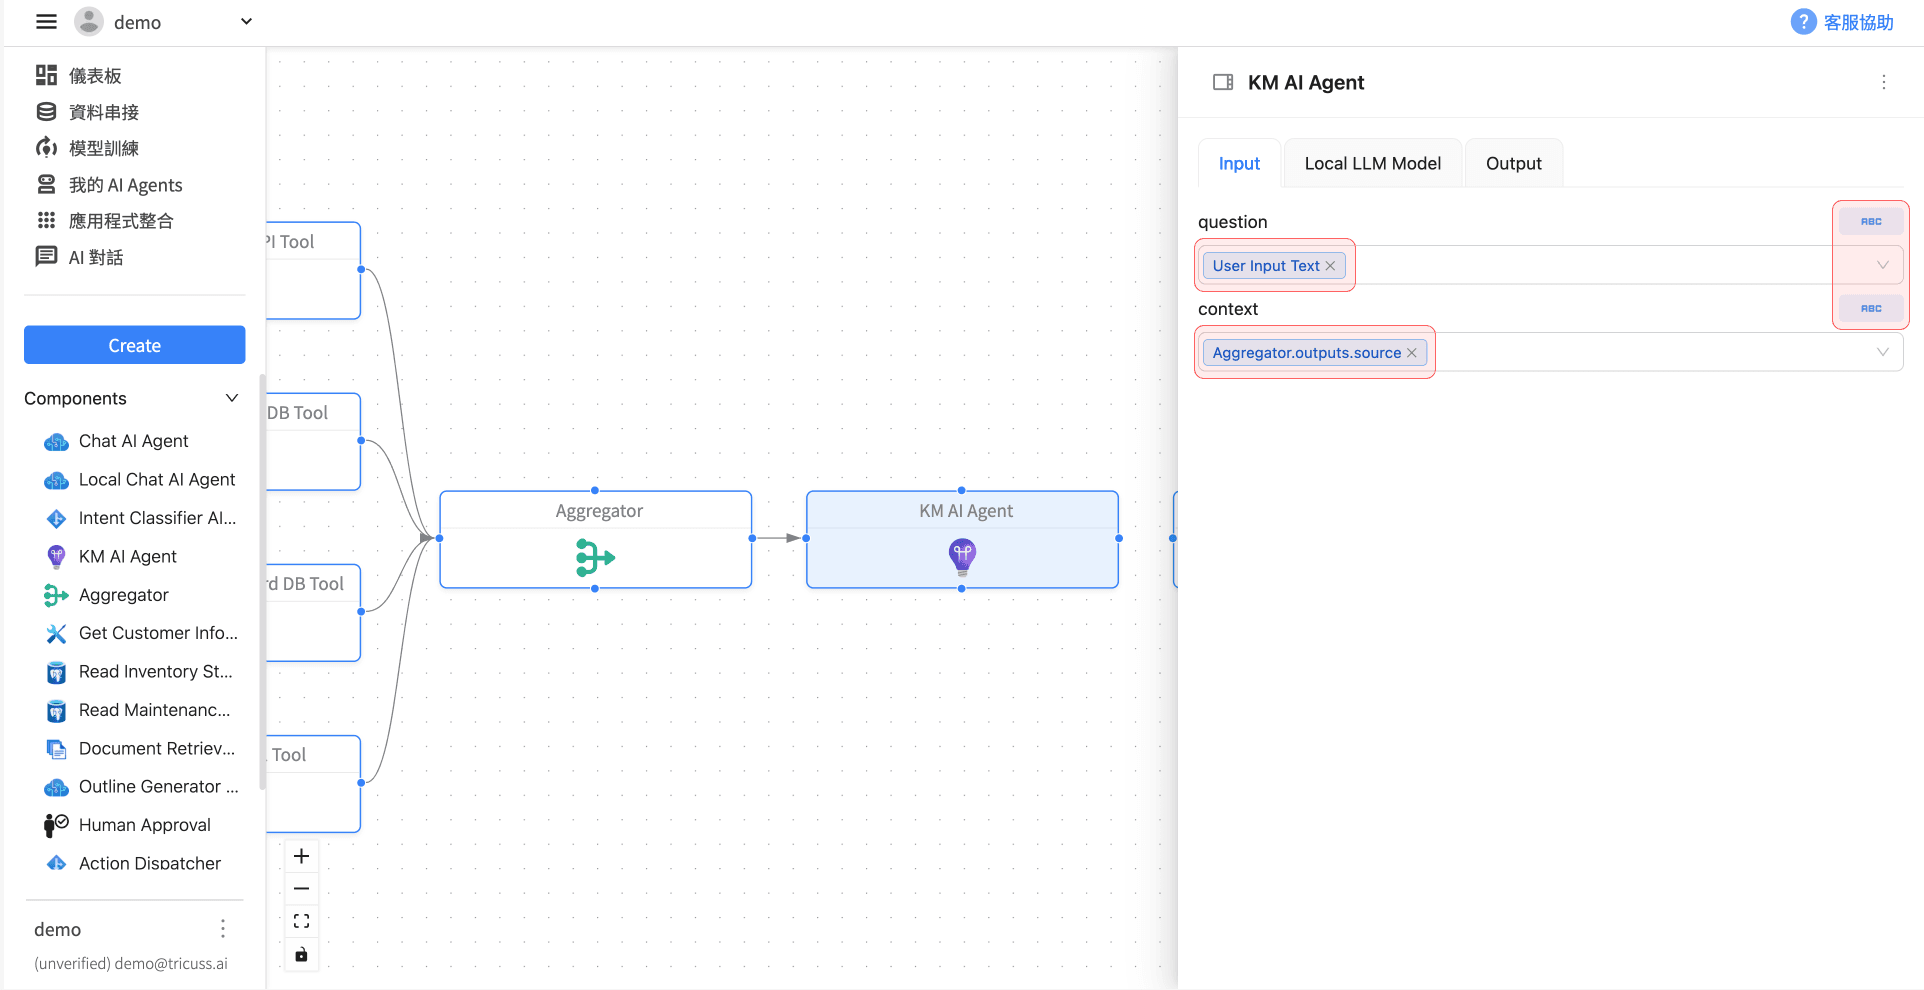
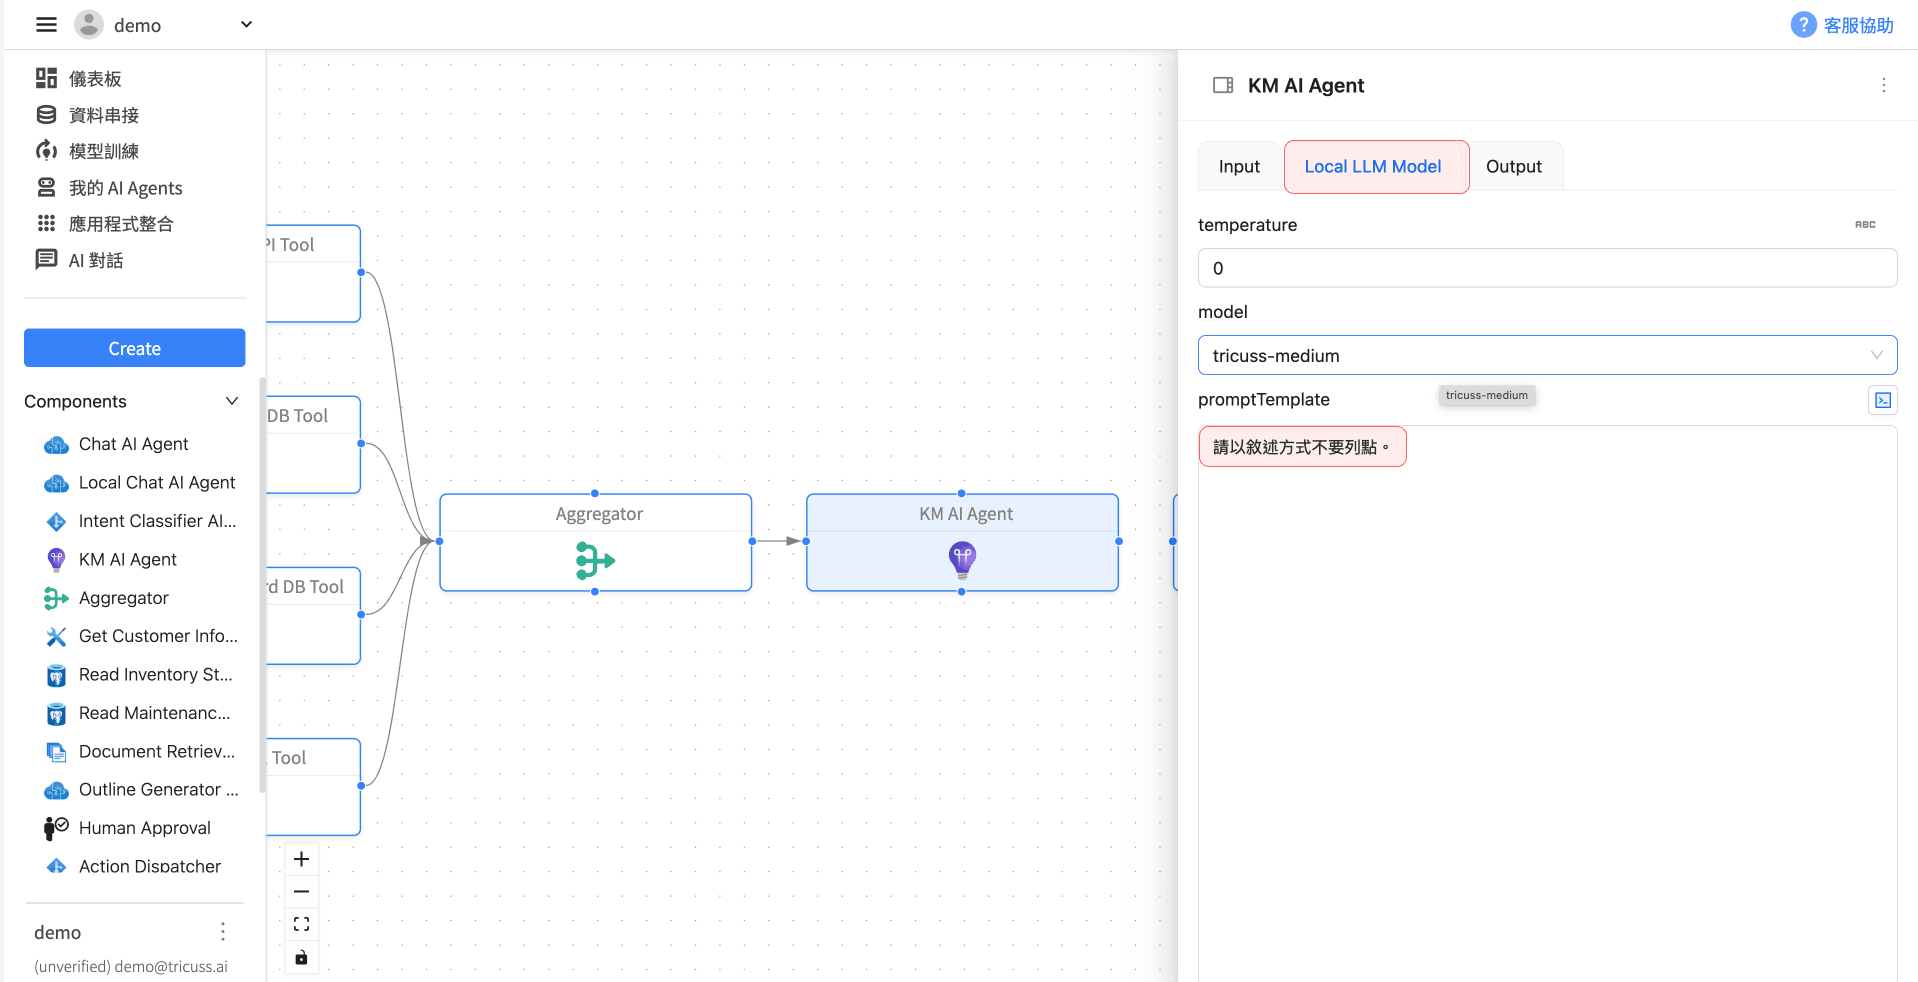
9️⃣ Add KM AI Agent for final response
Add the “KM AI Agent” component and connect it to the Aggregator.
In the Input tab:
- Set
questionto User Input Text - Set
contextto Aggregator.outputs.source, which indicates the context for answering is based on internal documents
Switch to the “KM AI Agent” → Local LLM Model tab, and input the following in the promptTemplate to adjust the output style:
請以敘述方式不要列點。
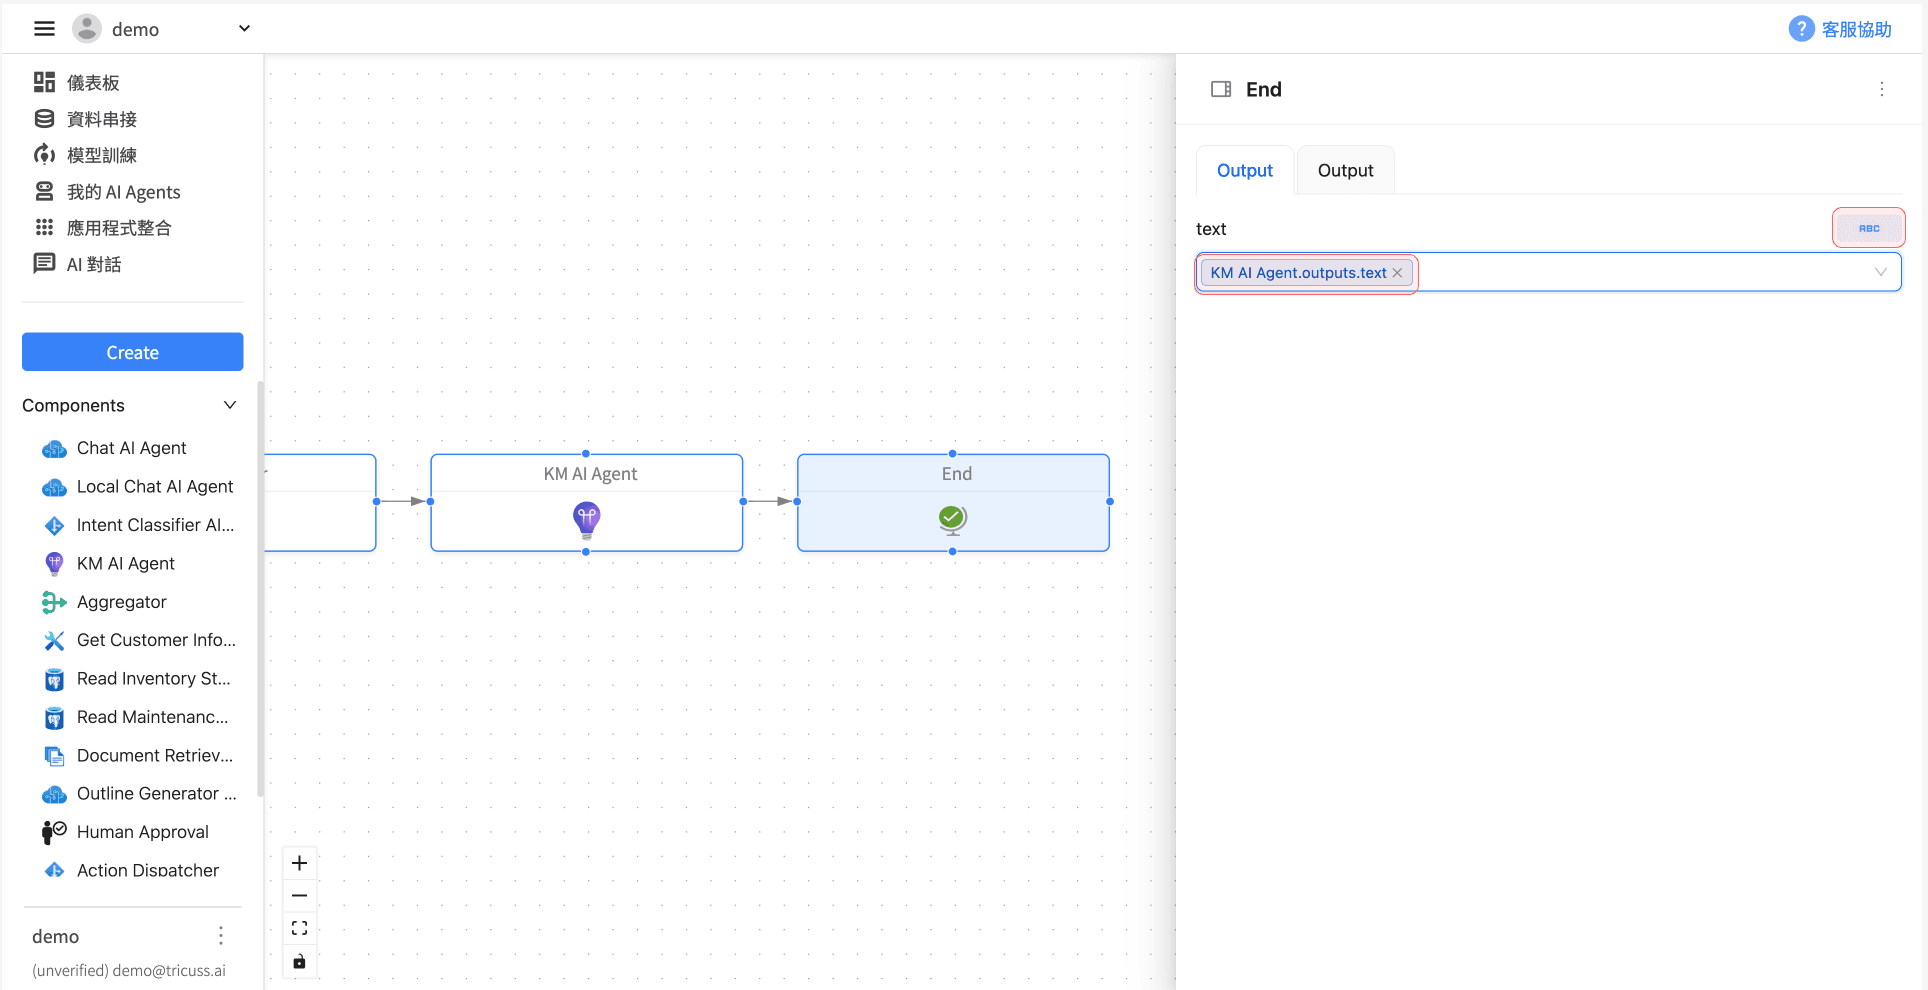
🔚 End the workflow
Connect the “KM AI Agent” to the “End” node.
Click “End” and in the Output tab, set the output to KM AI Agent.output.text
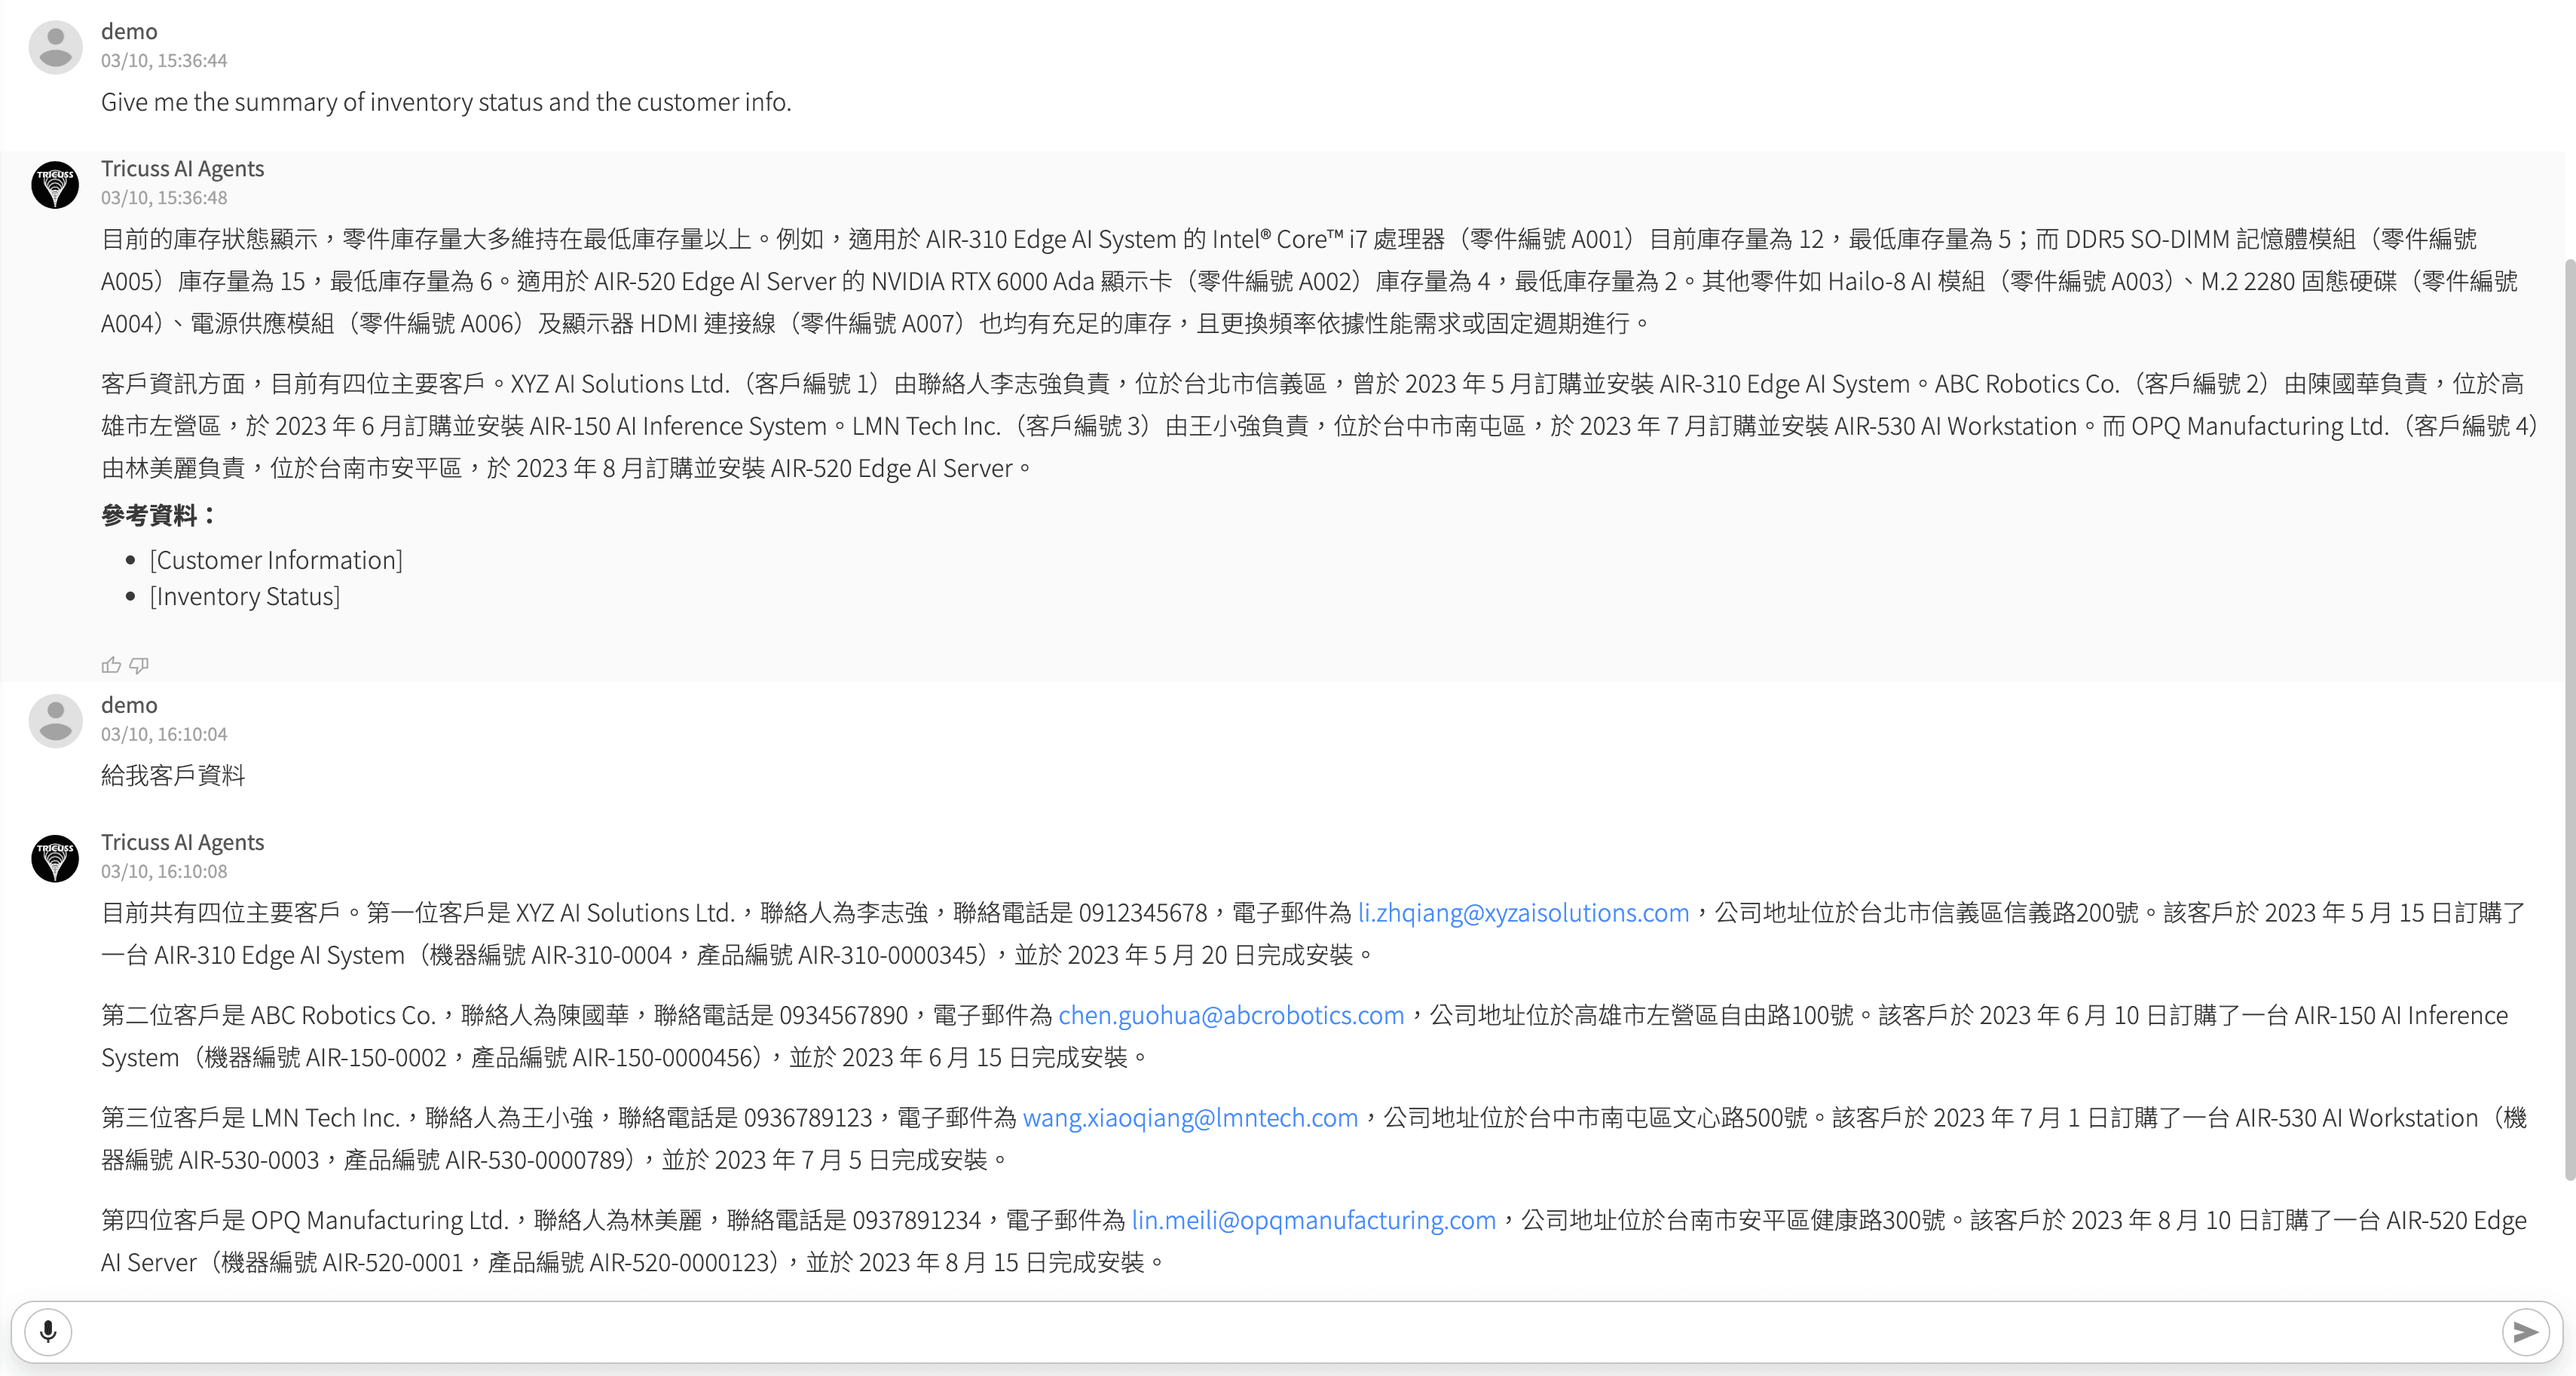
Testing the AI Agent with Internal Database Integration
After completing the above workflow and component setup, you can perform testing to verify the AI Agent's accuracy and responsiveness when querying internal company data.
The test will include various types of user questions such as retrieving specific customer information, checking product inventory status, reviewing past maintenance records, or analyzing uploaded document content.