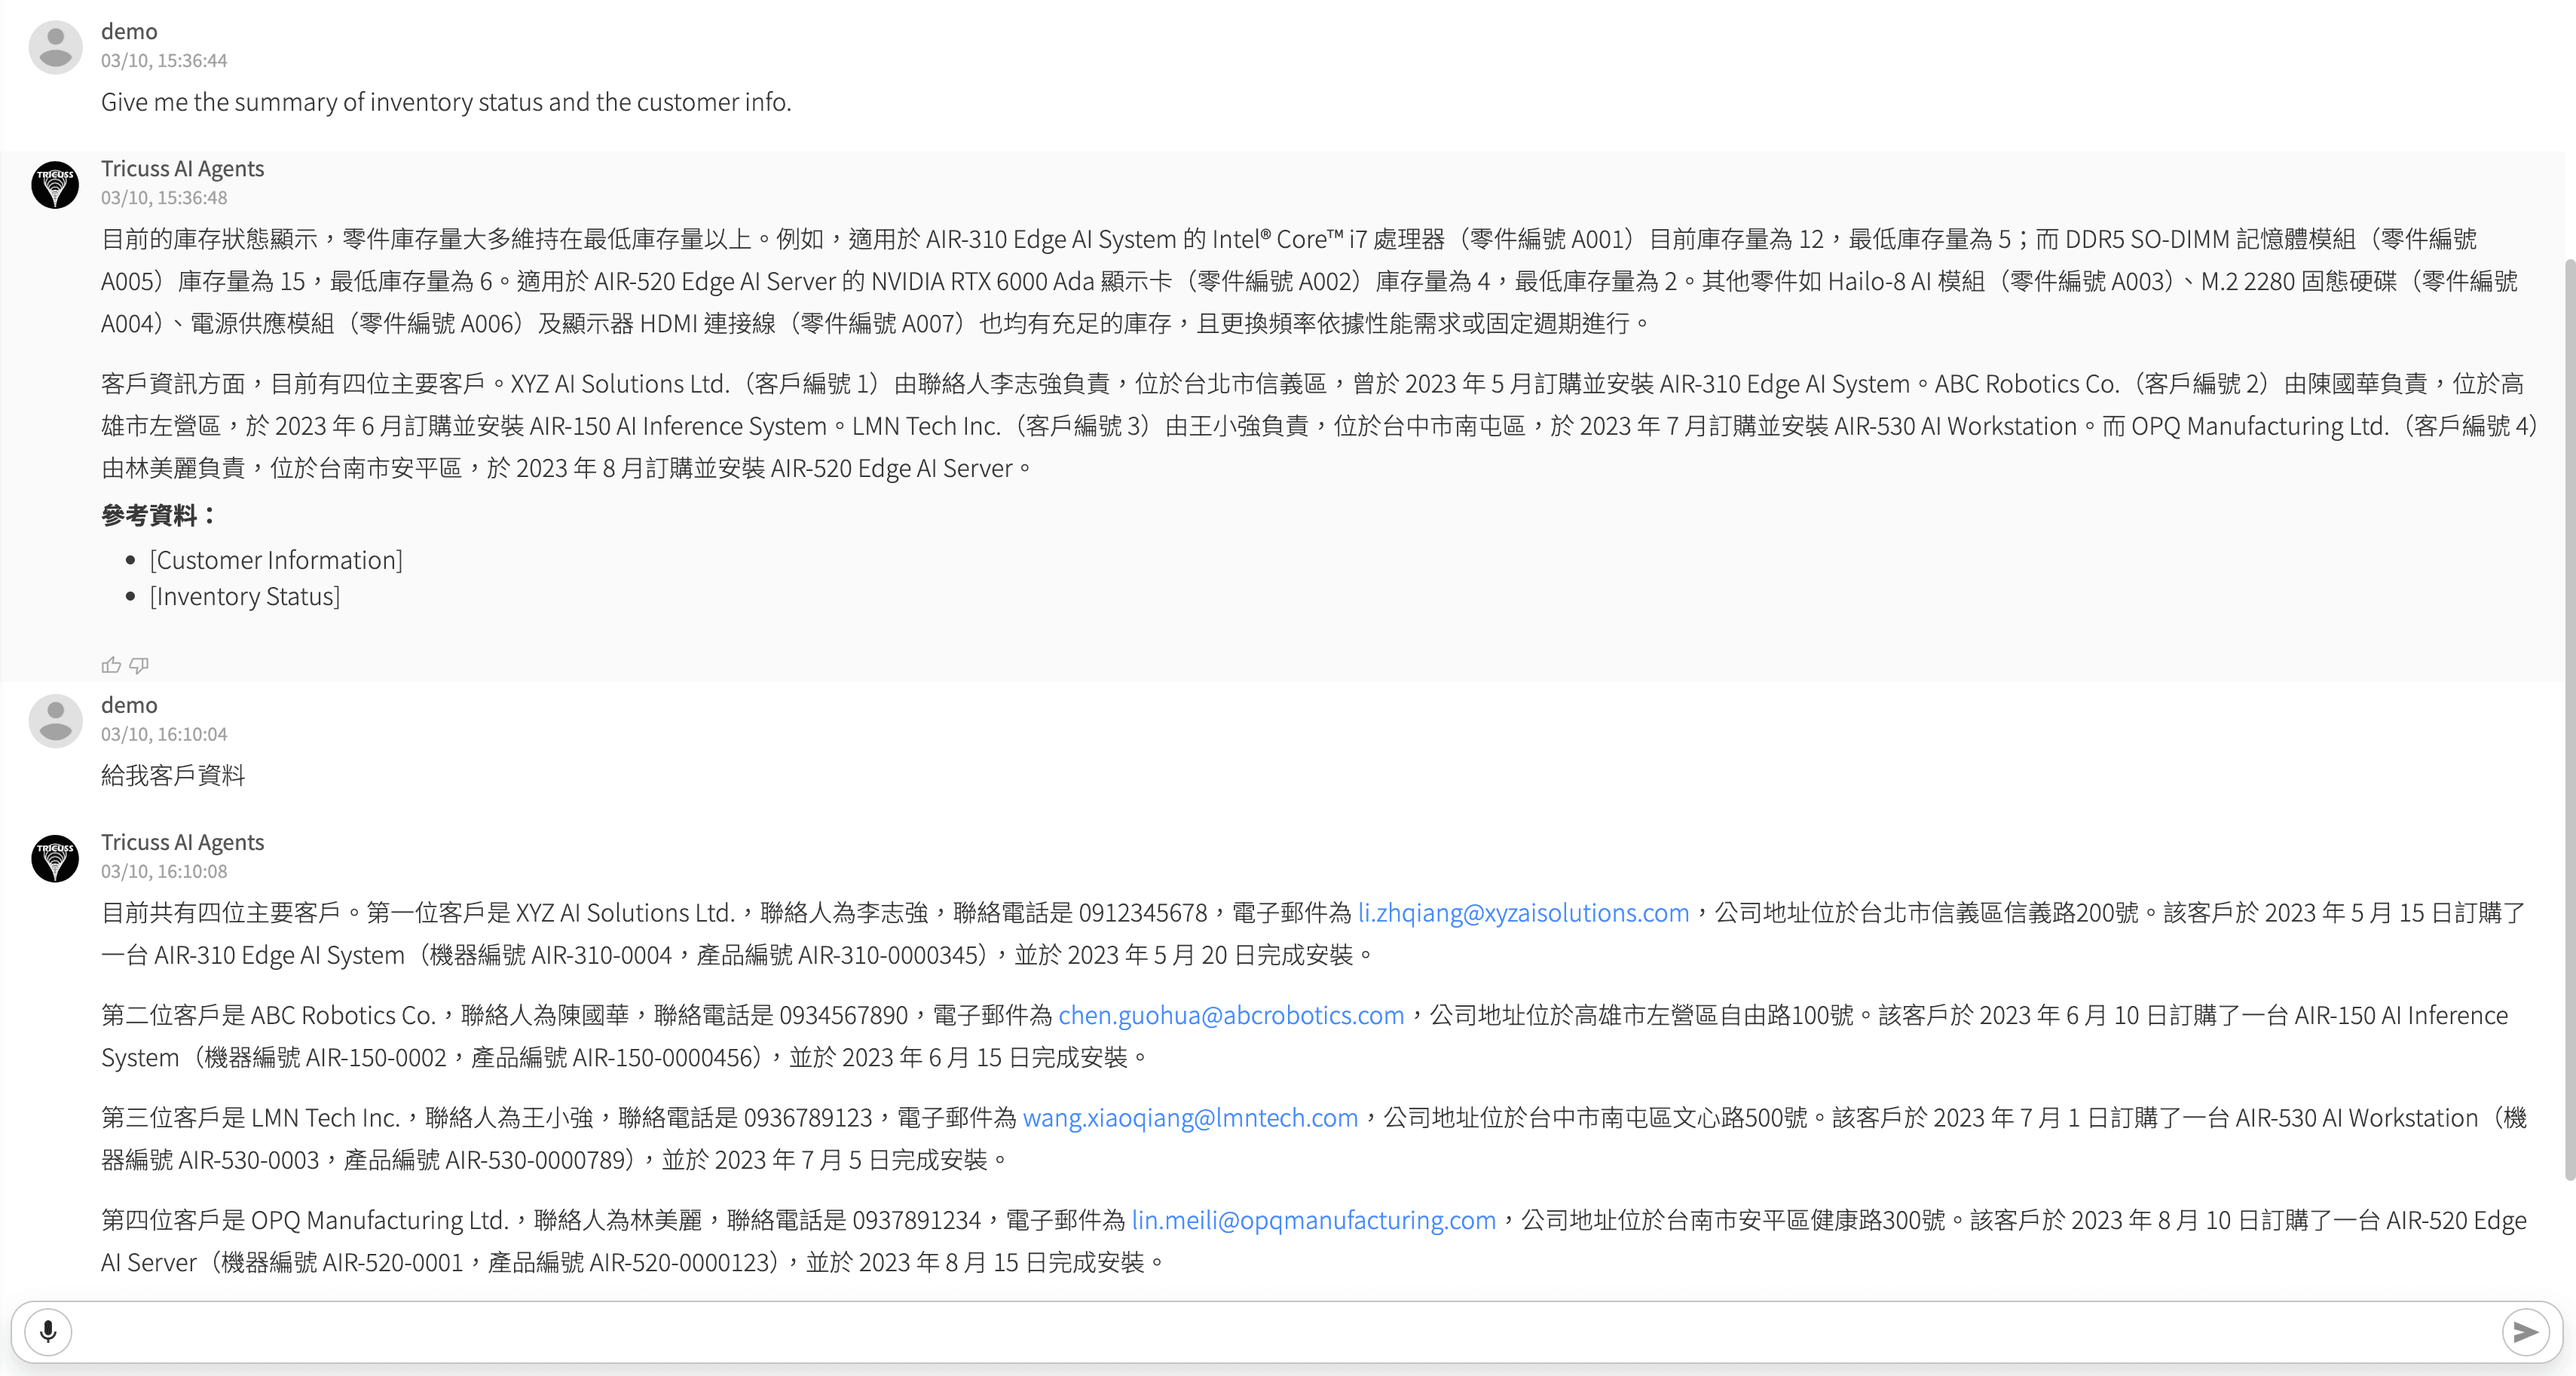
設定 AI Agent:串接企業資料庫
教學目標
本教學將帶你建立一個「問答型 AI Agent」,可根據使用者提問,從企業內部資料庫取得相關資訊並提供回答。
1️⃣ 移除預設的 Chat AI Agent
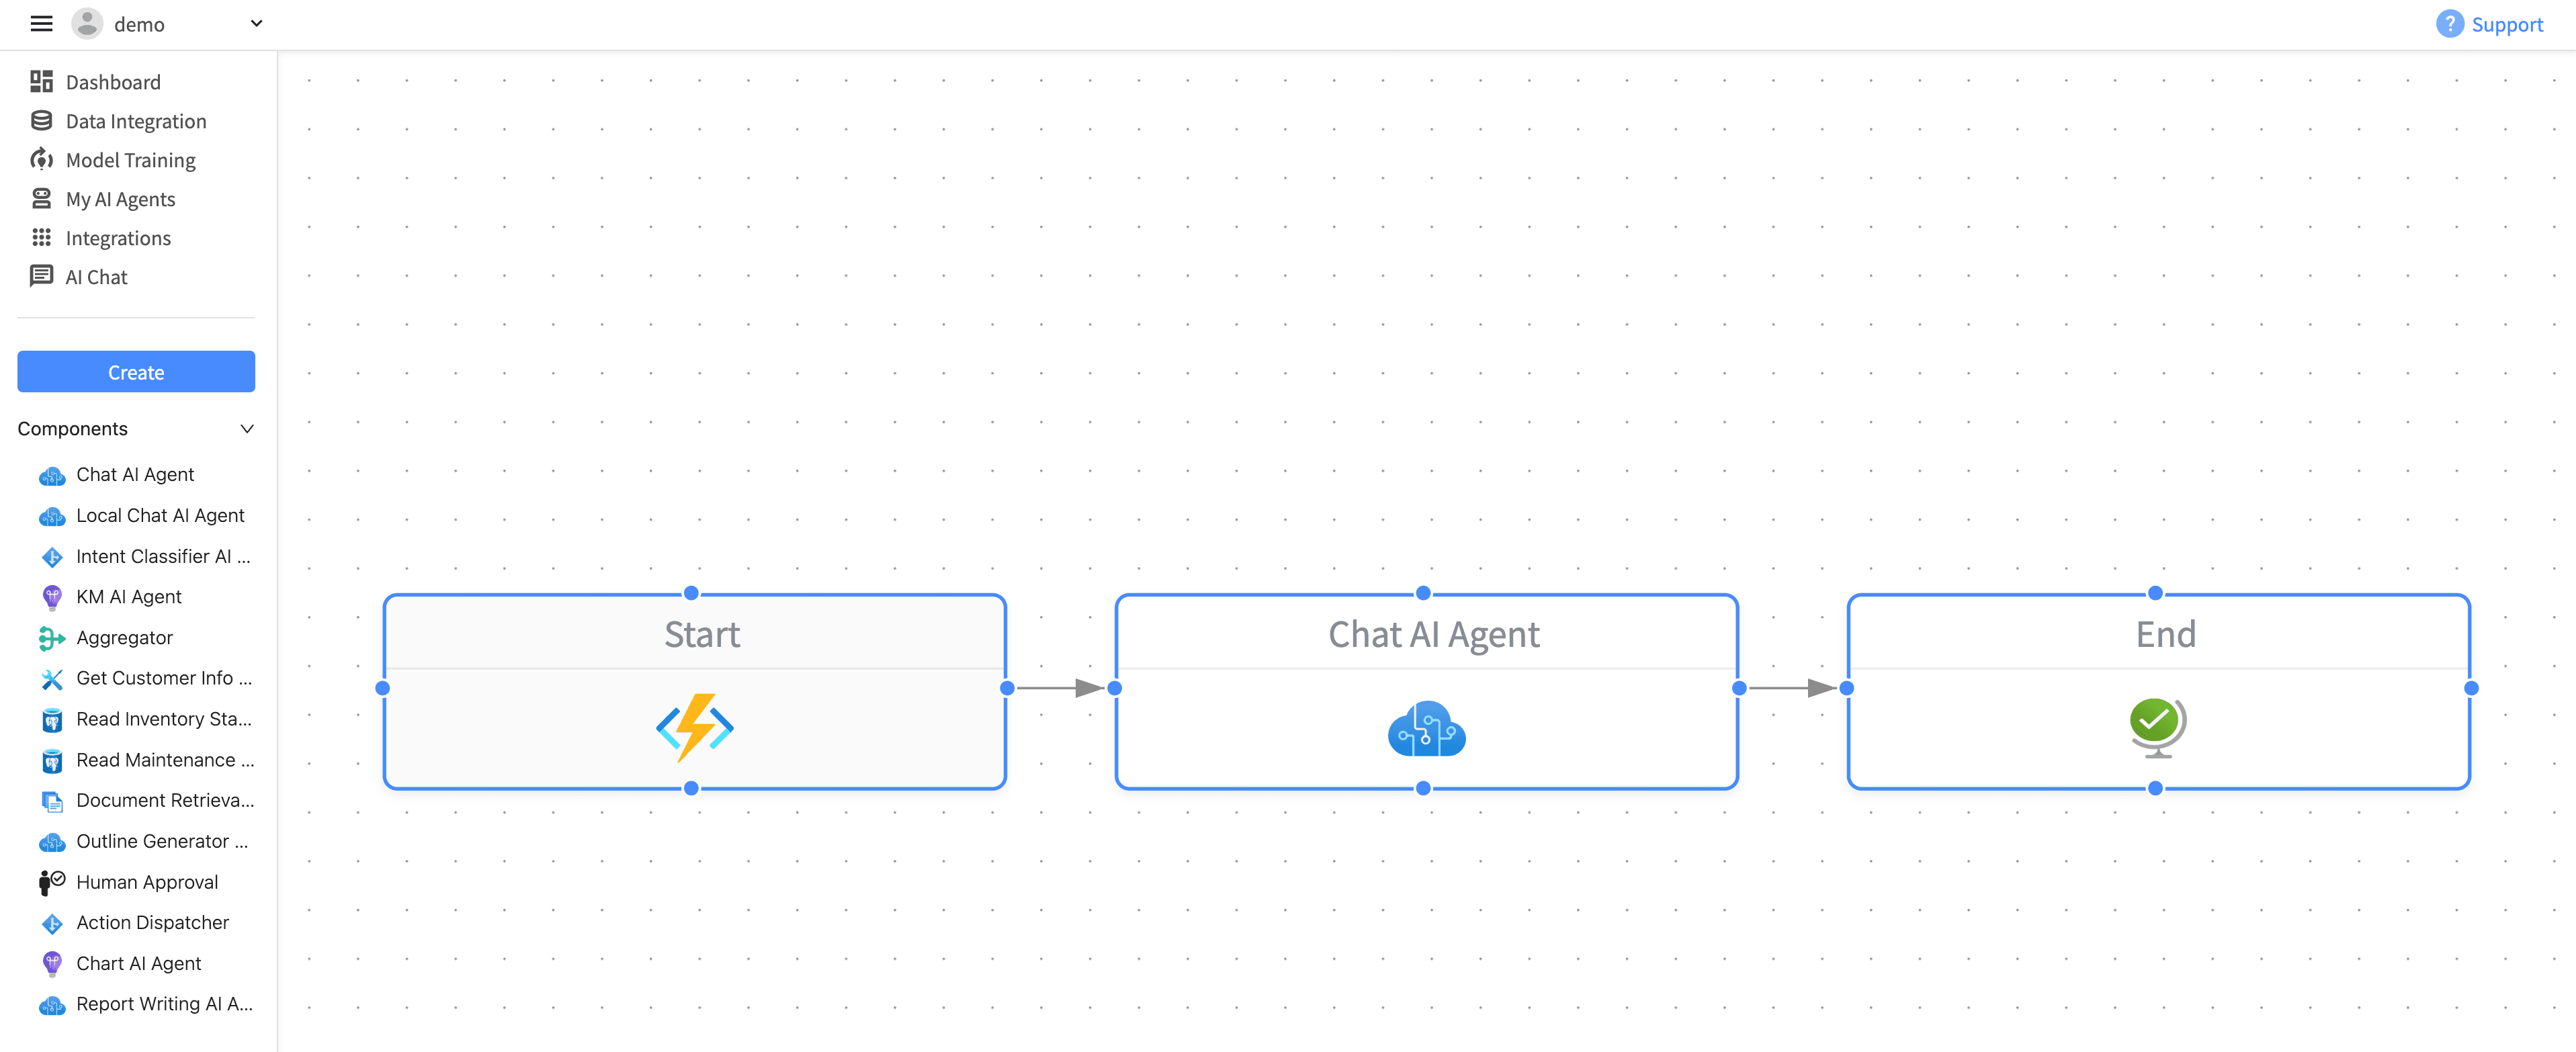
當你開始創建一個新的 AI Agent 時,預設的流程圖會呈現如下初始狀態:Start ➡️ Chat AI Agent ➡️ End
(開頭一定是由 Start 連結,由 End 結束)
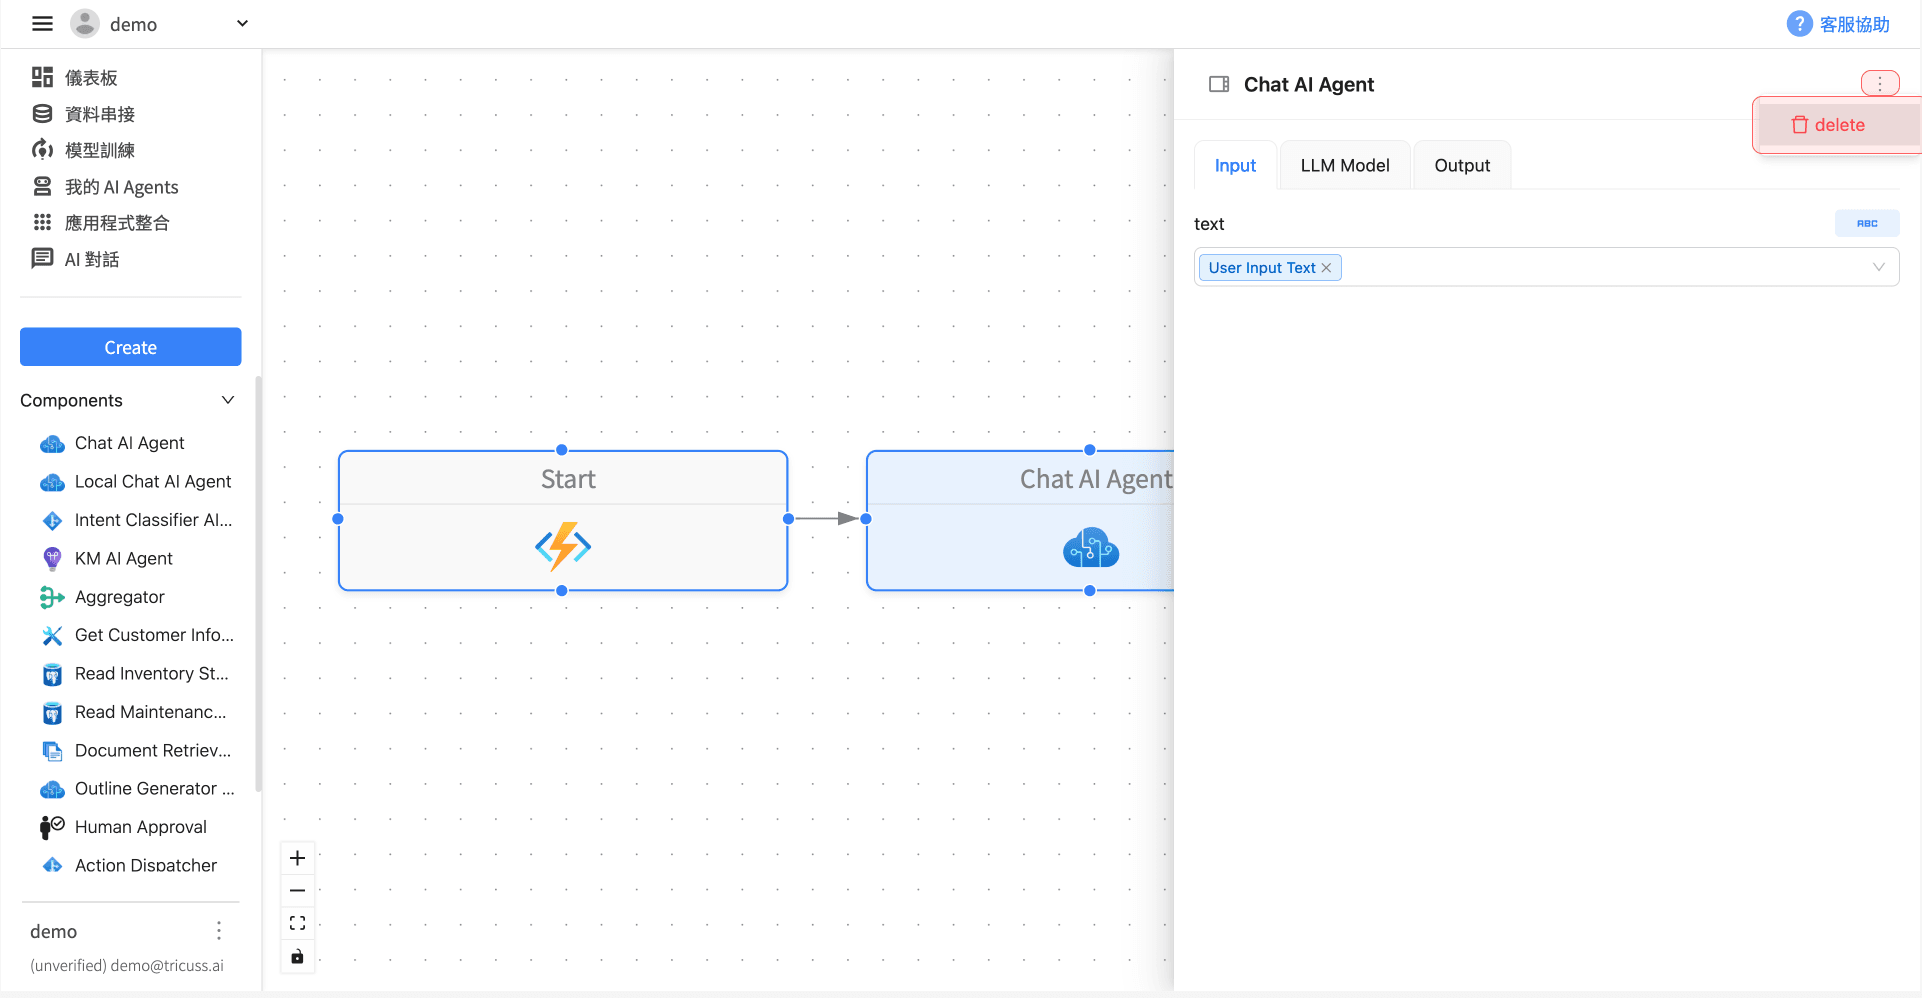
本案例主要功能為串接企業資料庫,因此需刪除預設的「Chat AI Agent」元件:
在右側面板中點選該元件的選單圖示(⋮),再點選 delete 即可。
2️⃣ 拖曳並加入 Intent Classifier AI Agent
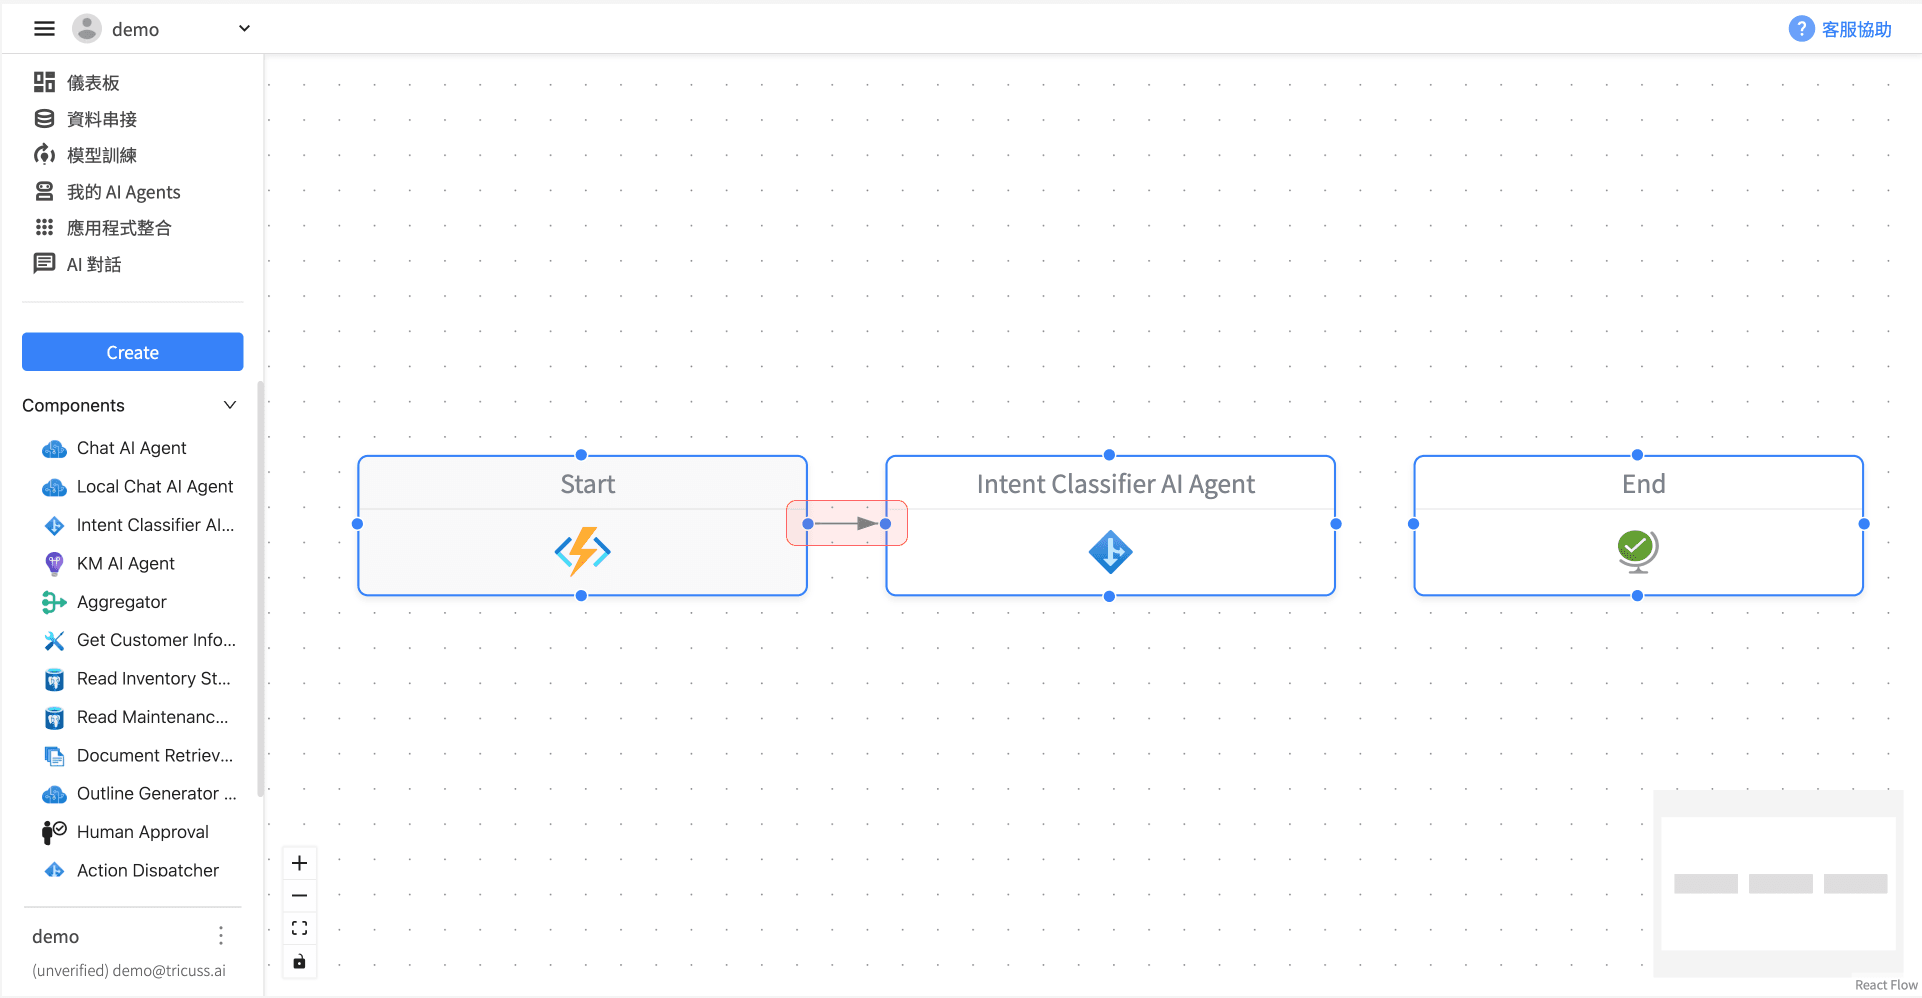
從左側的 Components 清單中,將 Intent Classifier AI Agent 拖曳至工作流程圖上。
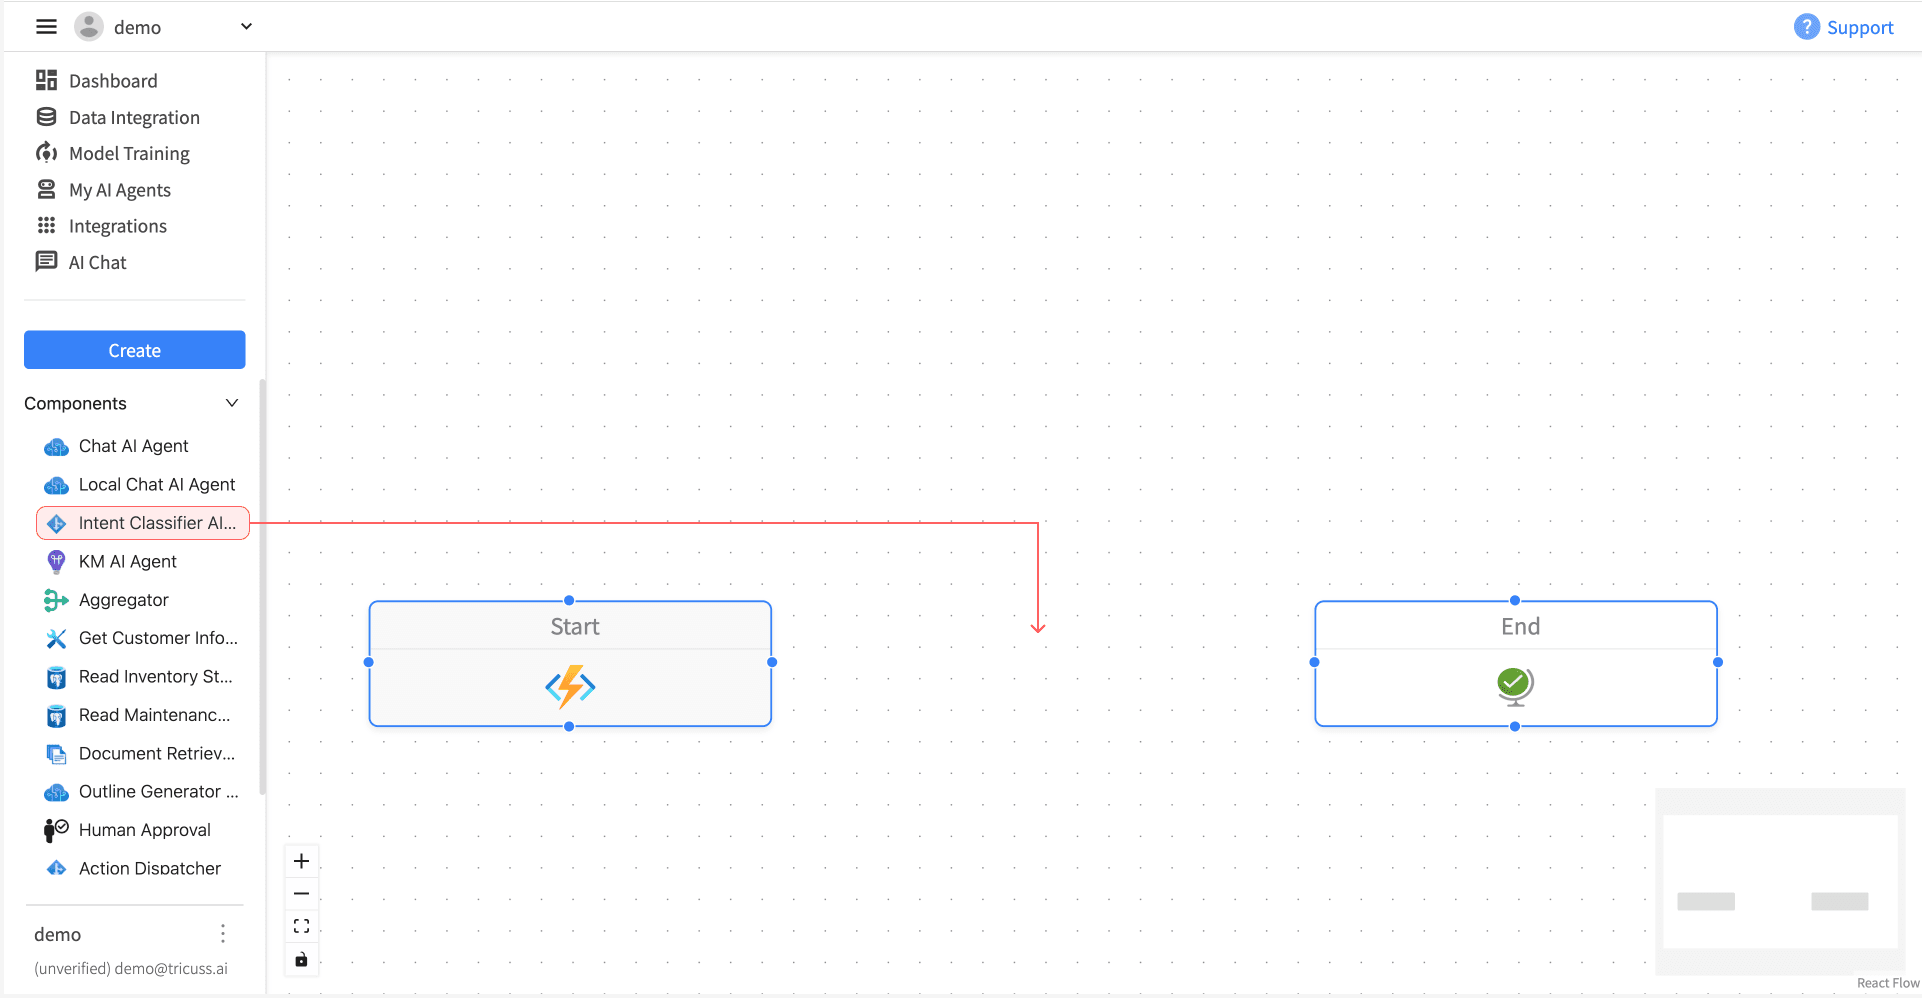
⚠️ 注意連接箭頭的方向:
連線應從左向右延伸,表示執行順序。
3️⃣ 設定 Input:選擇 User Input Text
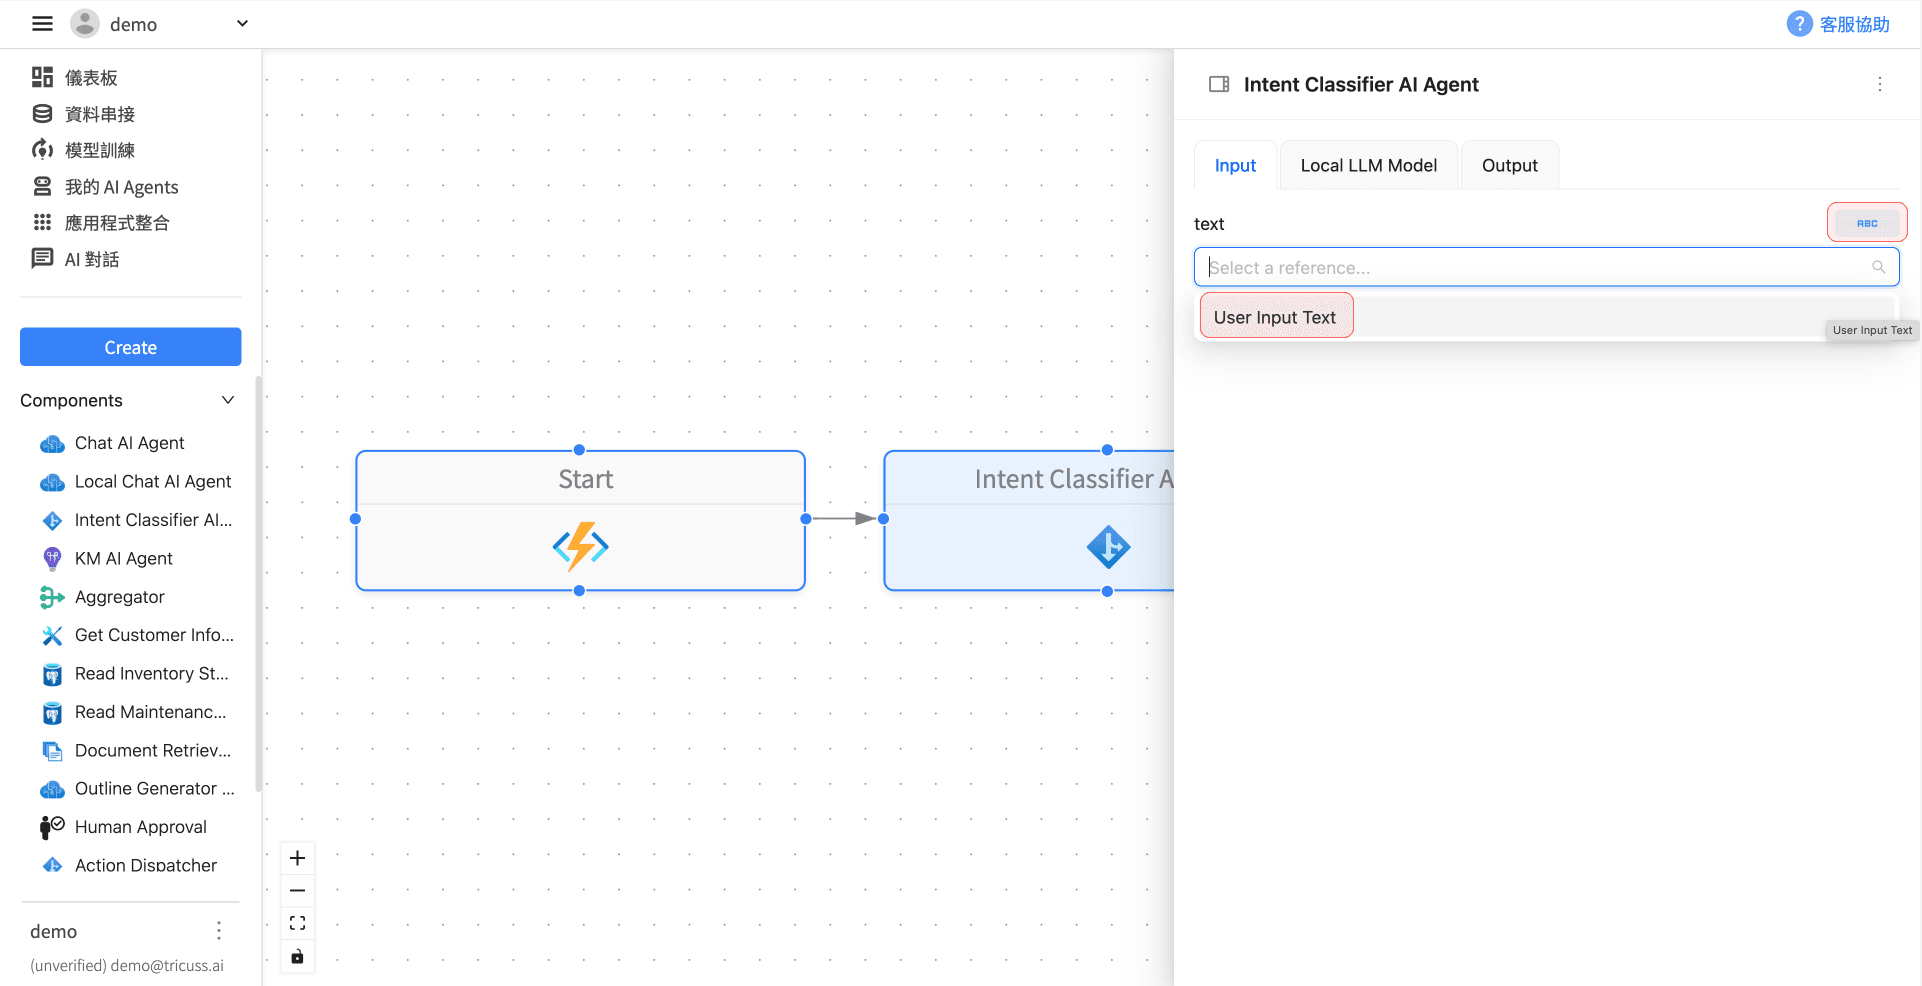
點選「Intent Classifier AI Agent」,切換至 Input 分頁, 點擊右上角的「ABC」按鍵,從下拉選單中選擇 User Input Text。
這個模組是使用者輸入的第一層處理核心,會透過本地語言模型(Local LLM)分析語意,並判斷使用者的意圖與所需資料的來源。
4️⃣ 新增並串接資料來源元件
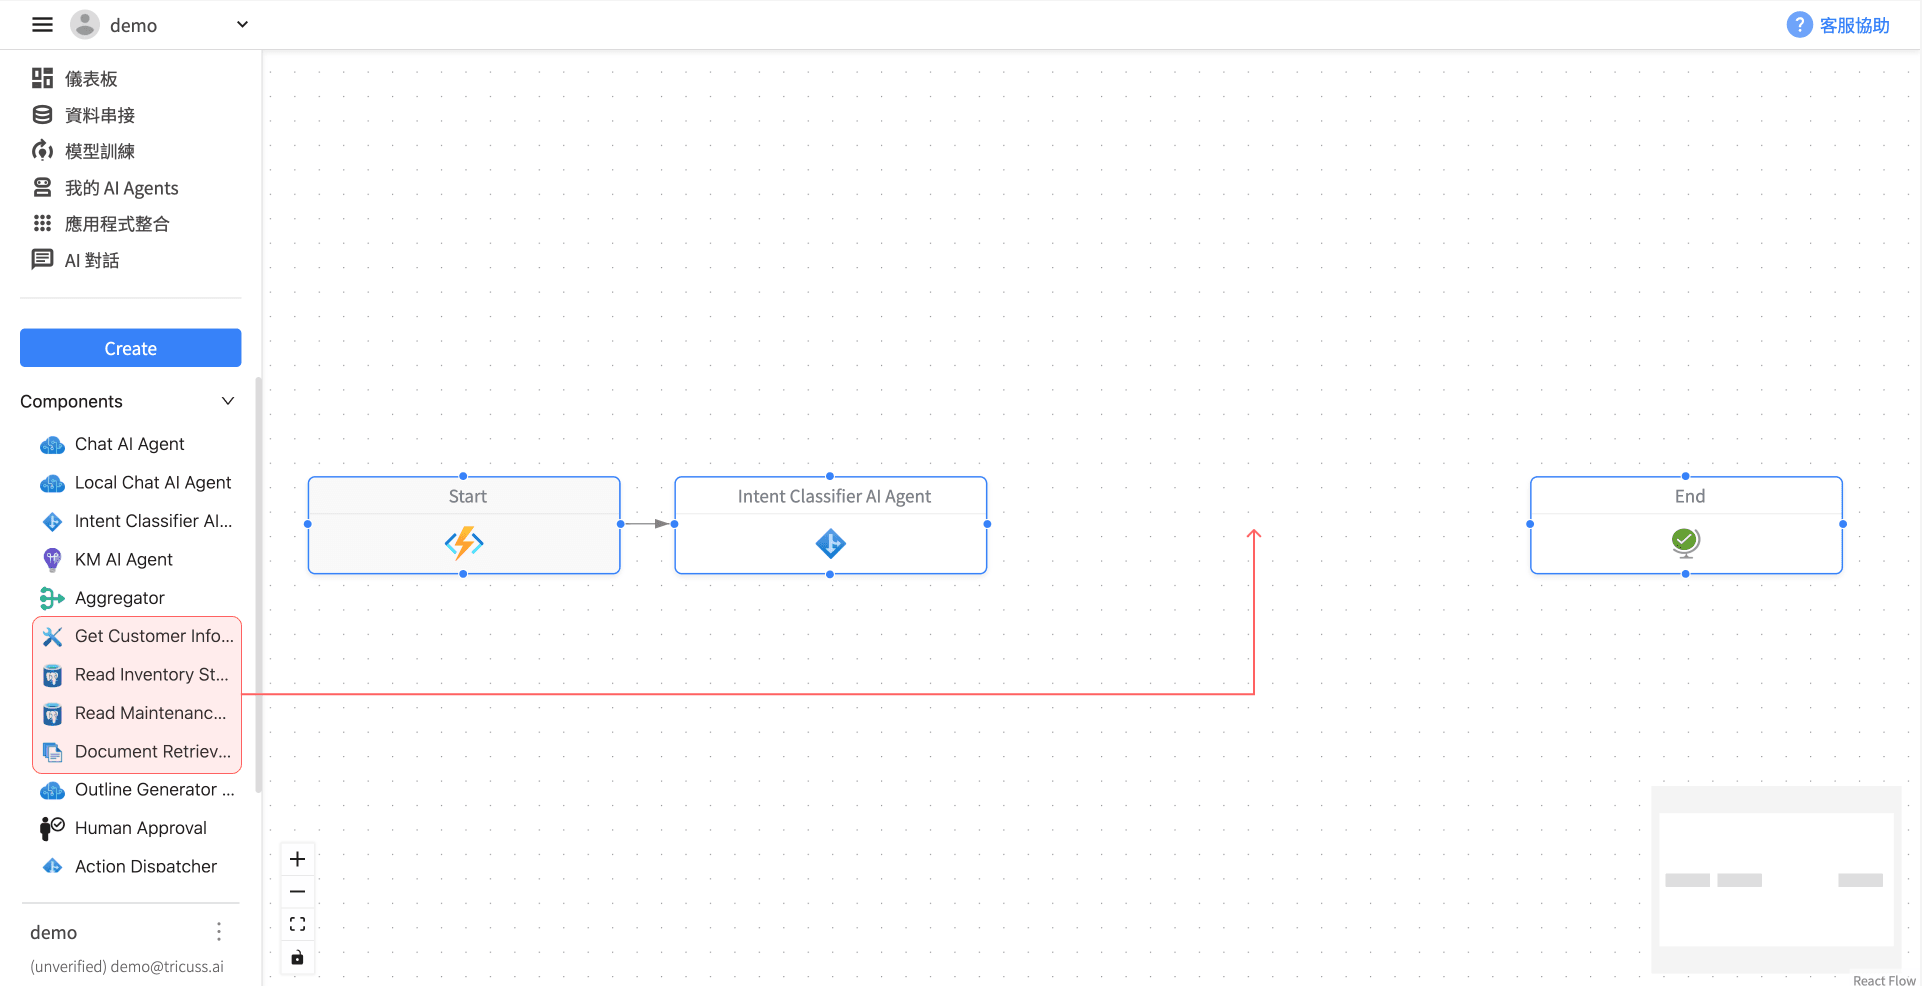
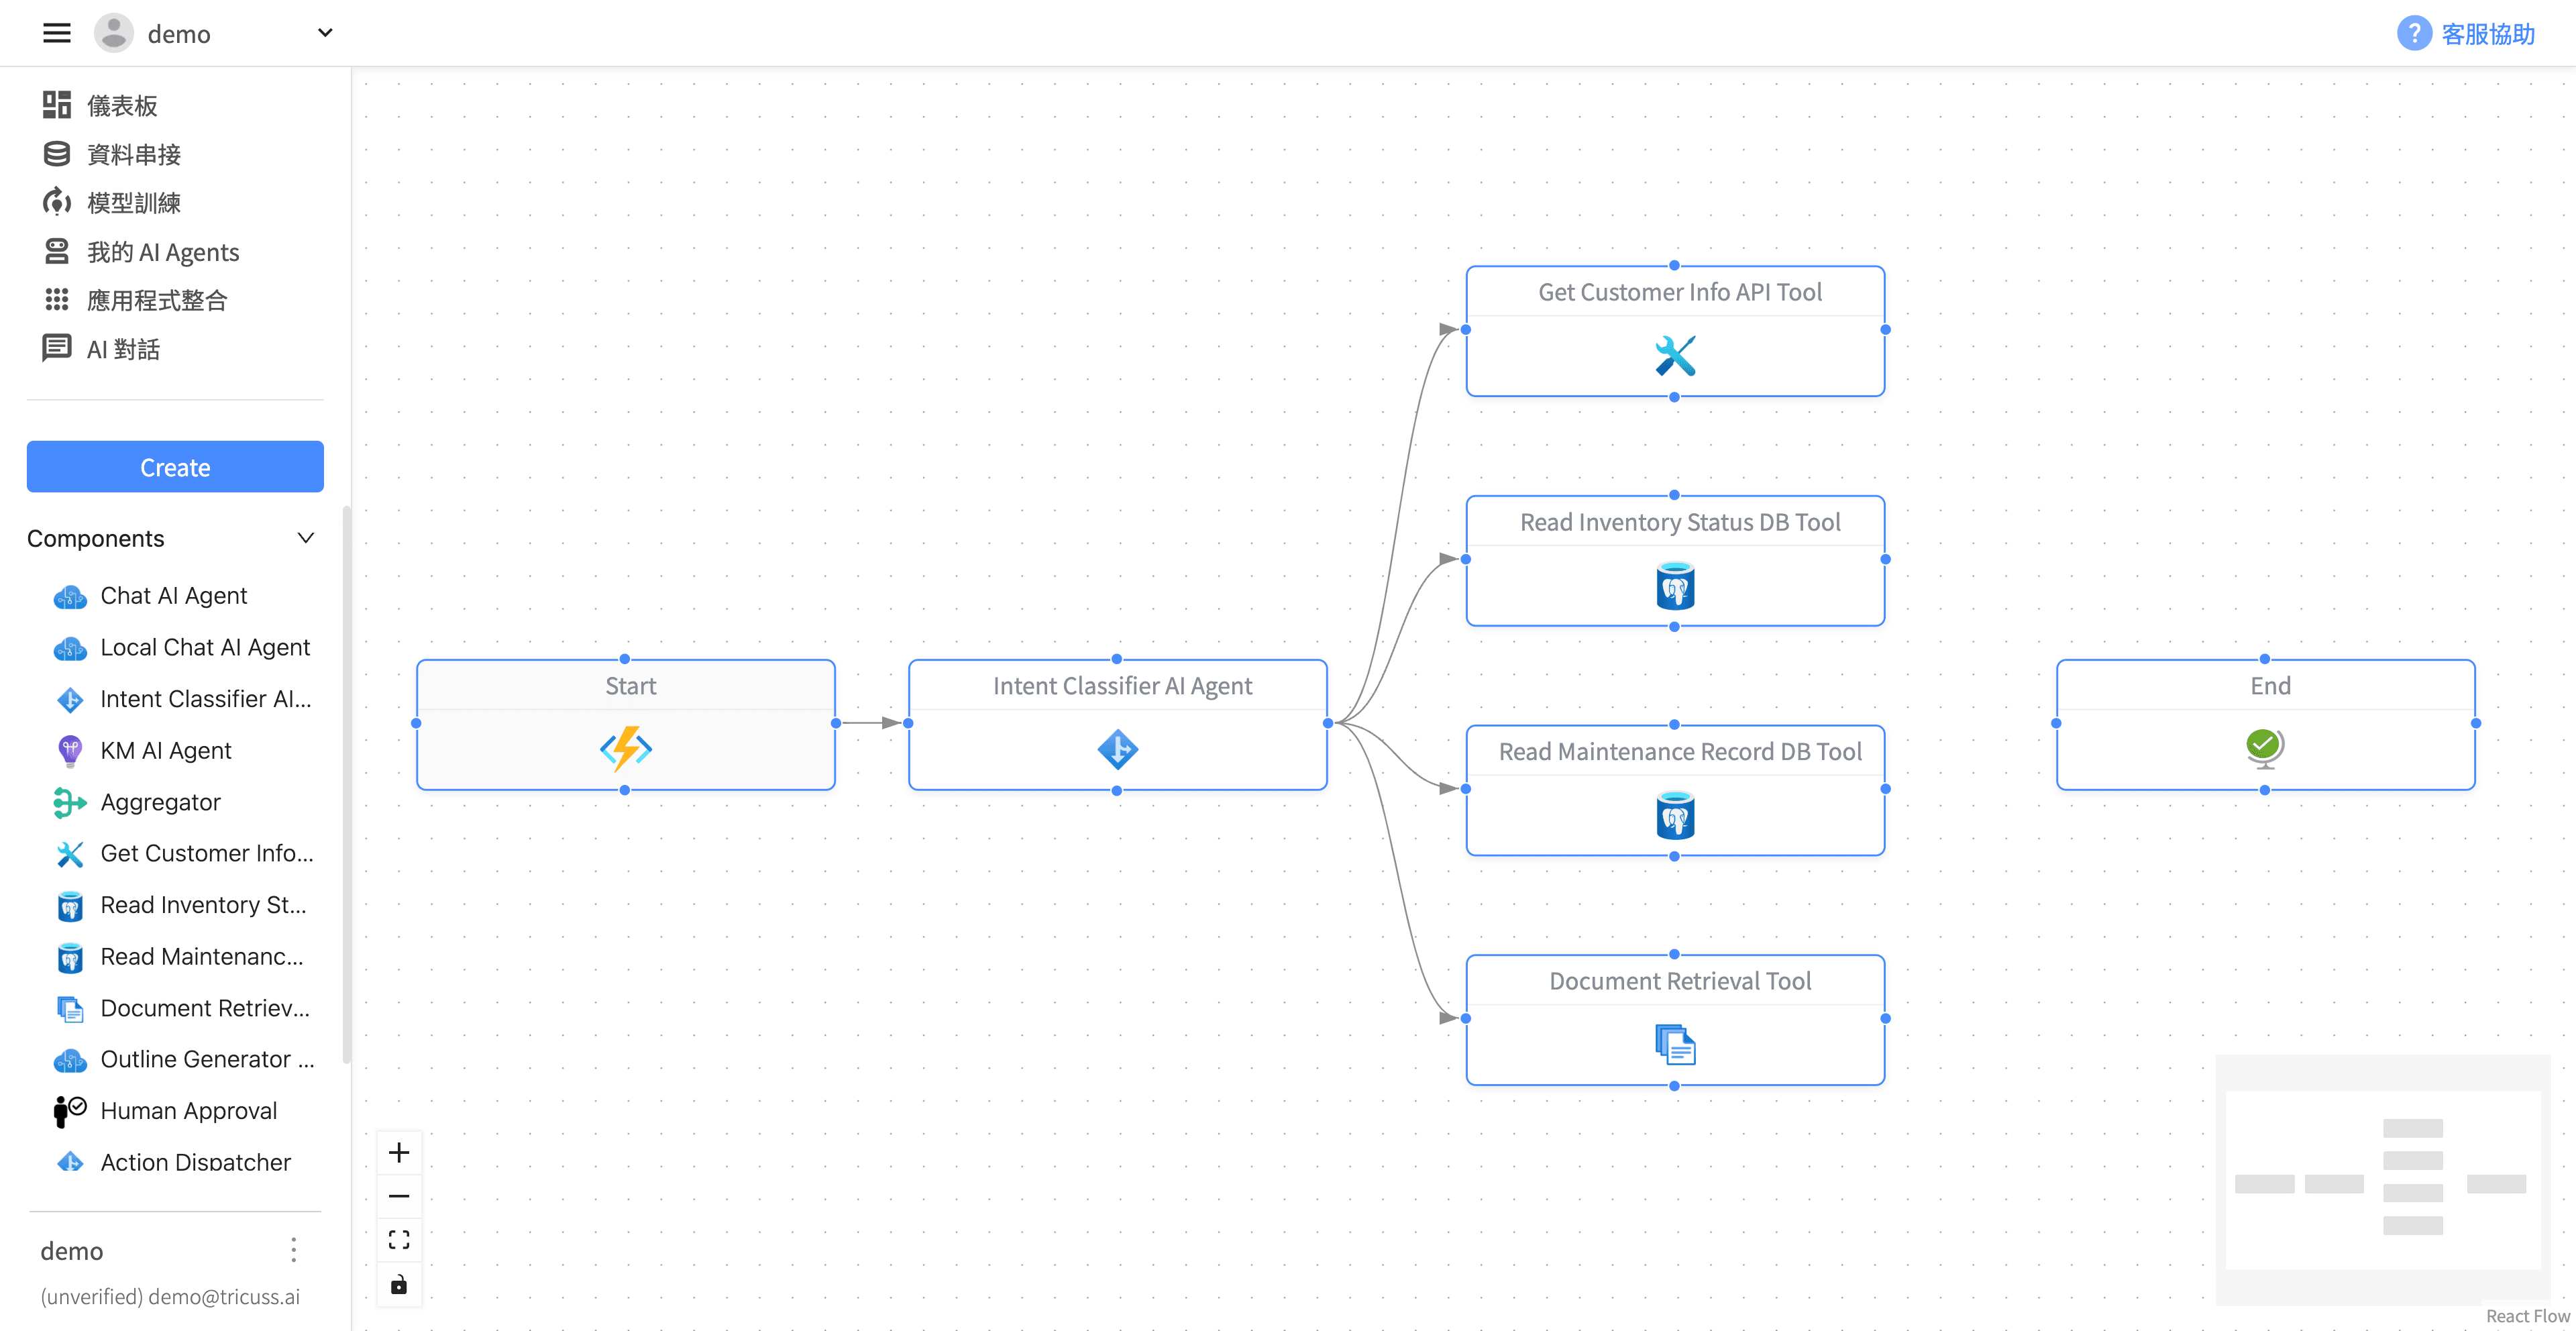
將企業內部database API以及可上傳的文件的 component 加入流程圖:
5️⃣ 設定語意判斷 Prompt Template
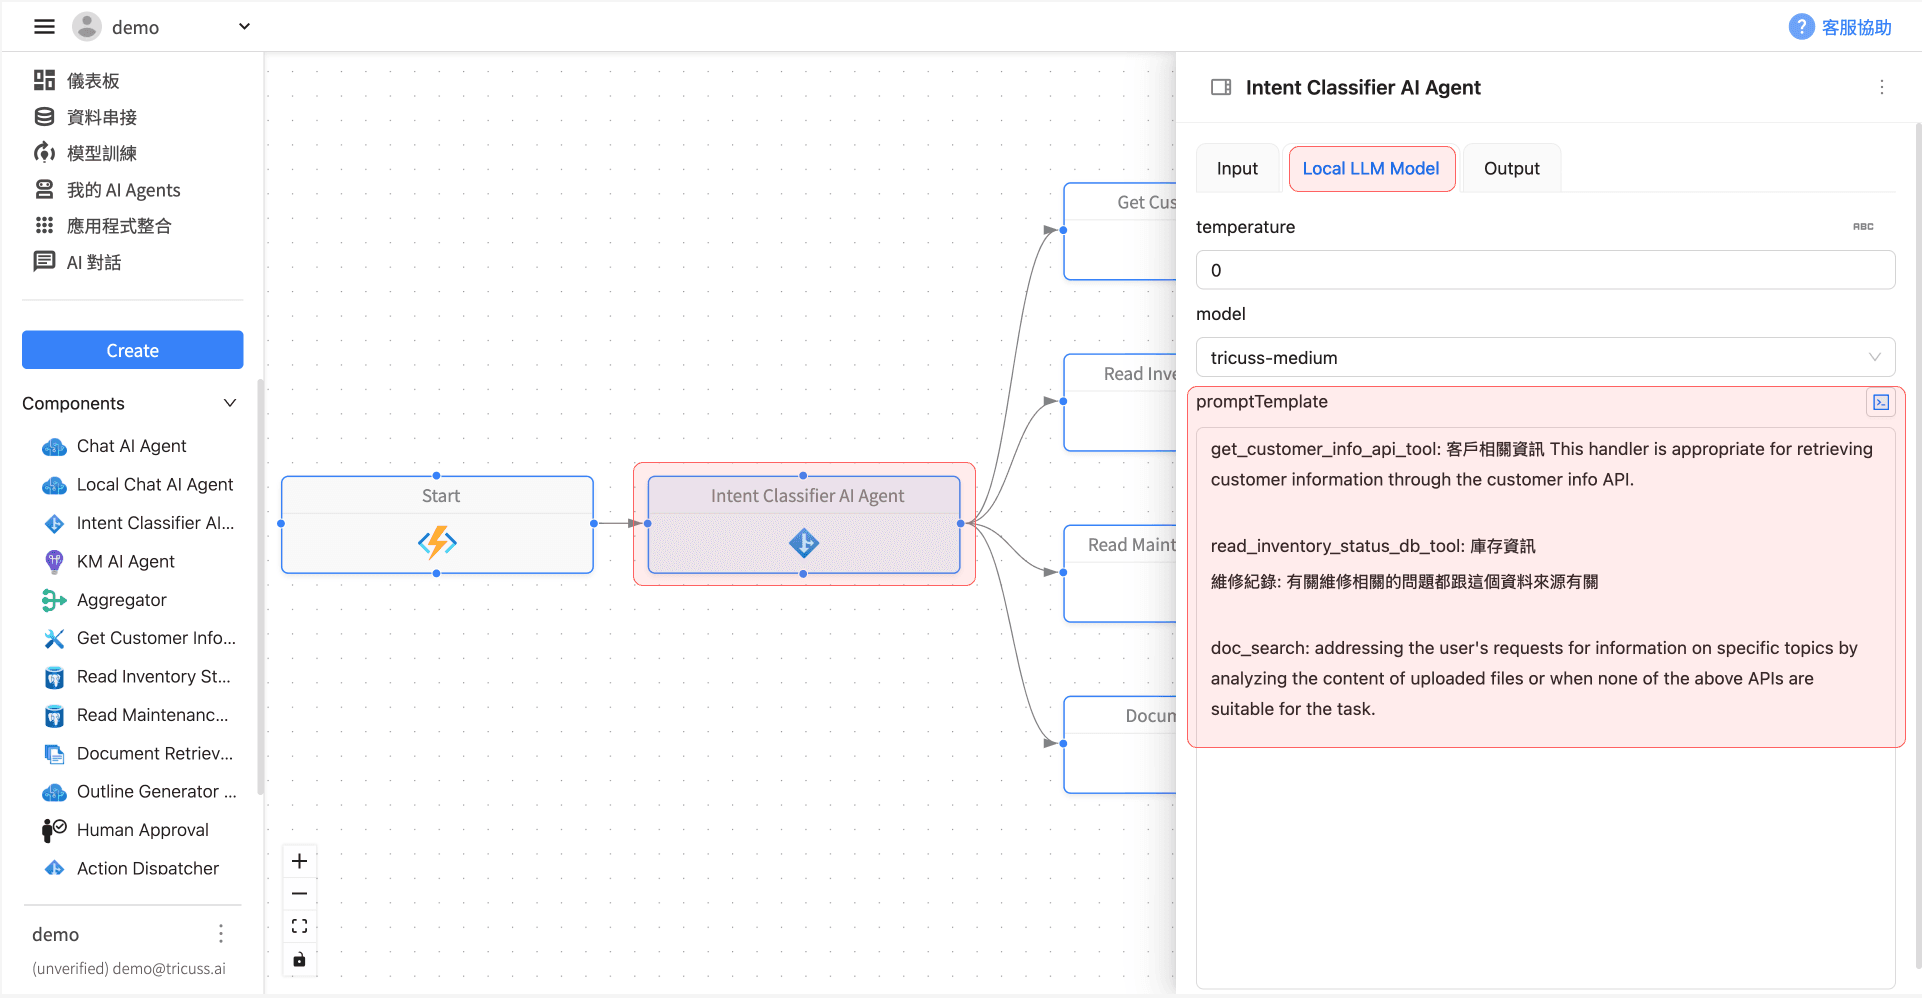
回到「Intent Classifier AI Agent」的 Local LLM Model 分頁,在 promptTemplate 欄位中輸入以下內容:
get_customer_info_api_tool: 客戶相關資訊 This handler is appropriate for retrieving customer information through the customer info API.
read_inventory_status_db_tool: 庫存資訊
維修紀錄: 有關維修相關的問題都跟這個資料來源有關
doc_search: addressing the user's requests for information on specific topics by analyzing the content of uploaded files or when none of the above APIs are suitable for the task.
6️⃣ 指令說明(Prompt 定義)

7️⃣ 設定條件邏輯(Conditional Routing)
透過條件設定,根據意圖自動分流到相對應的資料元件:
將滑鼠移到流程圖中第一條線上,點選出現的齒輪圖示。
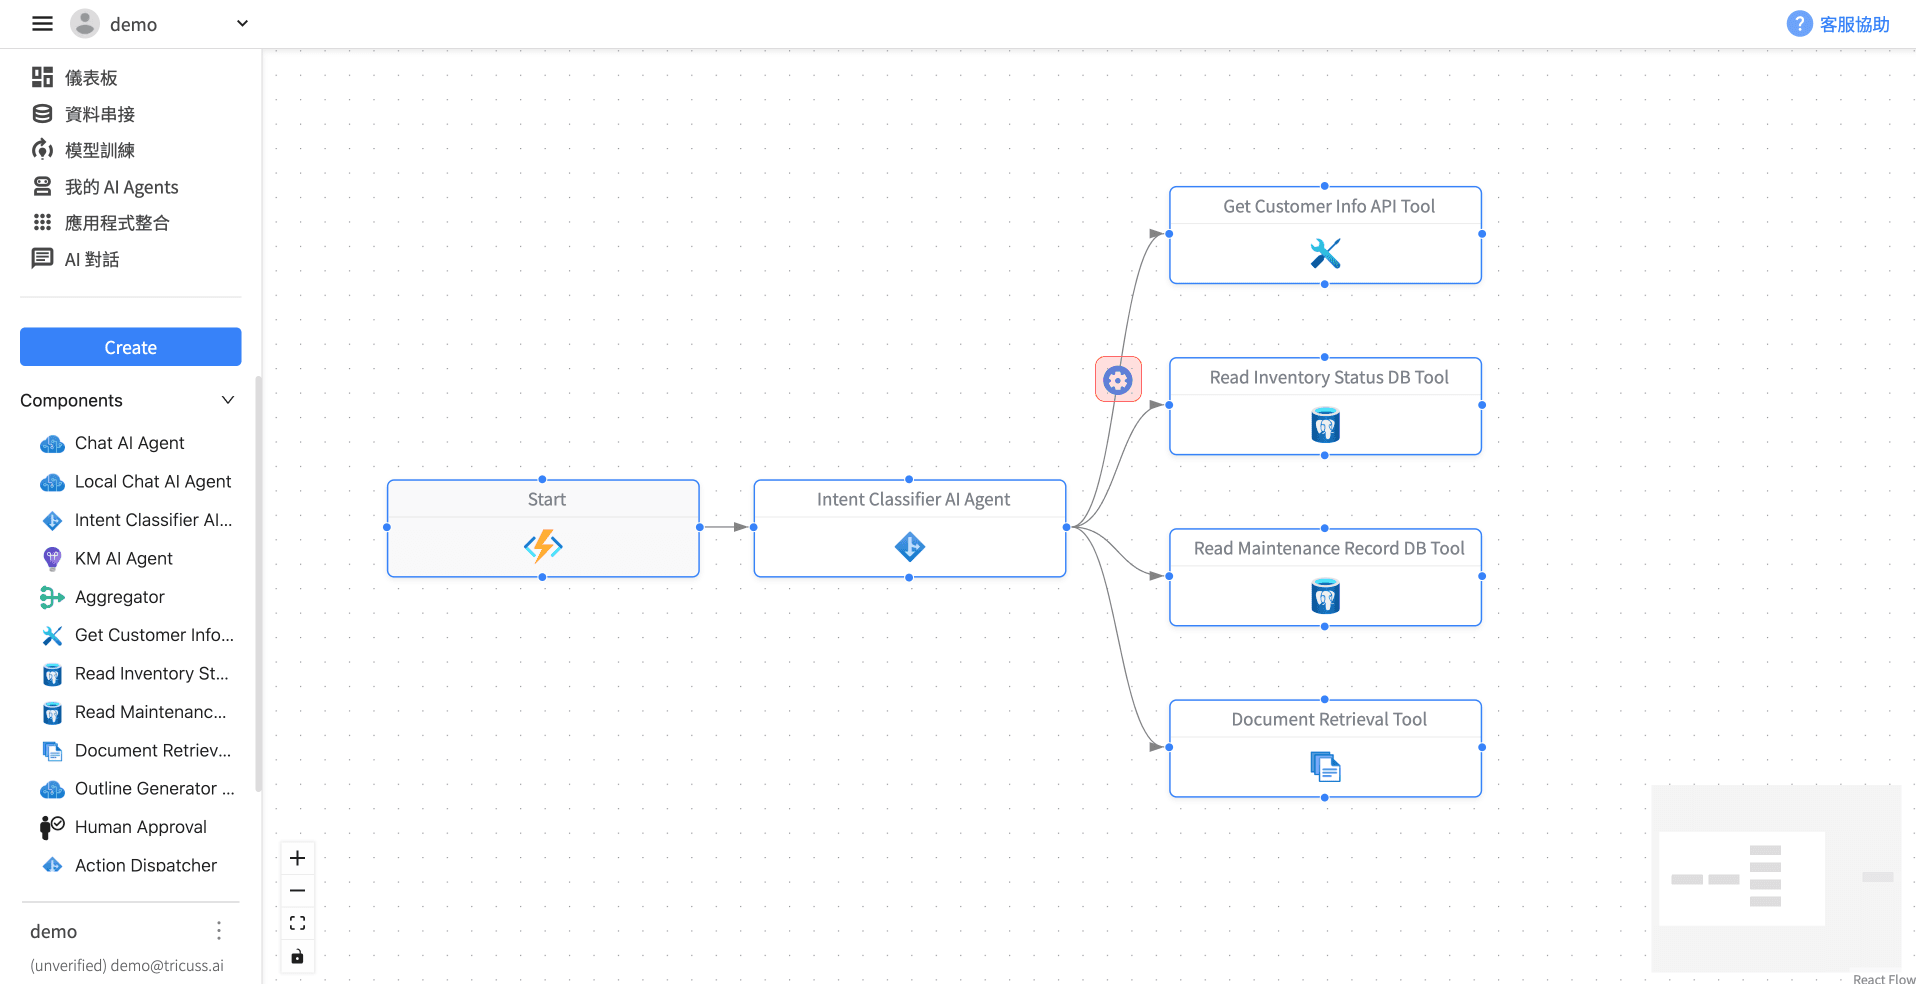
在「Edge Settings」中,將 Type 設為 Conditional,點選 Add Conditions。
設定方式如下:
Left Values 屬性設定為「String Array」,因為前一步「Intent Classifier AI Agent」會產出多種結果。
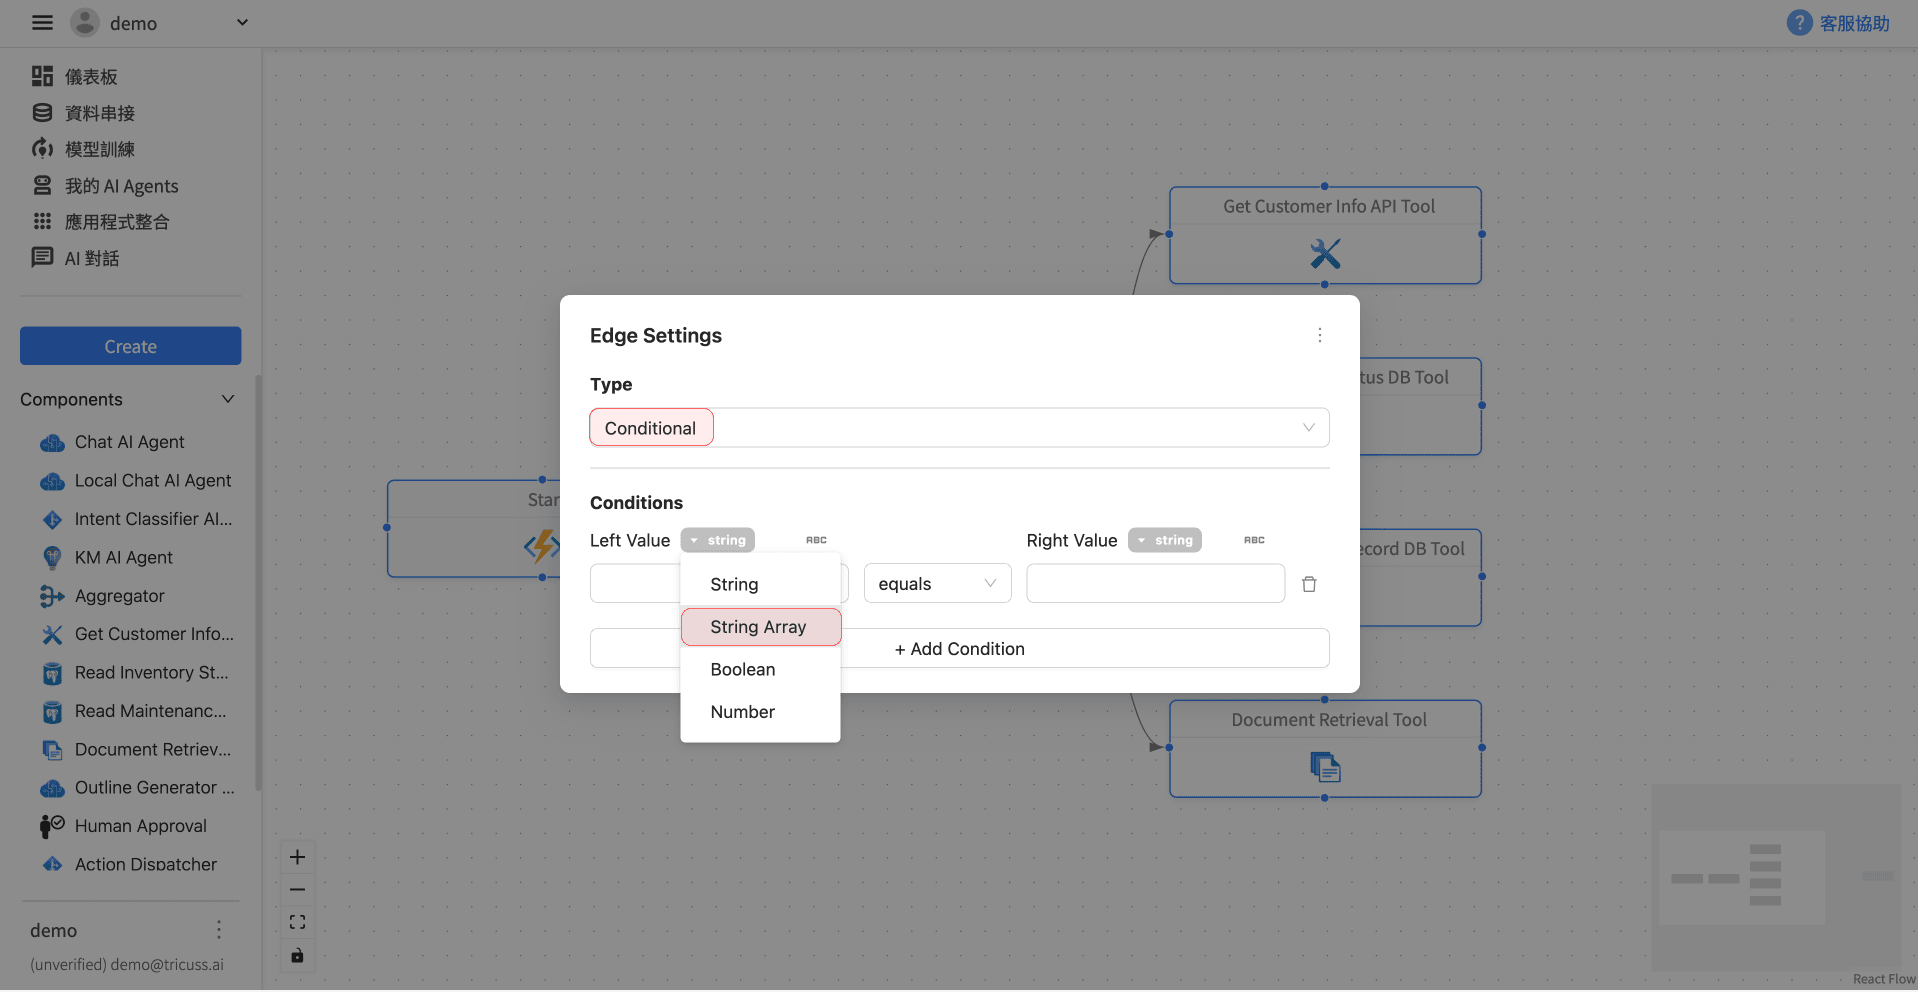
Left Values 下拉選單,選擇「Intent Classify AI Agent.outputs.action」
中間下拉選單,選擇「contains」
Right Value填寫:get_customer_info_api_tool
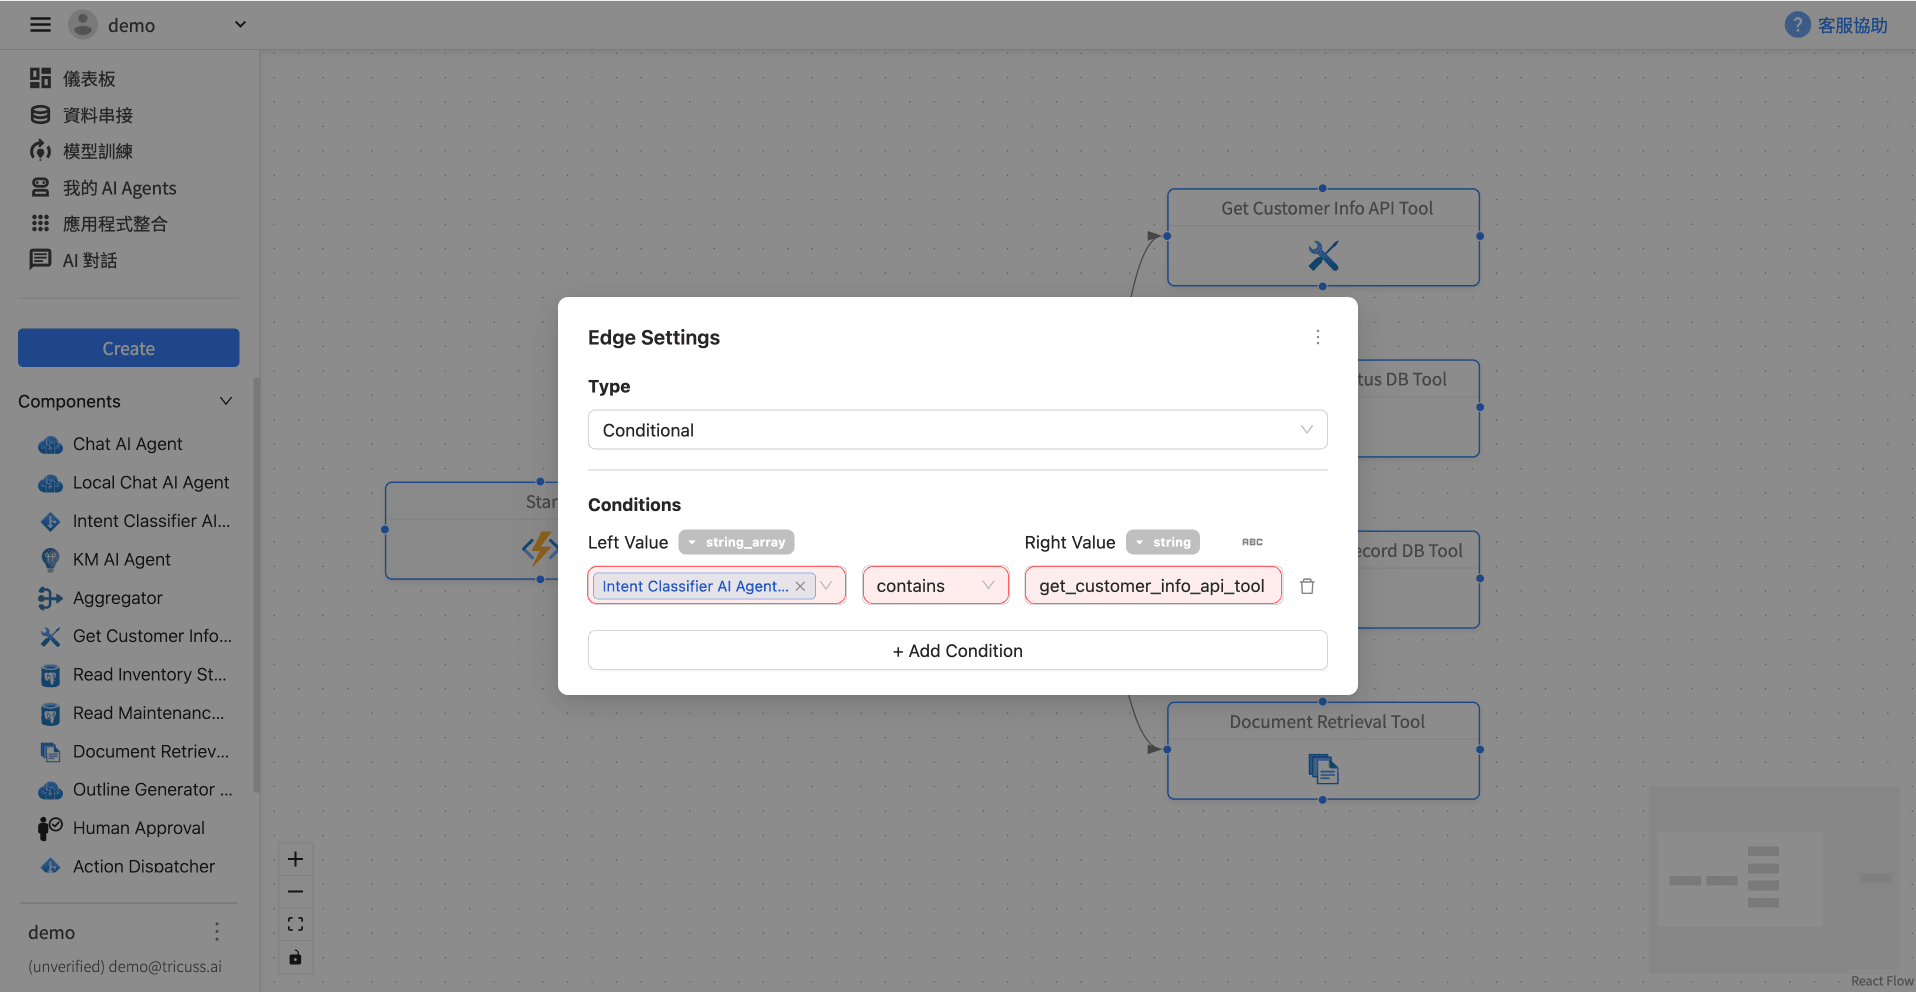 說明:Right Value填寫的是在「Intent Classifier AI Agent」Local LLM Model分頁中,promptTemplate輸入的值。
因此其他條線的設定,Right Value依序是:read_inventory_status_db_tool、維修紀錄、doc_search
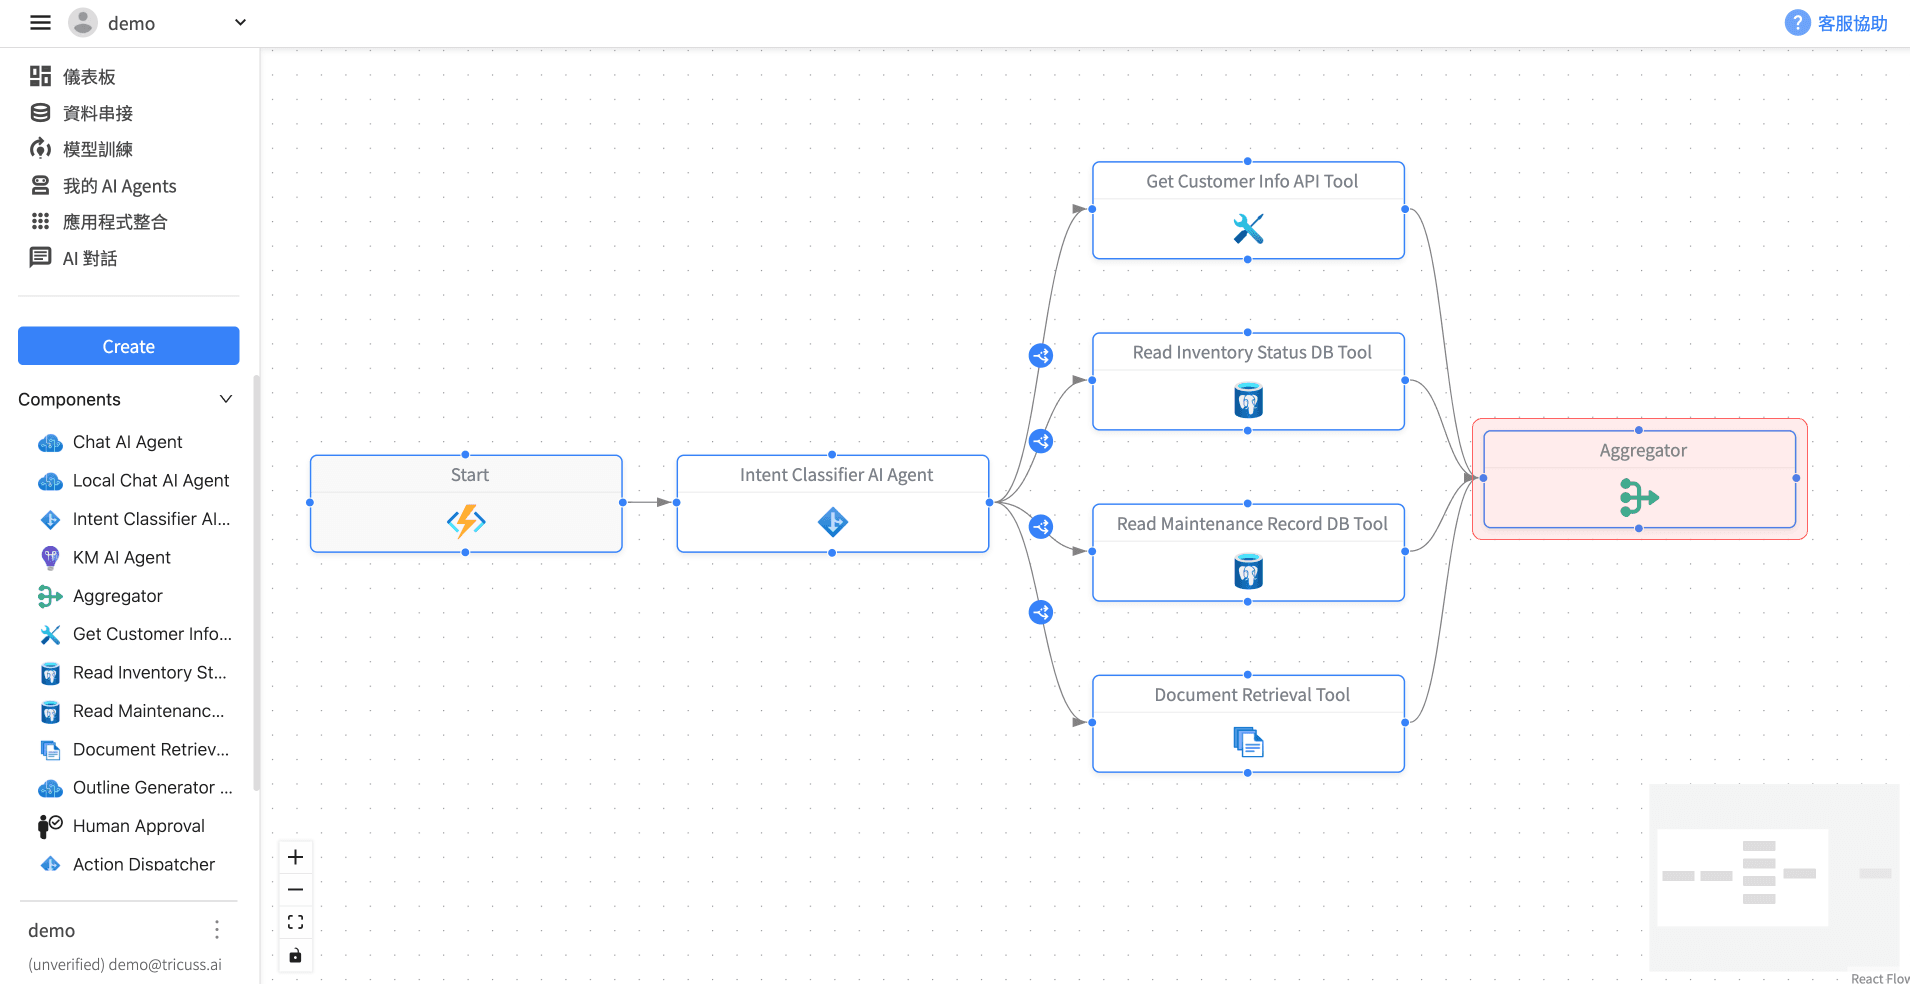
8️⃣ 加入 Aggregator 整合結果
當多個資料來源可能提供回應時,需使用 Aggregator 將輸出結果整合。
新增 Aggregator 元件並連接各資料來源。
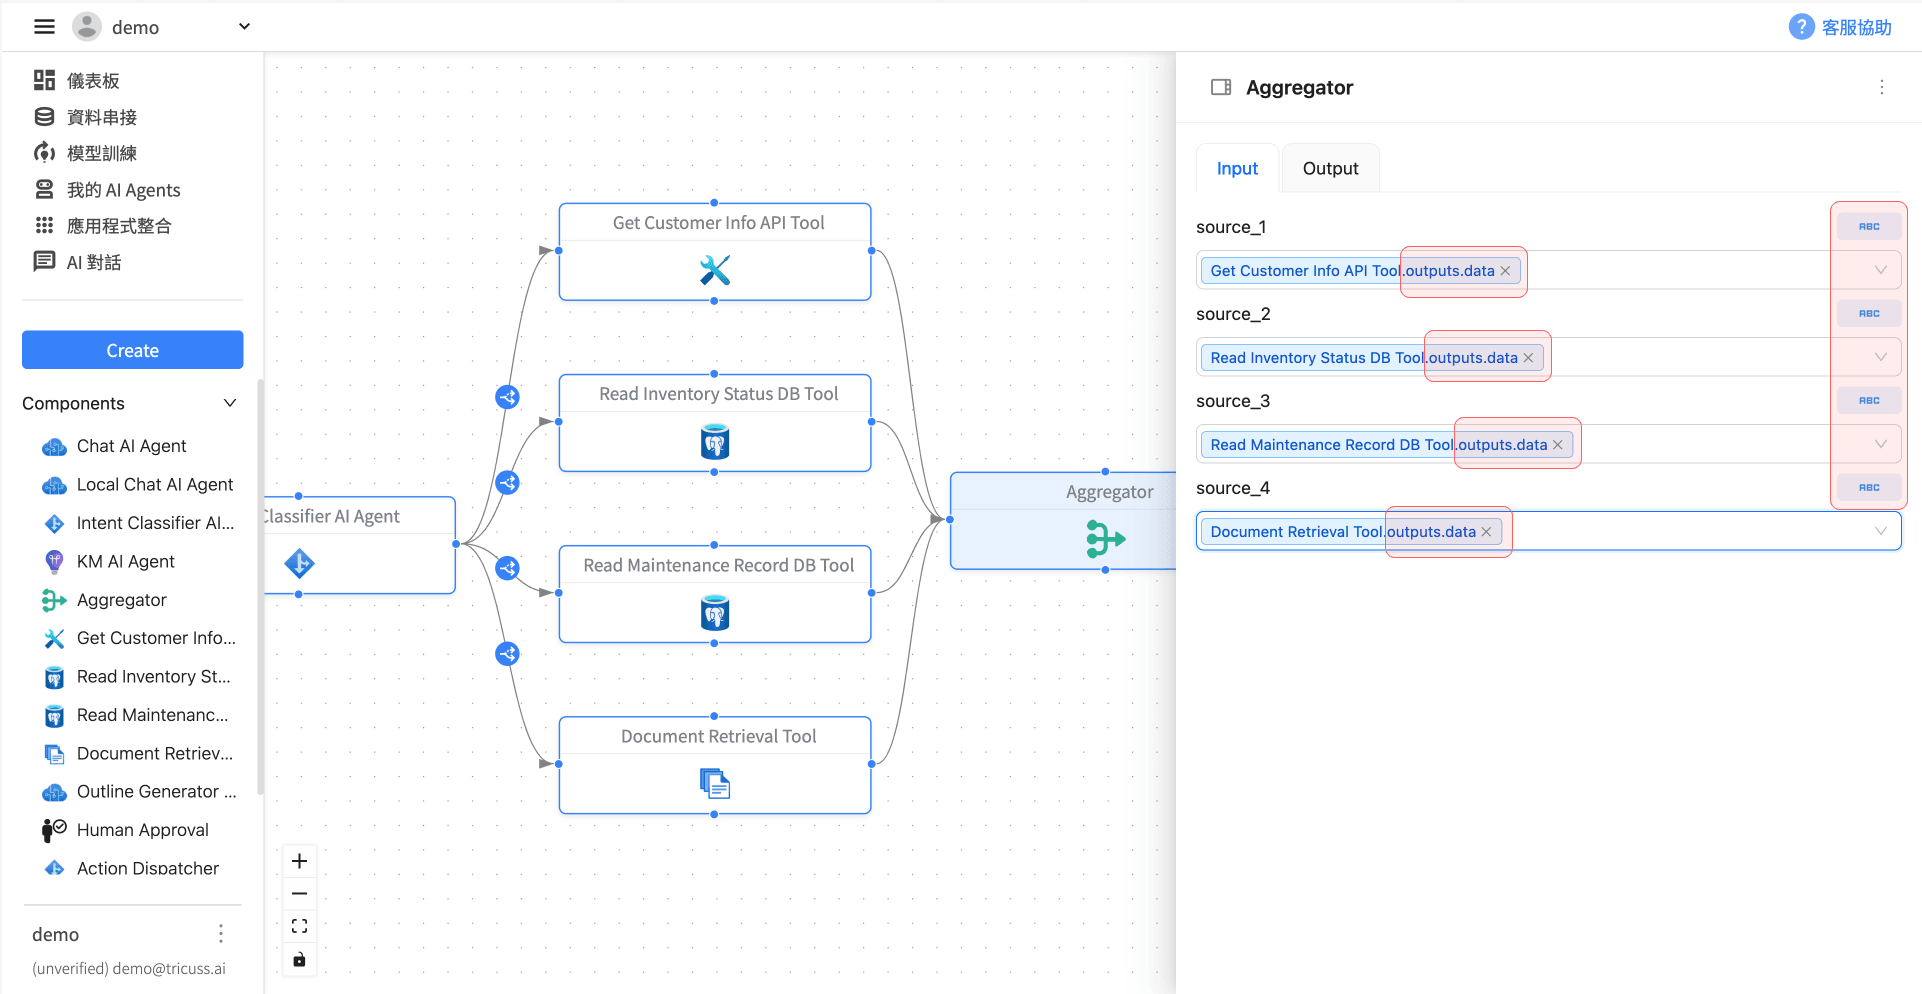
在 Input 分頁中,點擊「ABC」後選擇各元件的 outputs.data 作為輸入來源。
9️⃣ 加入 KM AI Agent 處理最終回答
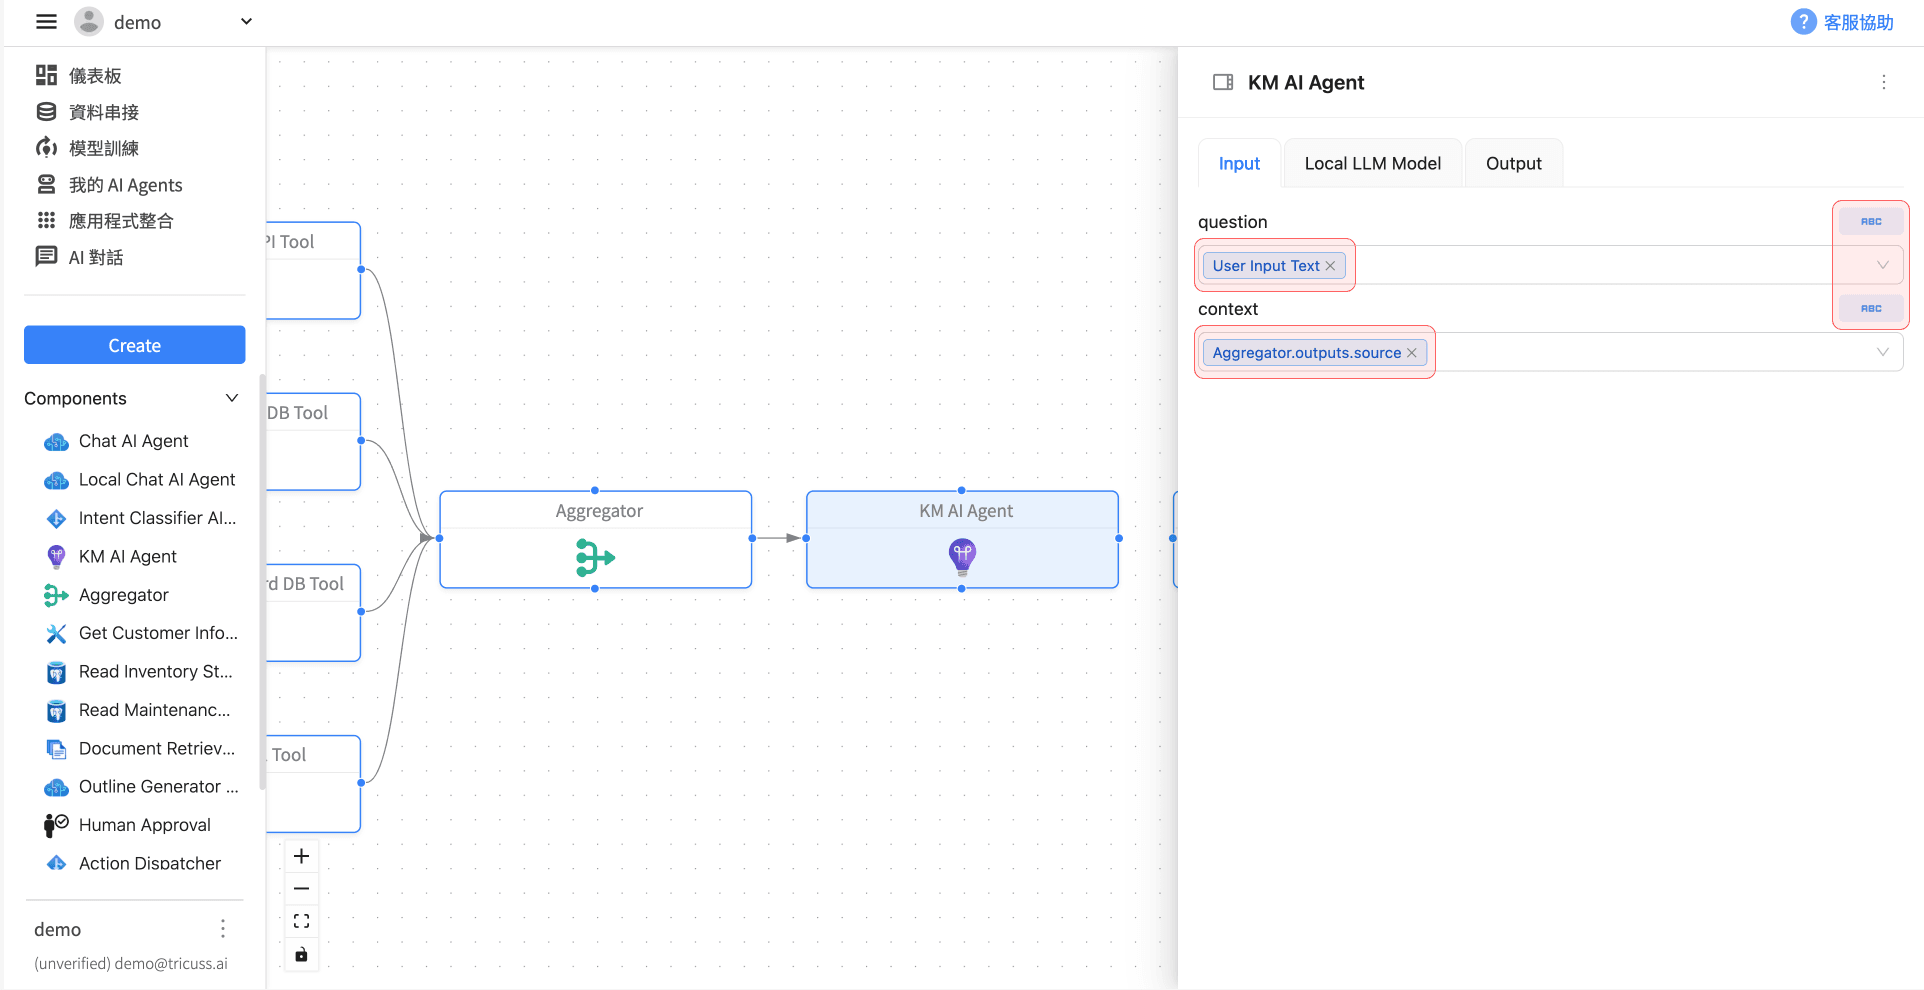
加入「KM AI Agent」元件,並將其連接 Aggregator。
在 Input 分頁設定:
question 選擇 User Input Text
context 選擇 Aggregator.outputs.source,代表回答問題的上下文以公司內部文件為脈絡
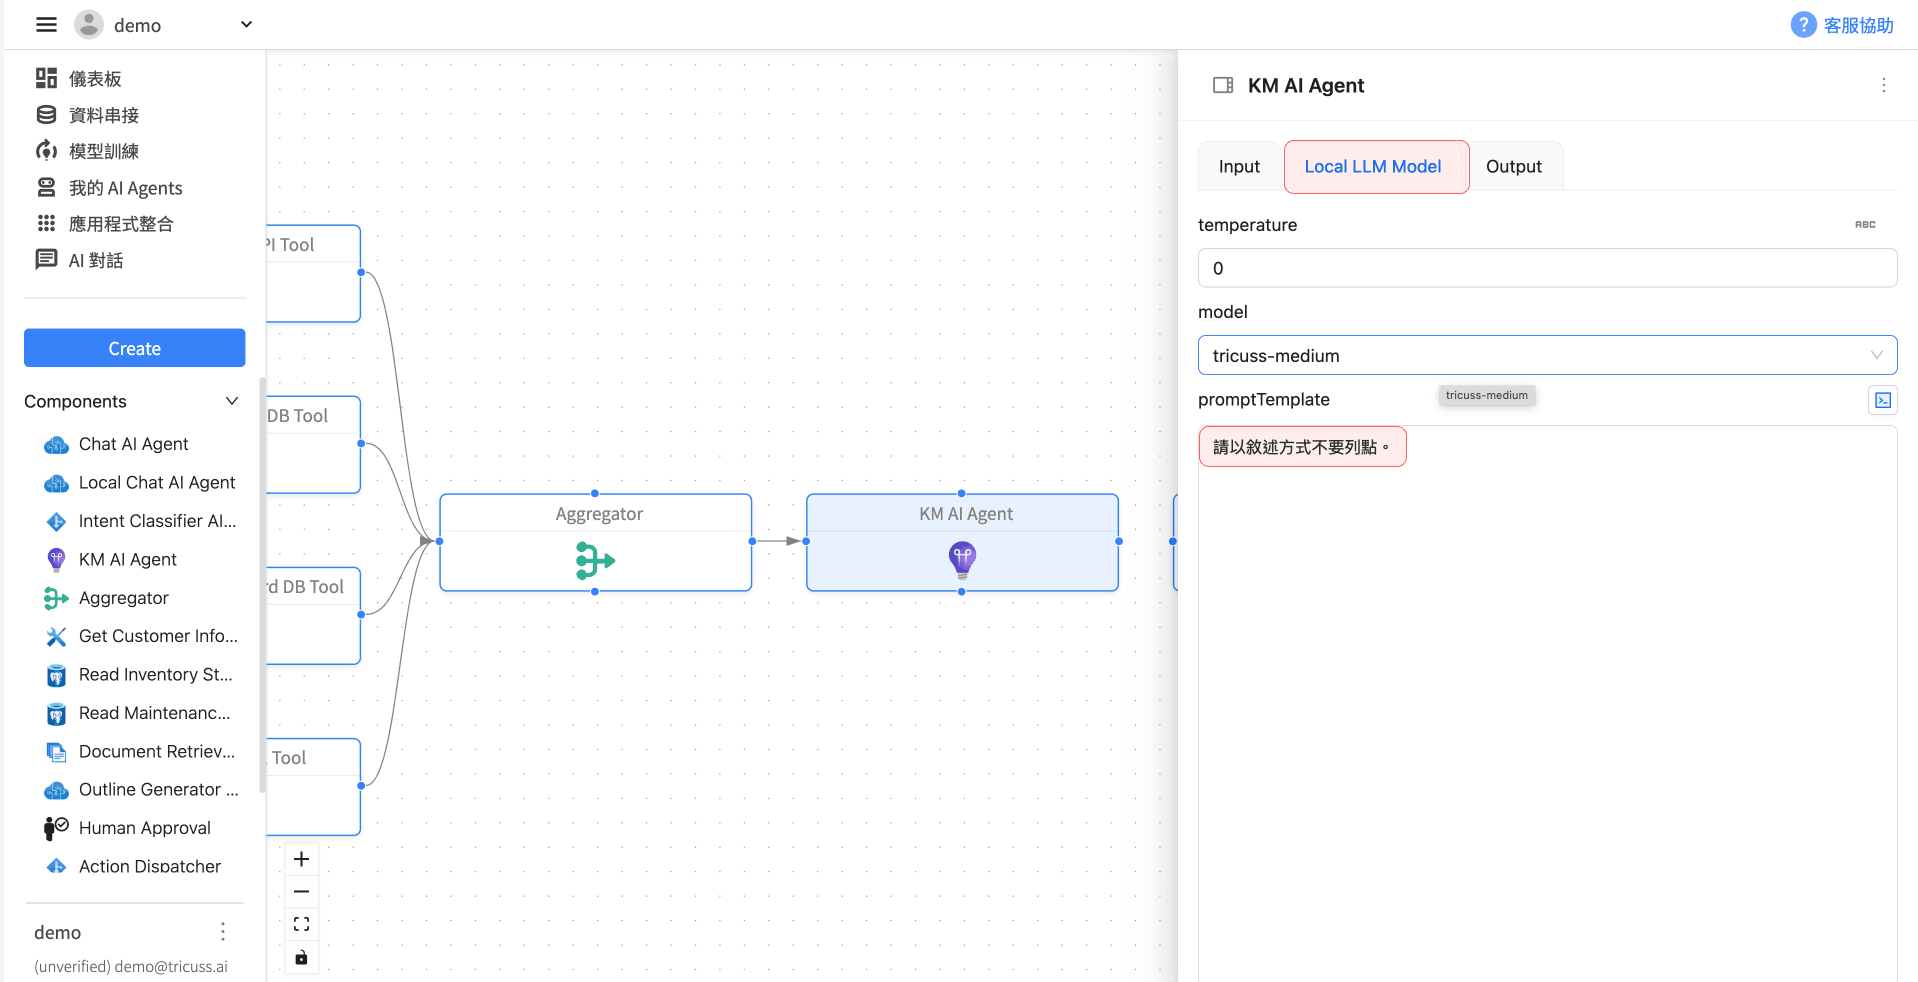
切換至「KM AI Agent」Local LLM Model分頁,在promptTemplate輸入「請以敘述方式不要列點。
」以調整輸出的敘述方式。
🔚 結束流程設定
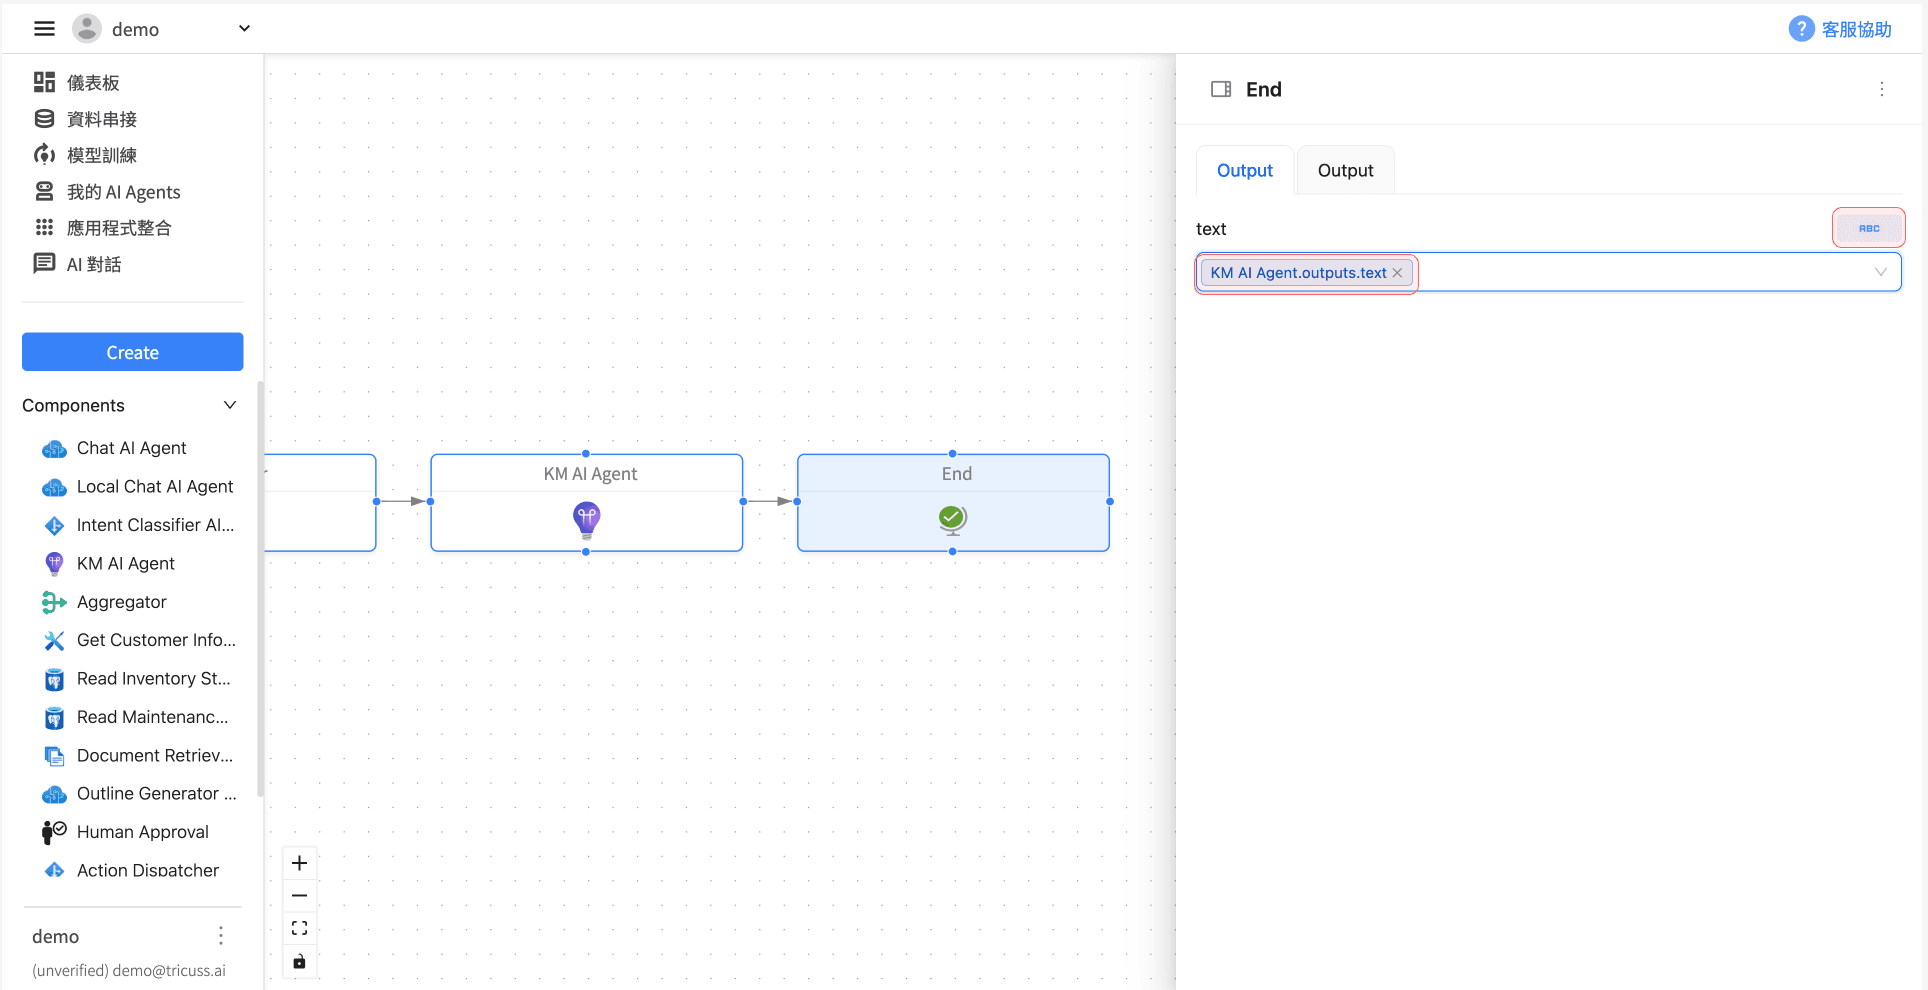
將「KM AI Agent」連接至「End」節點。
點選「End」,在 Output 分頁中選擇輸出為 KM AI Agent.output.text
串接企業資料庫 AI Agent 使用測試:
在完成上述流程設計與模組串接後,可進行實際使用測試,以驗證 AI Agent 對於企業內部資料的查詢與回應能力是否準確、即時。測試將涵蓋不同類型的使用者問題,例如查詢特定客戶資訊、產品庫存狀態、歷史維修紀錄,或針對上傳文件進行內容分析。
